Photography Tips

Brown Pelican Bird in Flight St. Petersburg Florida Fine Art Nature Photography

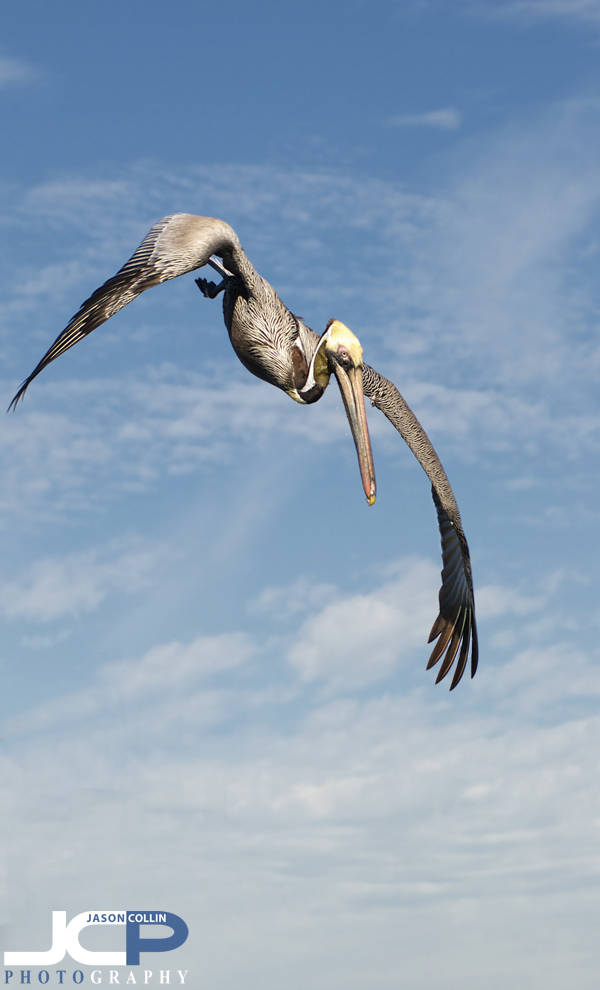
Brown Pelican preparing to dive St. Petersburg Florida - Nikon D300 Nikkor 80-200mm @ f/5.6 ISO 200 1/1250th

Regular followers of my nature posts will know that I am very fond of photographing the many local brown pelicans in my St. Petersburg, Florida neighborhood.  I have not yet achieved my long-term goal of photographing a pelican skimming just over the water, but I was glad to be able to add these images to my pelican portfolio.  On Saturday pelicans were regularly diving out of the sky into the water for fish around The Pier.  Once getting the settings dialed in using shutter priority mode and multi-point focus, it was just a matter of tracking the birds fast enough as they made their dives.
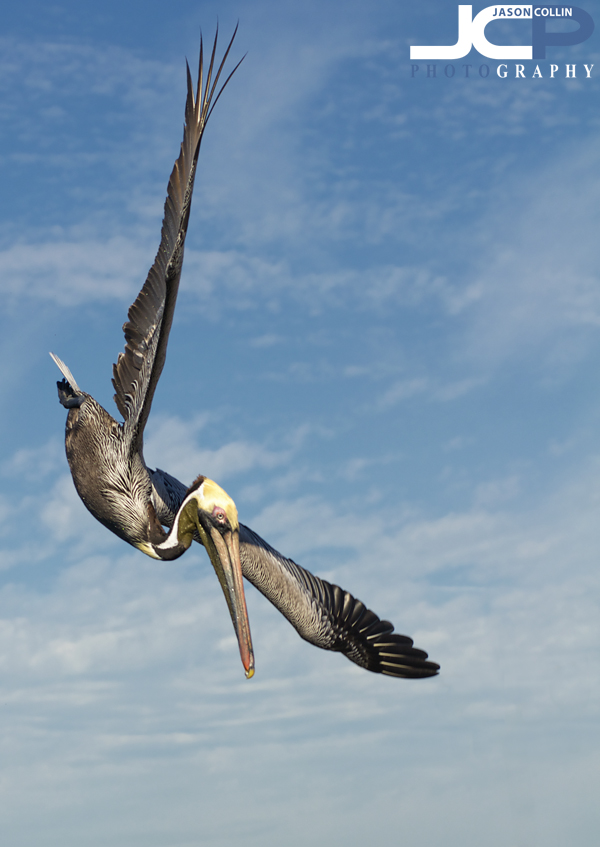
Brown Pelican on an aerial fish survey - Nikon D300 Nikkor 80-200mm @ f/6.3 ISO 200 1/1250thThis collection of pelican images focuses on the birds as they are about to make a plunge into Tampa Bay hoping to come up with a beak-full of small silvery fish.  Observing a bird's behavior is key to being able to capture the photographs one wants.  I watched where and how they circled and what they did with their wings right before their split second descents.
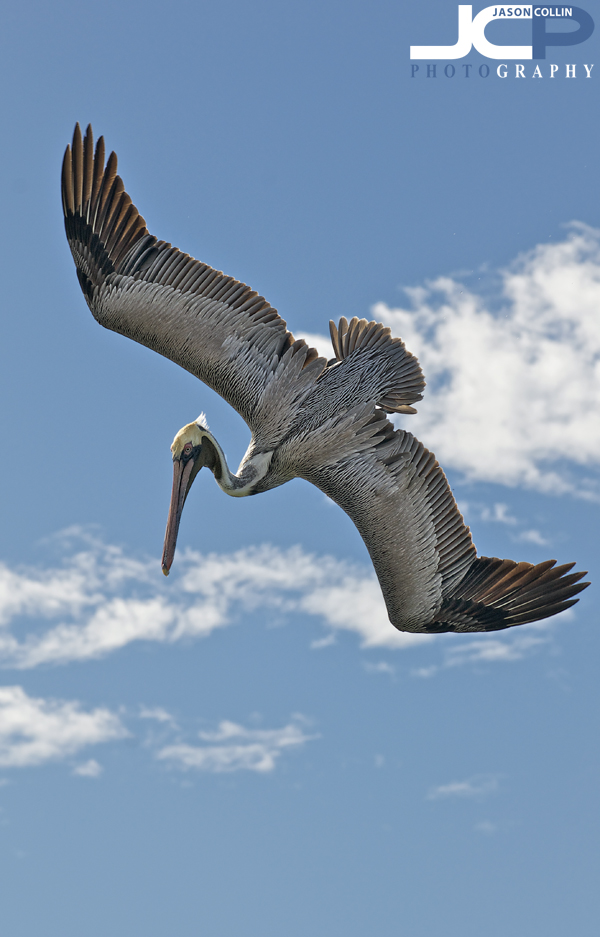
Brown Pelican wings arced for diving in St. Petersburg Florida - Nikon D300 Nikkor 80-200mm @ f/6.3 ISO 200 1/1000thDuring this shoot I also became, at long last, a believer in shutter priority mode.  With the pelicans diving from a bright blue sky background down to the dark waters of Tampa Bay, I knew what shutter speed I needed to freeze their flight, but adjusting the aperture constantly to maintain the correct exposure would have been nearly impossible.  Thus, shutter priority was the best exposure mode to use for these bird-in-flight images.
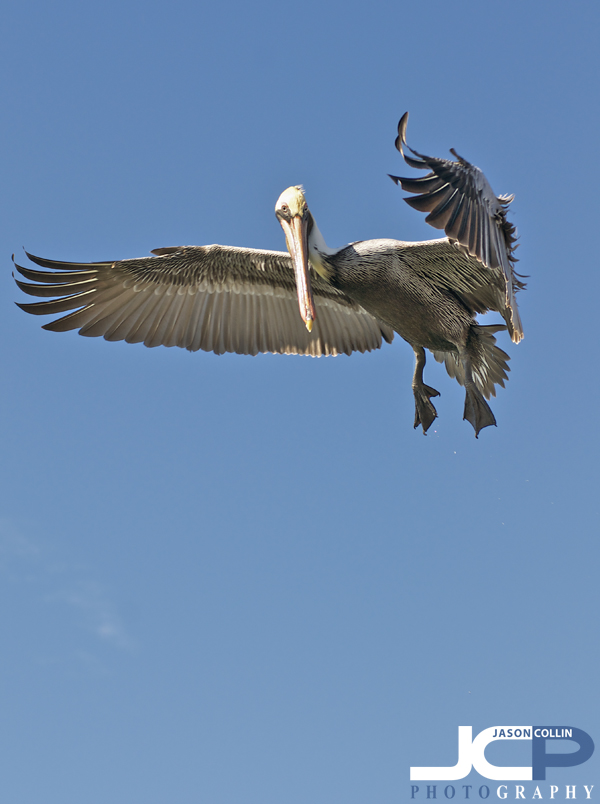
Brown Pelican hovering before diving in St. Petersburg Florida - Nikon D300 Nikkor 80-200mm @ f/4.5 ISO 200 1/1250thI also used multi-point focus because I was able for the most part to fill the frame with the pelicans, allowing the 21-focus points to act as a net.  If I could not fill the frame with the pelicans, well, I probably would not even push the shutter, but in that case I would use a single focus point to place right on the bird to distinguish it from any other possible background elements.  In relative close-up shots like these, the multi-focus point setting gave me the best chance of landing a focus point on the subject (pelican) where a single focus point might get lost under a single wing flap.

Visit The Pier for great pelican and bird-in-flight photography opportunities:


View Larger Map

  • License these images for business use or purchase fine art prints
  • View more pelican photo stories
  • Read more photography tips
  • Make time for your photography

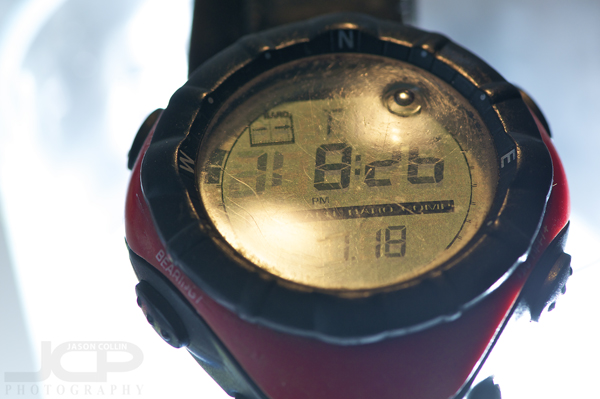
    Jason's own Suunto Vector watch that has been to the top of Mt. Fuji and the jungles of BorneoWhen was the last time you picked up your camera?  If you do not do photography for a living, it may have been awhile.  If you are a pro photographer, when was the last time you took your camera out for just some simple personal shooting?  Days can easily turn into weeks and your DSLR has not had a single actuation put on it.  Just like everything else, one has to make time for photography.

    This is certainly true for myself, as I very rarely go out on my own (no Kiki) to make photographs just for fun.  So this afternoon I made the time and went to Boyd Hill Nature Preserve for some macro photography (photos here).  Even though I really like macro photography, I had to make the effort and take the time to do it.

    So within the next week, be sure and make at least one morning, afternoon or evening just for shooting what you like, for fun.  Let me know how it goes in the comments below. 

  • Read more photography tips
  • Reserve your own 1-on-1 DSLR Photography Lesson with Jason today!
  • Learn more about the lessons 
  • Jumping Matrix Style with help from layer masks

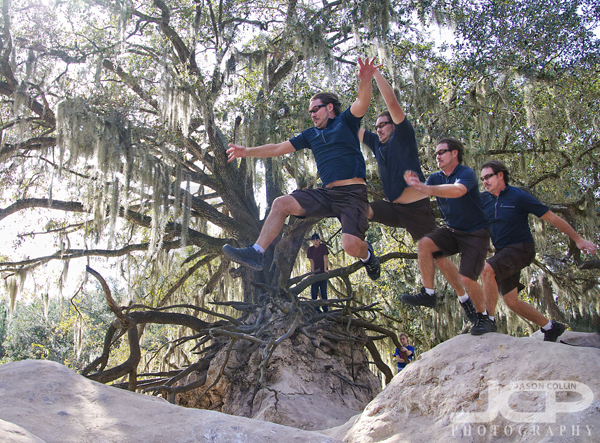
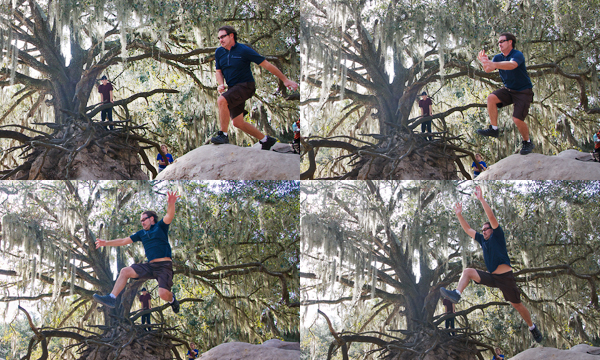
    Yours truly leaping a chasm! This is a blending of 4 different action shots using a simple layer mask technique.In case you missed it last week, I do take time away from being behind the camera to continue my love of rock hopping and leaping objects (see here).  I made the leap over the above chasm-ish span several times each time trying to go further.  I did not actually move fast enough to be seen multiple times in 1/500th of a second.  How I made the above image was to combine four of the shots taken in one burst of shots on my Nikon D300 (capable of 6 frames per second).  Since the DSLR was on a tripod all the background matched up perfectly, as does the exposure since that was set manually.  The only thing moving over the series of shots was me.  Then, it was just a matter of using layer masks in Photoshop to produce the multiple exposure, or Matrix, looking image.

    These shots layered on top of each other produced the above shot.Using layer masks to blend multiple images is not a difficult type of digital photography editing.  I have written a tutorial on how to use layer masks here.  Give this photography tip a try and post your results in the comments below!

    Edward Medard Park and Reservoir Trees HDR & Jumping

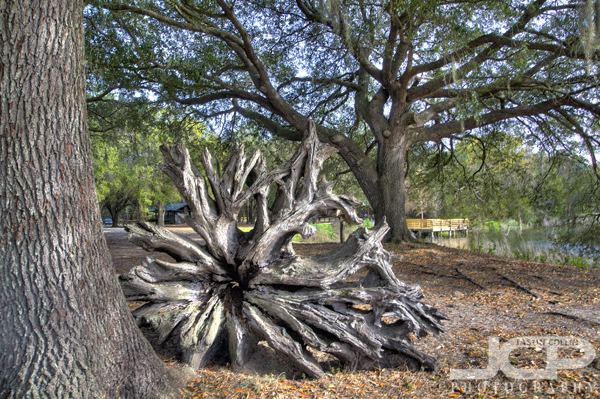
    Live Oaks showing their roots in Edward Medard Park - Nikon D300 Tamron 17-50mm @ f/8 ISO 200 7-exposure HDR tripod mountedIt had been too long since a couple of old college friends and I had one of our outdoor adventures together.  That was remedied by a recent visit to the surprisingly amazing Edward Medard Park and Reservoir in Plant City.  They said it had hills, so I was expecting some modest plain grass covered round and soft hills.  I never expected to step into an alien environment where live oaks sat perched upon angry hills of clay-like dirt with all their roots exposed in a display of their might.

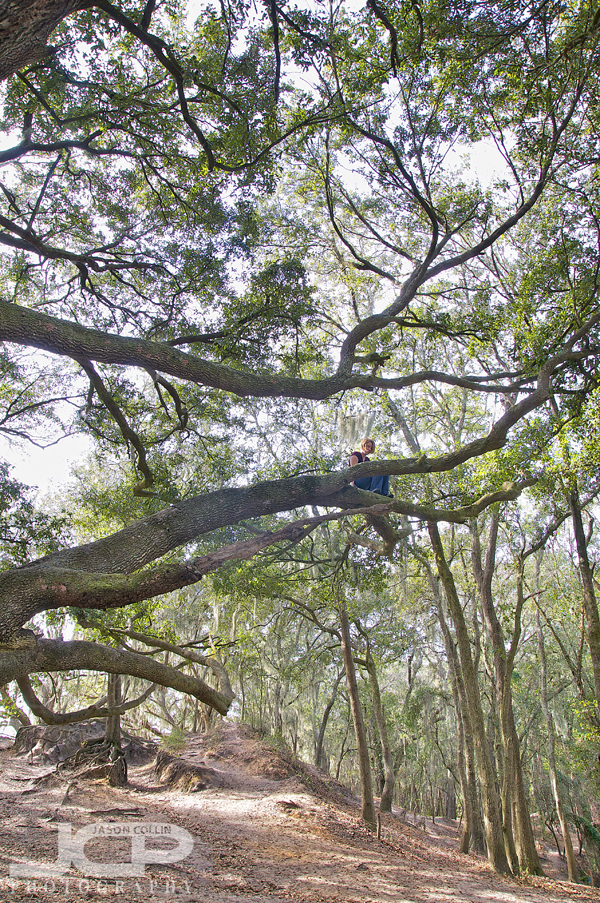
    A fearless tree climber in Edward Medard Park - Nikon D300 Tamron 17-50mm f/8 ISO 200 1/40th tripod mountedAfter a few handheld shots with my 80-200mm f/2.8 lens, I quickly relized that was not the setup ideal for photographing this environment and switched to my 17-50mm f/2.8 lens and mounted my Nikon on my Induro carbon fiber tripod the rest of the day.  Without that wide lens I would never been able to capture one friend who is an avid tree climber surprisingly high up in the branches of this long limbed live oak.

    uprooted tree in Edward Medard Park - Nikon D300 Tamron 17-50mm @ f/8 ISO 200 7-exposure HDR tripod mountedEdward Medard Park has more traditional looking Florida outdoor areas by the reservoir itself offering shady live oaks, with roots all neatly underground, well, save for one that was uprooted long ago.

    Jason performing trademark "Liu Kang" leap - Nikon D300 Tamron 17-50mm @ f/2.8 ISO 800 1/800th tripod mountedJust to show you I did not spend the entire time behind the camera, in the above shot you can see yours truly performing my patented "Liu Kang" method air leap over some roots perfectly shaped like hurdles on a tricky downslope.  Some of you who have know me well will already have seen my debut of this move, which was over a much more dangerous gap.  I set up this shot with my Nikon D300 mounted on my tripod with all the settings dialed in.  

    photography tip:

    As you can see shooting an action shot into the sun required some very unusual settings.  My DSLR photography lesson students should be able to see I used settings I have told them probably never are needed, such as using f/2.8 on a wild angle lens.  In order to expose the subject (me) enough, a long shutter speed is needed especially shooting into the sun like this.  However, to freeze the action, a fast shutter speed is needed.  The solution to this is to go ahead and set the needed shutter speed, 1/800th of a second, then adjust aperture and ISO until there is enough exposure to show me and not worry if the sky gets blown out.  So that is my photography tip for action shots into the sun!

    Using the tripod all day did not slow me down, but rather freed me much more to make the photographs I wanted to and still enjoy all the action with my friends.  Shooting on a tripod is not physically demanding and the setup is pretty easy to carry, so I did not get tired from having a camera hanging off me all day.  Plus, since I did not have to constantly keep taking a camera strap on and off, but rather just let the tripod stand up on its own, it was really easy for me to switch from photographer to adventurer.  I just had to leave the camera standing where it was on the tripod then explore the area as I liked.  

    As you can see Edward Medard Park, despite the unfortunate name, is a great place for photography and adventure!

    --official website and directions 

  • Read more photo stories
  • Reserve your own 1-on-1 DSLR Photography Lesson with Jason today!
  • Learn more about the lessons 
  • How to fix black clouds in HDR images using layer mask

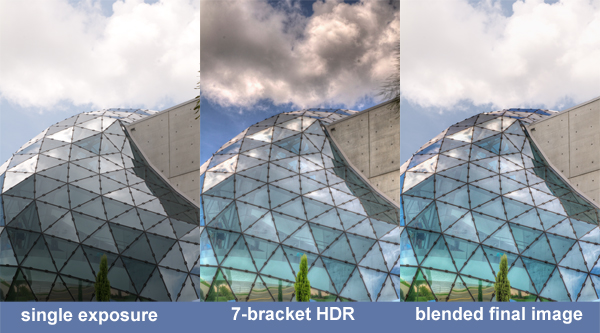
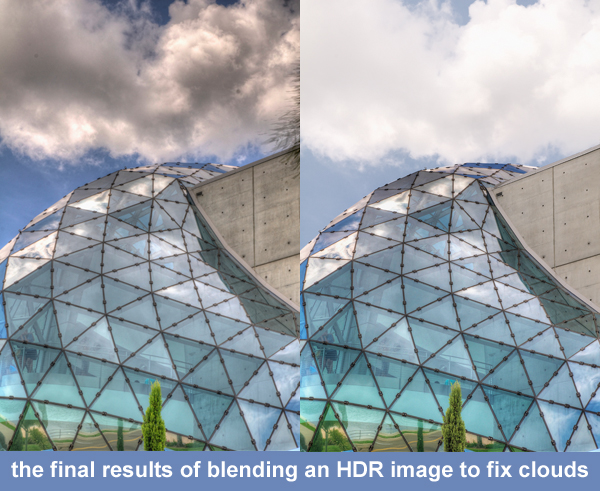
    HDR photography and images are very popular right now.  I, myself, have participated in a local exhibition featuring only HDR images.  The thing is, I do not care for 90% of HDR photography I see.  There is a large debate about processing HDR images to look more real or more hyper real.  I am not referencing that debate here.  For me, a simple reason why I do not find a vast majority of HDR images appealing is because they suffer from horrible shadow effects as demonstrated in the black clouds in the center image above.  As you can see with the single exposure photo, the sky looks good, but there is no detail inside the glass.  The 7-bracket HDR image reveals what is under the glass and adds better color, but at the expense of the clouds.  Therefore, the best final results come from blending the single exposure photo with the 7-bracket HDR image.

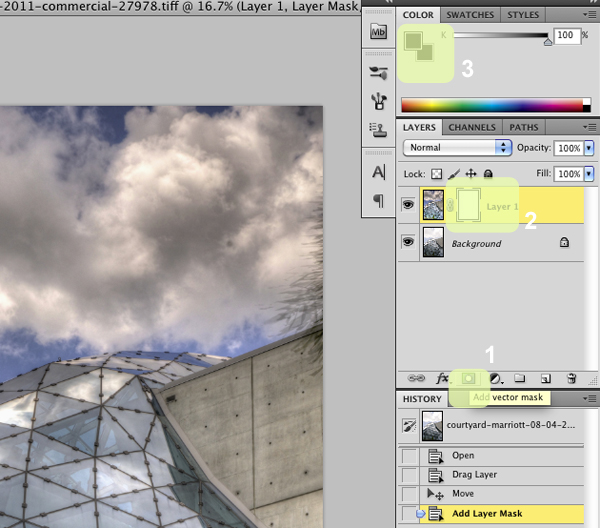
    1. click on add layer mask (sorry, shows vector) 2. click on layer 1 3. paint with a black brushBlending two images together is not a difficult time consuming process using Photoshop.  The screenshots in this post are using CS5, but other versions should basically be the same.

    First, open the single exposure photo and 7-bracket HDR image in Photoshop.  Drag the 7-bracket HDR image on top of the single exposure photo.  Once you do this you will only see the 7-bracket HDR image.  The single exposure photo is completely hidden underneath.  Our goal is to reveal only the parts of the single exposure photo we want, in this case, the clouds and sky.

    After you have dragged the 7-bracket HDR image on top of the single exposure photo, follow the three steps highlighted in the screenshot above: 

    1. Click on "Add layer mask"
    2. Click on "Layer 1"
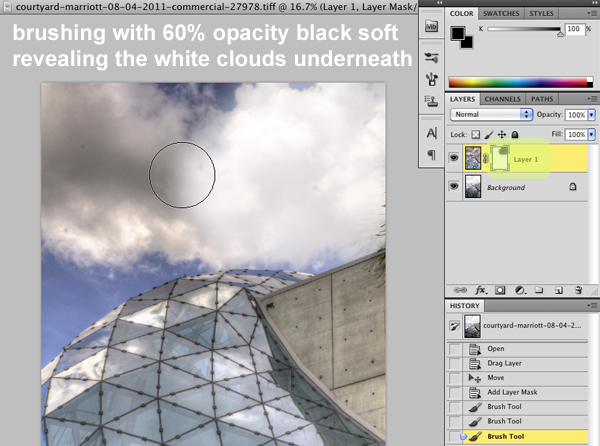
    3. Select the Brush tool: soft brush setting, black, 60% opacity (or similar, just not 100%) 

    Now using the Brush tool at the settings described above, slowly brush the areas you want to reveal.  The 7-bracket HDR image starts to disappear revealing the single exposure photo below.  In the above screenshot you can see that I already revealed the nice white clouds on the right side.  Here is an extra tip:  I also used the Brush tool on the concrete wall of the building that looked too black & dirty to reveal the cleaner wall from the single exposure photo.  If you make a mistake and reveal something you did not want to, set the Brush color to white and the top image will return.

    Here again are the before and after results.  By using a layer mask you can create a dynamic hdr image and still maintain the clean look of clouds, walls, etc in the image.  This vector mask technique is great for other photography tricks too.  Want to change the background on a portrait?  You can do that following this same process! (see results here)

    Try the vector mask process on some of your images and be sure to post links to the results in the comments below. 

  • Read more photography tips
  • Reserve your own 1-on-1 DSLR Photography Lesson with Jason today!
  • Learn more about the lessons
  • Photograph the same subject during the day & at night

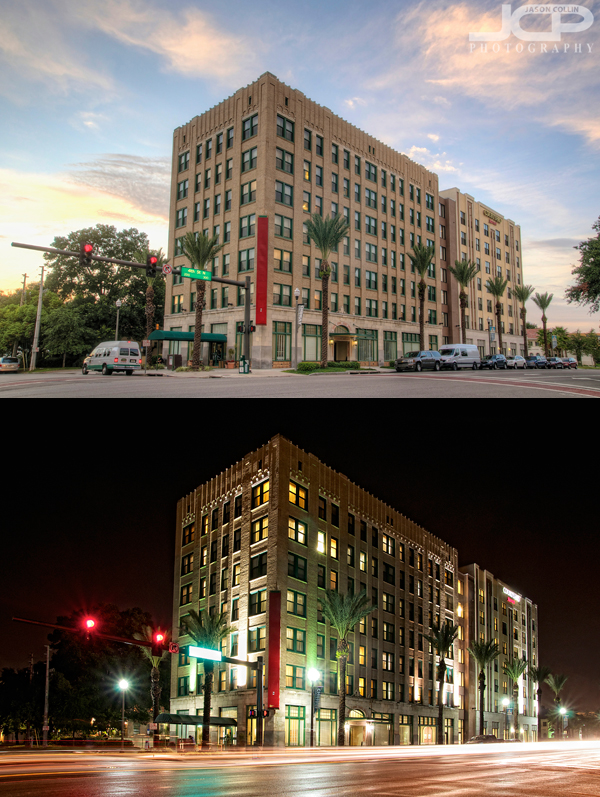
    The Courtyard Marriott Hotel in downtown St. Petersburg, Florida: top in late afternoon, bottom at night after a rainstormThe client wanted both daytime and nighttime exterior shots of their hotel.  I shot the daytime one first.  Several days later I went to photograph the hotel at night, having to wait out a sudden rainstorm that sprang up as I was making the 5-minute drive from my home to the hotel!  The daytime image is a 7-exposure HDR image and the bottom is just a single long exposure.  

    I did not make a shot from the same spot necessarily on purpose, but I am glad I did as it was a chance to see how a specific subject appears in a photograph in two totally different lighting situations.  So this photography tip is more like a photography project: 

    • Photograph the same subject during the day and then at night 

    As you can see a hotel in a city makes for a pretty good day & night subject.  Anything that has cars passing in front of it or on it will allow for making a light trail long exposure night shot.  

    Be sure and include a link to your day and night shot in the comments below. 

  • Read more photography tips
  • Reserve your own 1-on-1 DSLR Photography Lesson with Jason today!
  • Learn more about the lessons
  • The Future is on the Street

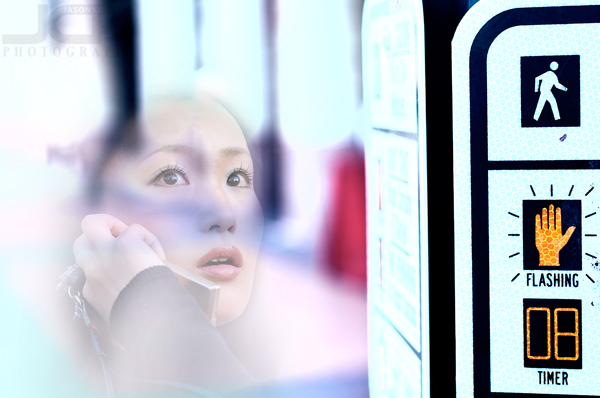
    I did not edit this photo, so much as I imagined it . . .I do not want to explain the technical aspects of the above image.  I made it based on a feeling I had this evening.  I was thinking of the street and of the future.  A home can be a cocoon, especially on a cold day.  Desire to go outside lessens in favor of remaining inside, in warmth.  However, the street is always out there.  On the street is a network.  There is a potential to go anywhere, do anything.

    The future is on the street too.  The future is not going to come from within one's home.  Pieces of the future can trickle into it, but they will not spring from it.  

    How is photography connected to the street and to the future?  That is up to the individual photographer to express.

    Photography Tip:  make an image based on a thought, not thinking of exif data