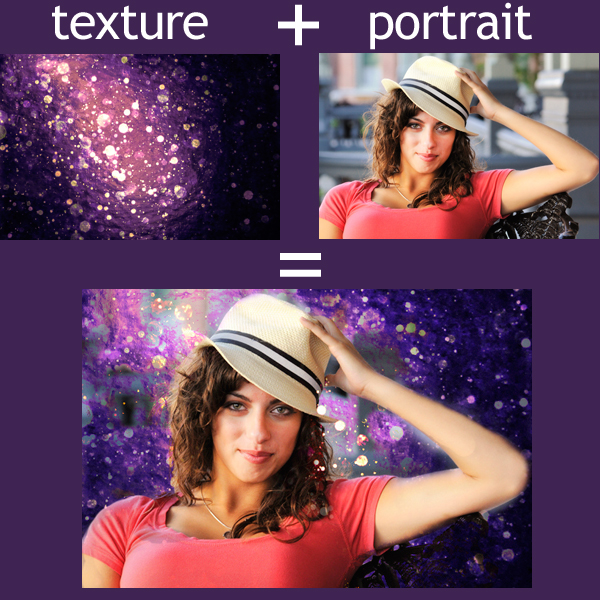
 Using a layer mask in Photoshop CS5 to change the background of a portrait - book your lesson today to learn tomorrow!
I met Ed from Jacksonville again this morning for our second of two Photoshop CS5 centered DSLR Photography Lessons. After giving him a crash course on the basics of using many common Photoshop tools yesterday, today we focused mainly on one thing: layer masks. As seen in the image above, if you take a texture, drop it onto a portrait, create a layer mask, then "brush back in" the portrait, you have a very quick and easy way of completely changing the background of a photograph. You could also keep some of the texture visible over the portrait subject as well to create a different look to the entire frame.
This layer mask technique is also very useful for fixing clouds in HDR images, which often turn out too dark. Using one of my own HDR shots as an example, I showed Ed how you can get the benefit of an HDR image without the drawback (dark clouds) by taking a single frame of the bracketed shots that has very white clouds and using it as a layer mask to blend into the HDR image. I will be posting this tutorial using the HDR example later this week.
The four hours (total) I spent showing Ed what I know about Photoshop went by very fast. We easily could have filled another four. He took detailed notes so I am confident that with what he learned during our intensive lessons he will be able to apply to his own images and begin teaching himself how to use more features of Photoshop.
--Professional Model DSLR Photography Lessons now available!
