Photography Tips

1-on-1 Nikon D3100 DSLR Photography Lesson with Carol in St. Petersburg Florida

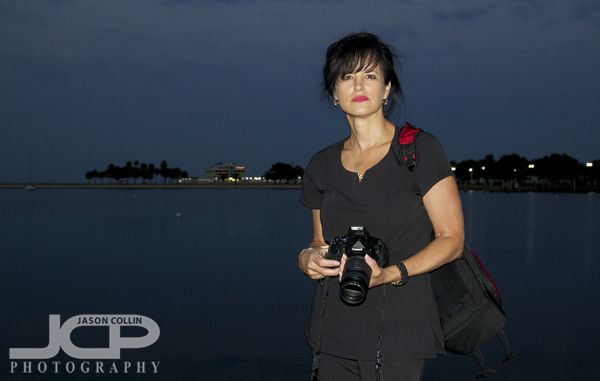
Carol with her new red Nikon D3100 during our 1-on-1 photography lesson in St. Petersburg FloridaOn a stormy Florida evening I met Carol for a 1-on-1 DSLR Photography Lesson along the waterfront of downtown St. Petersburg.  She had very recently gotten a snazzy looking red Nikon D3100.  Her reason for making the jump to the DSLR world was sparked by simply wanting to pursue photography as a hobby and be able to make great photographs.  I think that is a pretty good reason!

As we walked around the waterfront under overcast skies I taught Carol my established process for making a well exposed and sharp shot in any given shooting situation, and how to use the meter and histogram together to determine how to get better results.  Being a photographer is not a matter of getting the first shot perfect each time, it is getting that second or third attempt perfect.  Once you can get the results you want in your images, and be able to repeat that process in different shooting conditions, then you know you have gotten the hang of photography.

A few rain drops did chase after us toward the end of the lesson, but not before we had a chance to practice a little landscape portrait shooting utilizing the pop-up flash.  Even using the limited pop-up flash we were able to get pretty good results out along the waterfront.  I look forward to seeing Carol use what she learned during our lesson as she photographs dragonboat racing!

Canon DSLR Photography Lesson 1-on-1 in downtown St. Petersburg Florida with Sandy

Sandy lining up a shot using leading line composition during our photography lesson in St. Petersburg FloridaIt had been nearly a month since I saw Sandy as we met this past Saturday morning for our second of four 1-on-1 DSLR Photography Lessons in downtown St. Petersburg Florida.  It was a bright and sunny morning, as is typical for Florida in May, though thankfully not too hot at our 9:30am lesson start time.  

Sandy had done some practicing with her DSLR applying what we learned during the first lesson and realizing what she would like to practice and review in our second lesson.  There is nothing more important when learning photography than actually going out and shooting!  

We made our way through the Saturday Market finding some challenging lighting situations.  Normally during the day increasing ISO is not necessary, but when photographing subjects under shelters like at the market, using a 200mm+ focal length, with a max f/5.6 aperture lens, those deep shade shooting conditions do require a bump in ISO in order to maintain a safe 1-to-1 shutter speed to focal length ratio.  

Canon T3i 1-on-1 DSLR Photography Lesson in St. Petersburg with Pamela

The Pier in the background of our evening photography lesson with Pam and her Canon T3iI have not had many evening lessons yet this year, but yesterday I met Pamela in downtown St. Petersburg for a 1-on-1 DSLR Photography Lesson with her Canon T3i.  She has had her DSLR for over a year, but had only been using it in auto-mode.  With an upcoming trip to Alaska to photograph grizzly bears, she wanted to learn more about what her camera can do to improve her chances of getting great nature shots.  

Pamela told me at the start of the lesson that she knew nothing, and many people actually say that, but it is never really true as everyone knows at least a little about photography.  Either way, Pamela was a quick learner of my 5-step system for making a well exposed and sharp shot in any given situation, and with the fading evening light there was a wide range of settings needing to be used to get a good exposure.  The Canon T3i has buttons for all the things you need to change, though it lacks a top LCD, it is still an ok camera egonomically for setting up a shot (though suffers for reviewing shots due to the usual Canon making you hit the review button twice before you can actually properly review a shot).  

While Pamela practices she will be deciding which new lenses to invest in for her wildlife photography hobby.  

Digital Photo Editing Lesson with Stacy - prom couple before and after

The past few weeks I have been teaching former Morean Arts Center photography student, Stacy, how to develop a Mac digital photo editing workflow.  She is new to Mac as well, so I have been showing her some of my top tips for using OS X as efficiently as possible (hint, use Expose every day).  She also got the same apps I have so she could learn my exact photo editing workflow which starts in Aperture 3, then Color Efex Pro 3, then finally Photoshop CS5.  

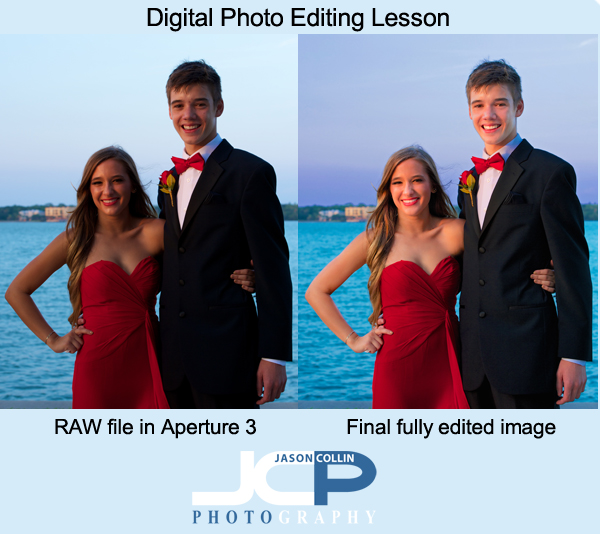
Stacy made this photo of her daughter and her boyfriend on their junior prom night.  No flash was used, only natural light.  Here is the process for how the photo was transformed:

Aperture 3 workflow:

  • white balance slider increased toward cooler (blue)
  • shadows slider increased
  • mid-level contrast slider increased
  • dodging brush used on all skin areas

Color Efex Pro 4 (she has 4, I use 3):

  • Polarization filter applied
  • Pro Contrast filter applied

Photoshop CS5 (approximate steps):

  • Quick Select Tool used on all skin areas
  • Dodge Brush used selectively
  • Healing Brush used for blemish removal
  • Clone Stamp Tool used for more complex blemish removal and slight skin softening in general
  • Dodge Brush used in highlights mode to brighten eyes & teeth
  • Clone Stamp Tool used to lighten under the eyes
  • Quick Select Tool used on water
  • Contrast adjustment made selectively to water
  • Quick Select Tool used on sky
  • Highlights adjustment made selectively to sky
  • Saturation adjustment made selectively to sky
  • Unsharp Mask filter applied

None of these individual techniques is advanced.  To a properly trained Photoshop professional they might even seem crude.  However, what each technique lacks in complexity, the complexity comes from knowing when and how to use each one to accomplish a photo retouching goal.  At each stage of editing the photo looked better.  Through experience it can be learned how to keep adding yet another stage to one's editing workflow to make a photograph reach its full potential, or in some cases, save a photo that would otherwise be culled.

Photography Tip - look up!

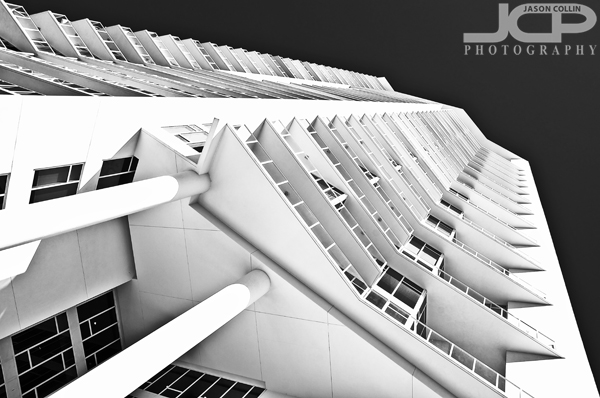
When looking to make a photograph remember to also look up!Pushing the shutter on your camera when looking at a subject at eye level with nothing else special done is very likely to result in an uninteresting photograph.  Shooting like these I often refer to as just snapshot photography.  I tell my photography students that to make a photograph one often has to show the viewer something she/he cannot also see simply by standing there too.  One of the easiests ways to compose a shot that breaks from this constraint is to simply look, up!  A sharp eyed viewer will also notice one of my other favorite composition techniques in the above shot of Signature Tower in downtown St. Petersburg--ending lines flush in corners.  

1-on-1 Digital Photography Lesson with Sony Camera in downtown St. Petersburg Florida with Harvey

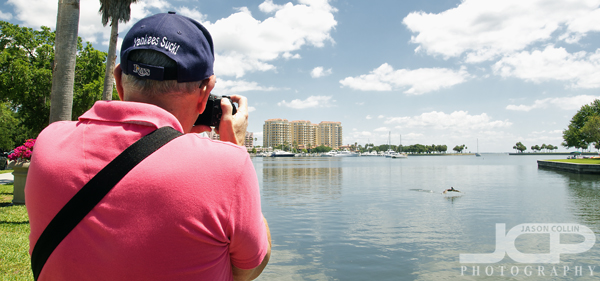
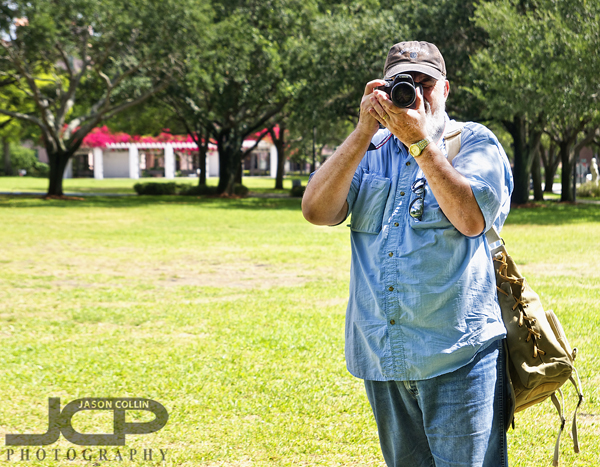
Harvey photographing a pelican coming in for a landing during our digital photography lesson in St. Petersburg FloridaI have been teaching 1-on-1 DSLR Photography Lessons in downtown St. Petersburg for almost four years now.  In that time I believe I have only twice before taught someone with a non-DSLR camera.  My reasoning for that is that there is a uniformity to DSLRs even across brands allowing me to quickly show a person how to shoot in manual mode.  Non-DSLRs have no such uniformity and it took quite some time just figuring out how to change the aperture on Harvey's Sony digital camera.  Although it took more time than usual, I was able to figure out how to use the camera in full manual mode and thus began teaching my 5-step process to Harvey.

He kept asking me, like many people do, "which settings should I use for this and that," which I can never answer because unless I am looking at the same subject and light, I cannot really say.  This is why I stressed to him and to others that I teach a process that allows you to determine which settings to use on your own.  Of course there are basic default settings one can start out with in typical shooting situations, and those can be found in my photography tips section, but I cannot answer questions that contain the words "always" and "settings."

Eventually Harvey became a bit more comfortable, and accepting, of shooting in manual exposure mode.

Canon T4i 1-on-1 DSLR Photography Lesson in St. Petersburg with John

John with his new Canon T4i during our 1-on-1 photography lesson in downtown St. Petersburg FloridaOn a surprisingly crisp Florida morning in May I met John in downtown St. Petersburg for a 1-on-1 DSLR Photography Lesson.  His interest in photography has been growing leading him to purchase a Canon T4i making the transition from point-and-shoot to the DSLR world.  He had also starting reading up on photography before we met so he had familiarity with photography terms, but just needed help seeing how they all relate and also simply how to set them on his DSLR.  

After I showed him around his Canon T4i we walked around the waterfront area practicing how to use the meter to get a baseline exposure, and then how to read the histogram after making the shot to see how the results really came out.  I showed John how to control DoF with aperture and focal length and then concluded the lesson with a little shade versus direct sunlight portrait practice.