composition

Leading lines on The Road in black & white

Leading lines on The Road in black & white

Shooting low and on The Road is one of my favorite shots

The low angle on The Road shot is one my favorite types of photo to make. This one was made on a winding desert road south of Santa Rosa. It’s a great driving road for its lack of traffic, scenery, and numerous bends and curves. As light was starting to fade, I pulled over and got the camera out to compose this shot using the double yellow lines as a composition technique called leading lines. You can use anything to make leading lines, which catch the viewer’s eye and lead them to look into the full frame of the photo. The next time you are out with your camera, look for something you can use as leading lines in your shot.
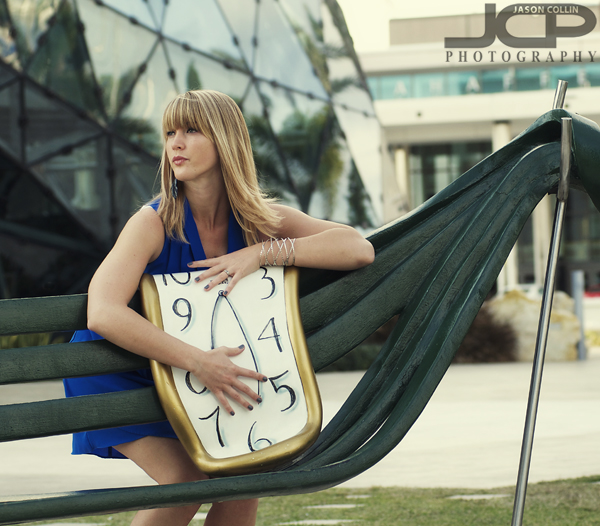
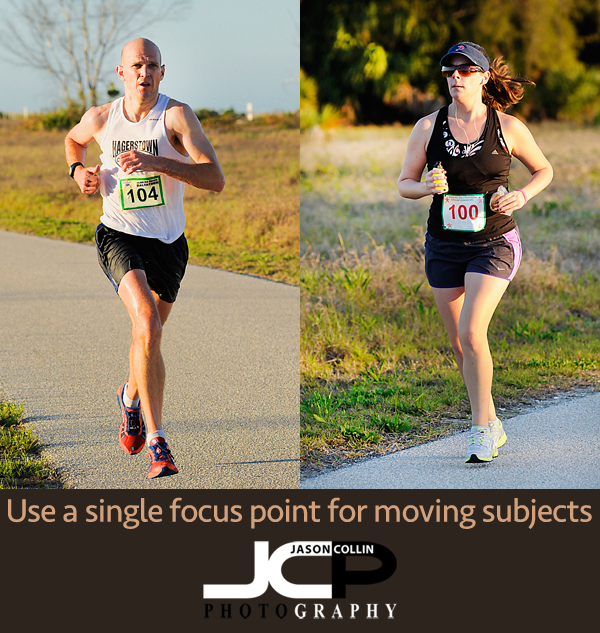
Read More

Depth of Field Matters in Making a Creative Photo

Depth of Field Matters in Making a Creative Photo

Using shallow depth of field and setting your focus point

Since I started Jason Collin Photography back in 2009, I have taught hundreds of people of all levels 1-on-1 photography lessons. In the course of that teaching I repeated some favorite photography advice. Here is one of them:

“Show me something I cannot see by just standing there.”

Another one is:

“A photographer can make something out of nothing.”

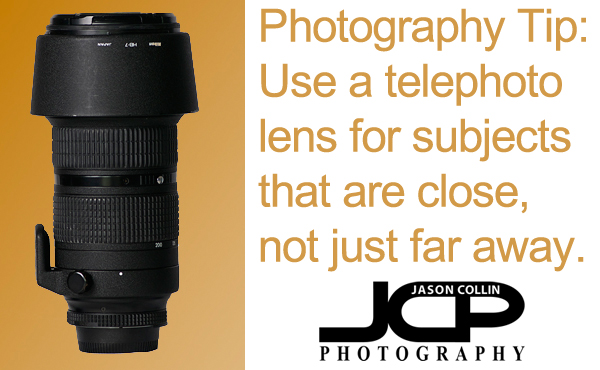
In the example photos in this blog post I had my Sigma 50mm f/1.4 ART lens on my Sony a7 III full frame mirrorless camera. This lens is my favorite lens for making something out of nothing because the large f/1.4 aperture means I can easily create very shallow DoF (depth of field). Making a photo with a very shallow DoF is one of the easiest ways to make something out of nothing.

Read More

Photo Tip - put a major subject focal point in a third and a third

Many of my hundreds of photography students start out always centering the subject in the frame during our first lessons.  That is understandable as they are busy learning my 5-step process for making a well exposed and sharp photograph in any given shooting situation.  Once the technical apsects of photography take up less of the process of making a photo, then one can begin to focus on being creative, and the first step in that is composition.  

The rule of thirds is a good way to start getting more appealing composition, but I like to think in two dimensions with the rule of thirds as well.  By that I mean putting a major feature of my subject in a vertical thid and a horizontal third.  In the above example of a model at the Dali Museum, the upper third and left third interset right by the model's face.  Then the lower third and left third intersect by her hand and the melting clock.  There is still a good amount of negative space in the frame, but that is put to the far upper and left parts of the photo.  I would not want a lot of negative space on both sides of the subject (as in if I had centered her with no focal points other than along the midpoint of the photograph).

So the next time you go out shooting, especially a portrait, try putting a major subject focal point at a third and a third in the frame.

The final version of the photo putting a major focal point at a third and a third

Photography Tip - use a telephoto lens for subjects that are close to you, not just far away

Many of the 155+ photography tips I have posted on my site come from the over 300+ one-on-one photography lessons I have taught over the past five years.  From a photography student's question, or from something I teach in the field, I find things that can make for a photography tip blog post.  Such is the case with the subject matter of this photography tip.  During a recent 1-on-1 photography lesson I had a student switch from a wide angle lens to a telephoto lens to help fill the frame with a subject and to make the background disappear and become bokeh.  This is something that I have had every photography student do during lessons, but only upon reading email feedback from this particular student did it occur to me that it may not be obvious to use a telephoto lens to photograph subjects that are close or even very close to you.

Using a telephoto lens for subjects that are close creates bokeh easily and adds another use for a long lens.He told me that he had not thought to use his 70-300mm lens for subjects that were close to him before, but only rather for subjects that were far away.  He went on to say this changed his entire perspective on using that lens.  Thus, I decided to make it a photography tip so that in case anyone else has not necessarily used their telephoto lens for close subjects before can do so and get the benefits of using a lens with a long focal length on a subject close to the photographer.

In the above portrait example, the model was very close to where I was standing, but I still used the lens' maximum focal length of 200mm to create a more personal composition and also of course bokeh in the background.  So try going out this weekend with your telephoto lens and photograph close by subjects and let me know the results. 

Photography Tip - turn on and use the view finder's grid display on your DSLR

When people ask me for feedback on their photographs, one of the most common mistakes I see is a horizon that is not level.  This is a very simple thing to do and without it, the photograph is ruined.  To help get horizon's level, use the grid display in your DSLR's viewfinder.  Not every DSLR has this option, and not every DSLR that does has it on be default.  So look in your menus (for Nikon cameras check the Custom Settings Menu) to see if you can turn on something usually called "grid display."  Not only will it lay a grid over what you see so you can get horizons level, it also shows the framing for the rule of thirds.  

For the sunset portrait above, I placed the lower third grid line right on the horizon itself, insuring a level horizon.  Also note on the upper third lines interset right at the main focus point of the subjects (their heads).  This is a composition style you will see commonly in many of my photographs, even ones without people in them.  

So be sure and turn on your DSLR's grid lines in the viewfinder and get every horizon level with easy!

Photography Tip - use a single focus point for moving subjects not filling the frame

There are a number of reasons why a moving subject may appear out of focus in a photograph.  One reason could simply be because the focus point(s) were not on the subject.  For still subjects, I always use a single focus point.  For moving subjects where the subject is not largely filling the frame, even in the examples above of runners, I use a single focus point as well.  By using a single focus point (in the center) when photographing the runners I could track them as they ran past me and I knew for sure that I was getting them in focus because the only focus point available was right on them.  There was no risk of back-focusing on the background which can happen when using multiple focus points (11, 21, 51, etc).  In this case, I did not want the camera trying to pick out the subject from the background which is what happens when using multiple focus points.  I selected a single focus point, kept it center, and kept that locked onto each runner.  Of course I was using AF-C (One Shot) focus mode and a minimum shutter speed of 1/500th--the other two things needed to have any chance at freezing of moving subject in a photograph.

So if you find you are having trouble getting a moving subject in focus (or even a still subject), use a single focus point (often in the center) and put it right on the subject you want to be in focus in the frame.  

Photography Tip - go minimalist with subject & background

Composed and exposed for minimalism in subject matter and background.One way to create visual appeal in a photograph is to compose for minimalism in both subject and background.  This also results in a very clean looking image.  Sometimes the lack of visuals can create a strong visual.  Nothing ruins a photograph like a busy background.  In the above photo instead of showing the sky, I chose settings that totally blew out the sky creating a pure white background.  This allows the old cable tower to be shown cleanly.  Only part of the cable tower was put in the frame to again focus the subject matter and create a minimalist look.  

The next time you go out shooting try composing for minimalism.  This can be done with any subject matter.