DSLR

Photography Tip - turn on and use the view finder's grid display on your DSLR

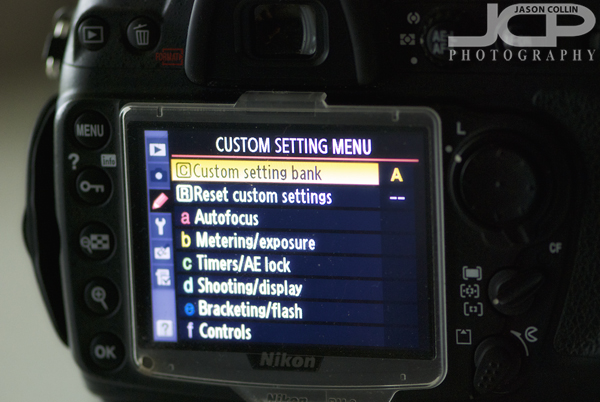
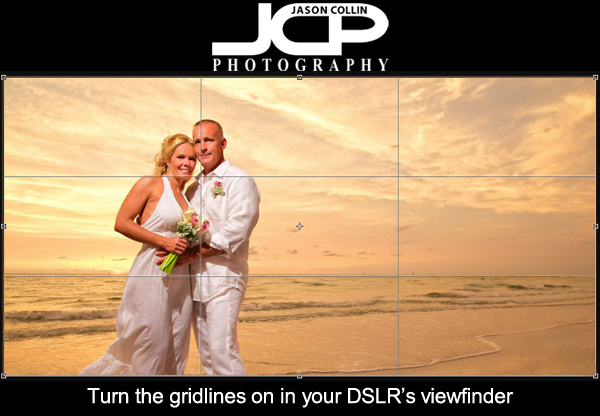
When people ask me for feedback on their photographs, one of the most common mistakes I see is a horizon that is not level.  This is a very simple thing to do and without it, the photograph is ruined.  To help get horizon's level, use the grid display in your DSLR's viewfinder.  Not every DSLR has this option, and not every DSLR that does has it on be default.  So look in your menus (for Nikon cameras check the Custom Settings Menu) to see if you can turn on something usually called "grid display."  Not only will it lay a grid over what you see so you can get horizons level, it also shows the framing for the rule of thirds.  

For the sunset portrait above, I placed the lower third grid line right on the horizon itself, insuring a level horizon.  Also note on the upper third lines interset right at the main focus point of the subjects (their heads).  This is a composition style you will see commonly in many of my photographs, even ones without people in them.  

So be sure and turn on your DSLR's grid lines in the viewfinder and get every horizon level with easy!

Photography Tip - leave your camera out ready to shoot

Photography Tip - keep your camera on a shelf with lens cap off ready to shoot at any time!If you are not shooting much from home, maybe it is because your camera is packed away in a bag in the closet somewhere.  A very simple way to start taking more photos at home is by keeping your camera out on a shelf, or table, lens cap off, all ready to just be picked up, turned on and shoot.  Just seeing your camera and having it out will remind you, hey I should be taking some photos to keep in practice.  Another reason to keep your camera at the ready is if you are always seeing good photograph opportunities, but miss them because your camera is four steps away from shoot ready.  For example, if I know I want to make a shot of the sunrise, the night before I have my camera out and on the tripod ready so when I wake up, that is one less hurdle to getting the sunrise photos I want.  

Photography Tip - go through all your DSLR menus and recheck settings

To start out the year, the first photography tip of 2014 is to go through each and everyone of your DSLR's menus and confirm that all the settings are what you want and to refresh your memory about where less often used settings are.  Deep in the menus are things that basically only ever need to be set once (like number of auto-focus points beyond a single point), but gremlins do exist and even though you may never remember changing any of these lesser used settings, they might have on their own somehow!  

Going through all the menus will also help you remember where things are that do occassionally need to be changed.  It's better to refresh you memory home at your desk than when out in the field already shooting.  

If you find something in your menus you are not sure of what to set at, or even what it does, leave a question in the comments and I will try and answer it for you.

Good luck shooting in 2014!

Photography Tip - set DSLR Drive Mode to its fastest for action shots

One big differentiator between DSLR models is how many frames per second it can shoot.  10 FPS is fast, 3 FPS is not.  6 FPS is a minimum for being able to produce pretty good action and sports photography shots.  The faster the FPS of your DSLR, the better the odds are for you to capture the best moment in an action sequence.  Knowledge of the action type definitely helps, but ultimately a lot of it comes down to just being lucky enough to have had your DSLR capture that particular frame that looks the best, the coolest, the most dynamic.  

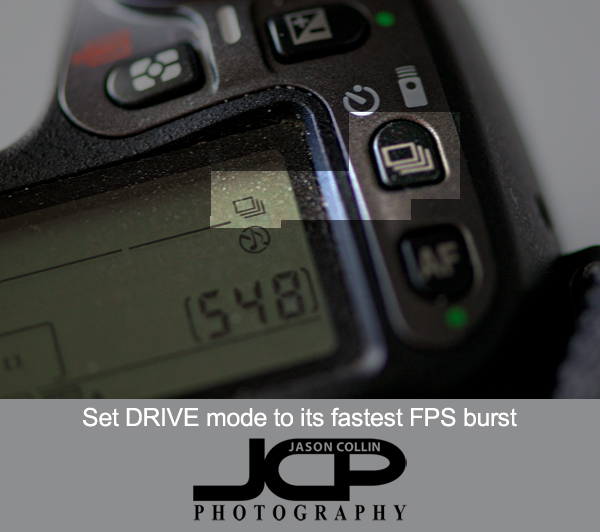
By default most DSLR will be set to take only a single shot no matter how long one holds the shutter down for.  For me, I always leave my Nikon in its faster FPS setting.  In the menus this is usually called the Drive Mode and its symbol looks like a stack of cards (see photo above).  Many DSLRs will have a button for changing this setting on the camera body.  My thinking for leaving it set to the fastest is you never know when something cool will happen and I much rather have 6 chances in a second of capturing it than one.  Of course I do not always hold the shutter down and take 6 FPS.  I have trained my finger to only actuate one shot each time I press the shutter if I only want to make one shot.  I have seen though that many newer model DSLRs have a very sensitive shutter button making this very hard to do.  Maybe those will eventually wear in and not be so sensitive.

If you find you are taking too many shots at once due to a sensitive shutter or other reasons, there is usually a second, less fast FPS setting you can use, without having to go to just a single shot setting.  When photographing the St. Anthony's Triathlon that was the drive mode I was recommended to use in order not to end up with too many shots of each triathlete.   
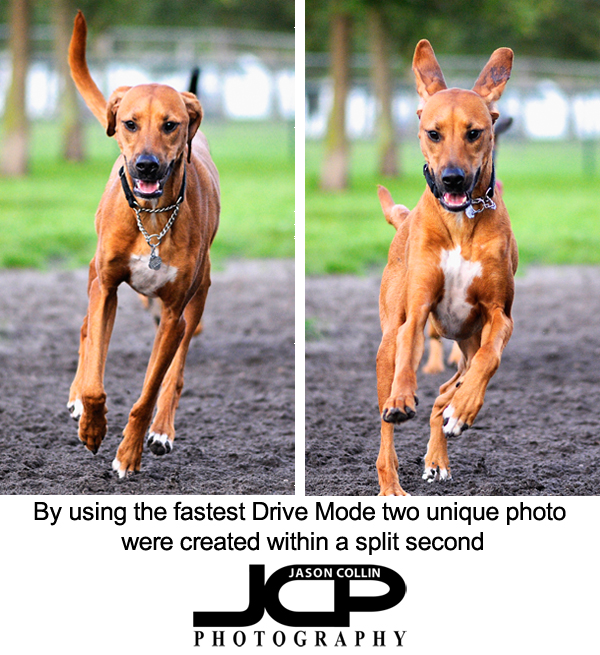
In the above dog photos these were made withing a split second of each other.  If I was trying to specifically get an ears up or ears down shot, I would never rely on having perfect timing to do it with one shot!  For sure I would use the fastest burst mode available.  This is definitely a case where you lock onto your subject and just hold the shutter down and hope the final frozen action of the subject looks good.  You use your skills to set exposure and focus, and to position yourself well relative the moving subject.  This minimizes how much you need to be lucky to capture good action shots.  Get your settings right, put yourself in good position, then hold the shutter down and hope you got just the right moment!  The faster your FPS, the better your chances.
Photography Tip - Change all your DSLR settings in under 10 seconds

Photograph opportunities often are not available for an infinite amount of time.  In fact, most are very, very finite and there are many times you have just one shot at making a photograph.  How can you insure you will always give yourself the best chance at making a great photograph even if you have just one shot at it?  By being able to change the settings on your DSLR very quickly.  

How quick?  

It depends on your particular DSLR and what dedicated buttons you have available.  No matter what DSLR you have, even if you have an entry level one, you should be able to change all five necessary settings for making a well exposed and sharp shot in ten seconds or less.  If you have a fully functional DSLR, i.e. two dials for changing settings, a top LCD display and dedicated buttons for all five things, then your goal should be five seconds or less.  Very rarely are all five things needed to be changed, but you should practice changing all five at home so that when you are out shooting you will be prepared.

Of course you have to know within fractions of seconds what to change your aperture to, or your shutter speed to, etc.  That knowledge combined with knowing your DSLR camera body with your eyes closed (seriously, if you have dedicated buttons you should be able to operate them eyes closed) results in giving yourself the best chance every time a sudden photograph opportunity comes up.

I offer 1-on-1 DSLR Photography Lessons that can help you learn both how to use your camera quickly and what to change the necessary settings to.  Reserve a lesson today!

Photography Tip - Intro to the Histogram

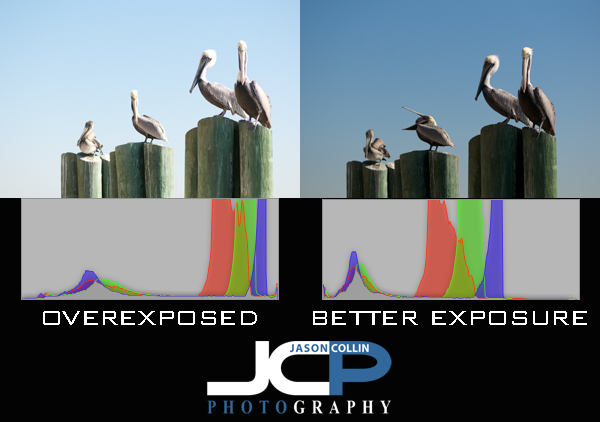
The histogram is a very useful way of checking and confirming exposure, especially out in the field.  It may just look like a bunch of strange squigly lines or a series of jagged mountains, but the histogram tells you exactly what your photograph really looks like in terms of exposure and color.  Since it is often hard to see the camera's review screen in direct sunlight to judge exposure, the histogram for a photographer is like a pilot flying an airplane by using only instruments.  You do not even need to see the photograph to tell if it is a dark image, a bright one, or even a very colorful one.  Essentially, the histogram looks like a rectangular box representing 256 shades of gray or individual colors, or all of them (see the histograms above showing grayscale and RGB color as Aperture 3 represents the histogram).  Black is on the left edge and white is on the right edge.  The more data to the left, means the darker an image is, and potentially underexposed.  The more date to the right means a brighter image, and possibly an overexposed ones.

It is usually best to try and get as much of the data in the center forming a nice mountain, with no spikes at either the far left or far right edges.  In the samples above, the left histogram has most of its data on the right side, indicating the photo is a bright exposure, as can be confirmed by looking at the photo itself.  The histogram on the right is much more balanced and a more even exposure, as seen in the photo showing a bluer sky and better whites in the pelicans' heads.

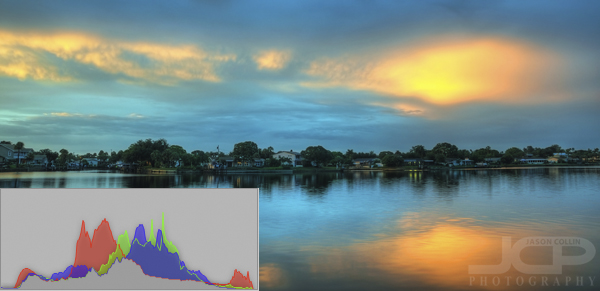
The above image of Smacks Bayou (as seen from just off my back patio) has a histogram that is about as ideal as it can get.  The majority of the data for grayscale and RGB color is in the middle-center and there is a lot of range in those colors.  The taller the peaks, the more of that particular color or shade of gray.  There are also no spikes at either far edge of the histogram.

Photography Tip - Enable Highlights mode

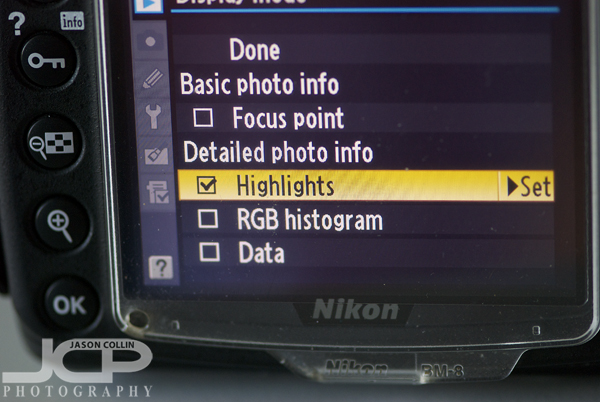
Go to Highlight alert on Canon DSLRs to show any overexposed areas when reviewing your shots.One very useful feature that is often not on by default in DSLR cameras, is the view highlights mode.  Enabling this mode allows you to see which areas of a photograph have blown out highlights.  The areas will flash giving a clear signal that part of the photograph is overexposed and that you may want to adjust exposure to bring back detail in those highlights.

Nikon offers many types of review views including highlights.As usual, Nikon does highlights mode much better than Canon.  No matter what review mode you look at on a Canon DSLR, the highlights will always be flashing.  This gets annoying when you just want to see the composition of the shot and you may have intentionally overexposed some areas.  On Nikon highlights have their very own review view.  

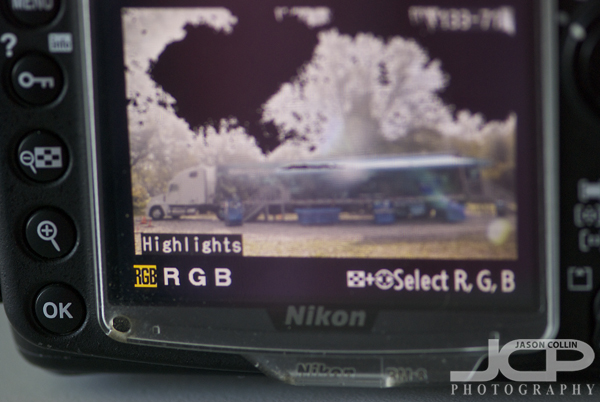
The black areas in the white sky are the flashing highlight signalIn the image above the large black areas in the sky indicate the portions of the photograph that are overexposed, or blown out.  Those black areas will flash on and off clearing letting you know, "hey, the sky is totally blown out, did you really intend to do that?"