 One big differentiator between DSLR models is how many frames per second it can shoot. 10 FPS is fast, 3 FPS is not. 6 FPS is a minimum for being able to produce pretty good action and sports photography shots. The faster the FPS of your DSLR, the better the odds are for you to capture the best moment in an action sequence. Knowledge of the action type definitely helps, but ultimately a lot of it comes down to just being lucky enough to have had your DSLR capture that particular frame that looks the best, the coolest, the most dynamic.
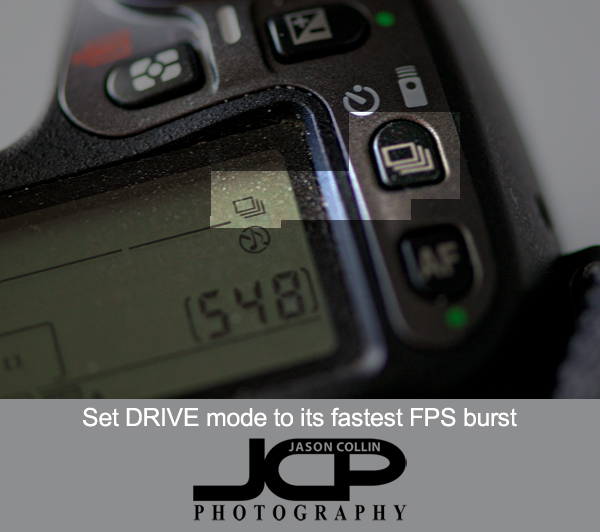
By default most DSLR will be set to take only a single shot no matter how long one holds the shutter down for. For me, I always leave my Nikon in its faster FPS setting. In the menus this is usually called the Drive Mode and its symbol looks like a stack of cards (see photo above). Many DSLRs will have a button for changing this setting on the camera body. My thinking for leaving it set to the fastest is you never know when something cool will happen and I much rather have 6 chances in a second of capturing it than one. Of course I do not always hold the shutter down and take 6 FPS. I have trained my finger to only actuate one shot each time I press the shutter if I only want to make one shot. I have seen though that many newer model DSLRs have a very sensitive shutter button making this very hard to do. Maybe those will eventually wear in and not be so sensitive.
If you find you are taking too many shots at once due to a sensitive shutter or other reasons, there is usually a second, less fast FPS setting you can use, without having to go to just a single shot setting. When photographing the St. Anthony's Triathlon that was the drive mode I was recommended to use in order not to end up with too many shots of each triathlete.
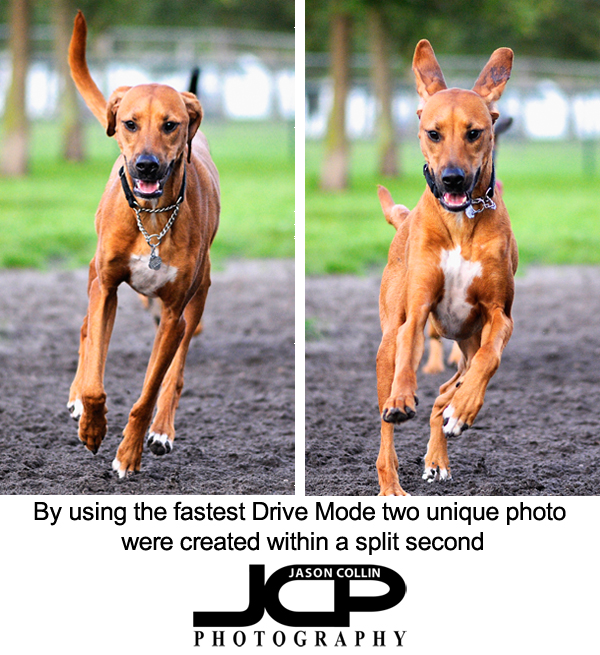
In the above dog photos these were made withing a split second of each other. If I was trying to specifically get an ears up or ears down shot, I would never rely on having perfect timing to do it with one shot! For sure I would use the fastest burst mode available. This is definitely a case where you lock onto your subject and just hold the shutter down and hope the final frozen action of the subject looks good. You use your skills to set exposure and focus, and to position yourself well relative the moving subject. This minimizes how much you need to be lucky to capture good action shots. Get your settings right, put yourself in good position, then hold the shutter down and hope you got just the right moment! The faster your FPS, the better your chances.

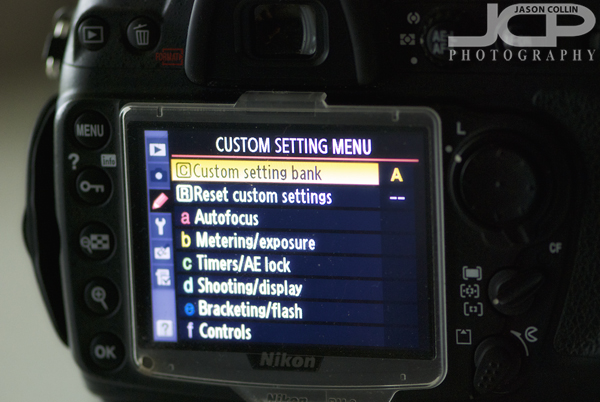 To start out the year, the first photography tip of 2014 is to go through each and everyone of your DSLR's menus and confirm that all the settings are what you want and to refresh your memory about where less often used settings are. Deep in the menus are things that basically only ever need to be set once (like number of auto-focus points beyond a single point), but gremlins do exist and even though you may never remember changing any of these lesser used settings, they might have on their own somehow!