workflow

Digital Photo Editing Lesson with Stacy - prom couple before and after

The past few weeks I have been teaching former Morean Arts Center photography student, Stacy, how to develop a Mac digital photo editing workflow.  She is new to Mac as well, so I have been showing her some of my top tips for using OS X as efficiently as possible (hint, use Expose every day).  She also got the same apps I have so she could learn my exact photo editing workflow which starts in Aperture 3, then Color Efex Pro 3, then finally Photoshop CS5.  

Stacy made this photo of her daughter and her boyfriend on their junior prom night.  No flash was used, only natural light.  Here is the process for how the photo was transformed:

Aperture 3 workflow:

  • white balance slider increased toward cooler (blue)
  • shadows slider increased
  • mid-level contrast slider increased
  • dodging brush used on all skin areas

Color Efex Pro 4 (she has 4, I use 3):

  • Polarization filter applied
  • Pro Contrast filter applied

Photoshop CS5 (approximate steps):

  • Quick Select Tool used on all skin areas
  • Dodge Brush used selectively
  • Healing Brush used for blemish removal
  • Clone Stamp Tool used for more complex blemish removal and slight skin softening in general
  • Dodge Brush used in highlights mode to brighten eyes & teeth
  • Clone Stamp Tool used to lighten under the eyes
  • Quick Select Tool used on water
  • Contrast adjustment made selectively to water
  • Quick Select Tool used on sky
  • Highlights adjustment made selectively to sky
  • Saturation adjustment made selectively to sky
  • Unsharp Mask filter applied

None of these individual techniques is advanced.  To a properly trained Photoshop professional they might even seem crude.  However, what each technique lacks in complexity, the complexity comes from knowing when and how to use each one to accomplish a photo retouching goal.  At each stage of editing the photo looked better.  Through experience it can be learned how to keep adding yet another stage to one's editing workflow to make a photograph reach its full potential, or in some cases, save a photo that would otherwise be culled.

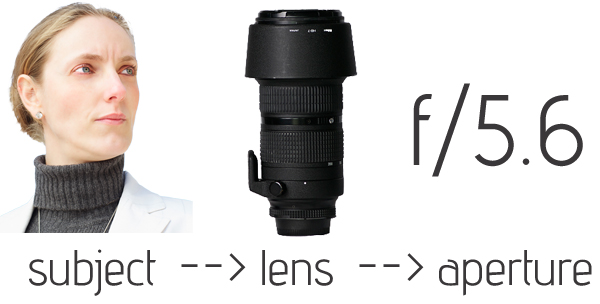
Photography Tip - subject dictates lens dictates aperture

If you find yourself thinking, which lens should I use?  Or if you are thinking, which aperture should I use?  Well, I suggest first thinking about what subject are you going to photograph.  I have lenses with the following focal lengths:  17-50mm, 50mm, 105mm, and 80-200mm.  Each one is very good at photographing different subjects.  After all, why have lenses that largely overlap in purpose?  Since I have these different lenses, how do I know which one to use?  And with what aperture?  I decide this by thinking of the subject first.  I phrase it like this:

subject dictates lens --> lens dictates aperture

Using the above image as a reference, if my subject was a single person for a headshot, that dictates to me I want to use my 80-200mm lens (pictured) and when I use that lens, I most often use it at f/5.6 (read this photography tip for more on which aperture for which lens).  In that way my subject dictates everything I need to know for making the shot as far as which lens & which aperture.  

Likewise, if my subject was a landscape, that would then dictate that I use my 17-50mm lens and that lens dictates that I most often want to use an aperture of f/11.  

So my advice is to always think of your subject first, then think which lens is best for that, and then for each lens you have you know which aperture you like to shoot at with it.  If you only have one lens, or a lens with a wide focal range of 18-200mm for example, you can still use the same process, just instead subject dictates lens dictates aperture, it would be subject dictates focal range dictates aperture.  I would think of the lens then as an 18-50mm and a 50mm-200mm in that regard.

Aperture 3 Workflow Digital Photography Lesson on MacBook Pro St. Petersburg Florida

Bill learning my Aperture 3 workflow right from my desk also getting emotional support from Kiki!Last week Bill came over to my apartment for a digital photography workflow lesson based on Aperture 3.  This was my sixth time meeting up with Bill, but the first to focus on the part of digital photography that happens after you return from shooting, which is just as important as learning how to shoot out in the field.  Once you start taking 200, 300, 400+ photos on any given outing with your DSLR then workflow and photo management becomes critical in making sure you showcase your best images and can find them one year down the road.  

After Kiki gave Bill an enthusiastic greeting, we opened up our MacBook Pros at my desk and I went step-by-step with Bill first getting my preferred Aperture 3 settings into his version, and then showing him what you do once you insert a memory card into the SD slot on the side.  Upon photo import in Aperture 3 you can imprint a lot of very useful metadata, as well as rename the files (so all your shots are not _DCC457) and put them into a new project to start off your workflow with good orginization.

Bill had photos from his daughter's prom night pre-dance getogether at his own home for us to use.  I showed him my culling process for picking the best shot out of 3-4 similar shots.  This involves a star-rating system and then a side-by-side full-screen comparison of shots.  We finished the lesson with using some of the handy sliders and brushes in Aperture 3 to make the first round of edits on a given digital photograph.