Photography Tips

Nikon D3100 DSLR Photography Lesson in St. Petersburg Florida with Kyle

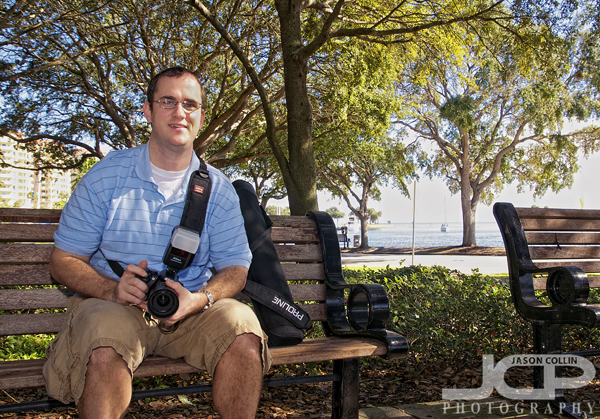
Kyle with his Nikon D3100 in Straub Park with Proline tripod product placementI had been in e-mail contact with Kyle for awhile, giving him tripod buying advice, etc.  This morning I met him for a DSLR Photography Lesson in the usual downtown St. Petersburg spot.  Even though the calendar said December 22nd, it felt more like May 22nd as the Florida sun continued to shine on full force.  

As usual during a first lesson, we covered a wide range of photography topics starting out with my 4-step process for getting the settings right for any given type of shot followed by simply how to best hold a DSLR for maximum stability and efficiency.  Kyle kept his Nikkor AF-S 35mm f/1.8G lens on his D3100 as we went from making shots with bokeh, to controling DoF for group shots, to how to compose and take shots using a tripod, before ending with some flash portrait practice.  

I hope Kyle can put all we covered today to use to produce his best holiday photographs ever.  He already had two of his photographs published in a local credit union's calendar, maybe next year he can go national!

How to fix black clouds in HDR images using layer mask

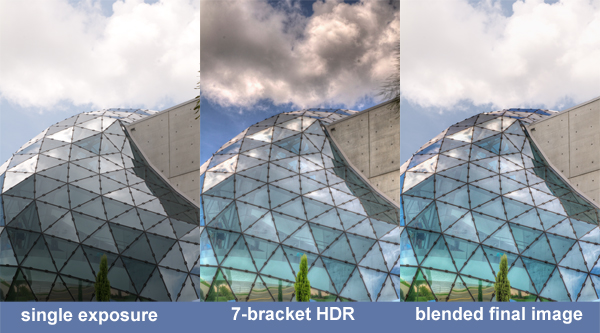
HDR photography and images are very popular right now.  I, myself, have participated in a local exhibition featuring only HDR images.  The thing is, I do not care for 90% of HDR photography I see.  There is a large debate about processing HDR images to look more real or more hyper real.  I am not referencing that debate here.  For me, a simple reason why I do not find a vast majority of HDR images appealing is because they suffer from horrible shadow effects as demonstrated in the black clouds in the center image above.  As you can see with the single exposure photo, the sky looks good, but there is no detail inside the glass.  The 7-bracket HDR image reveals what is under the glass and adds better color, but at the expense of the clouds.  Therefore, the best final results come from blending the single exposure photo with the 7-bracket HDR image.
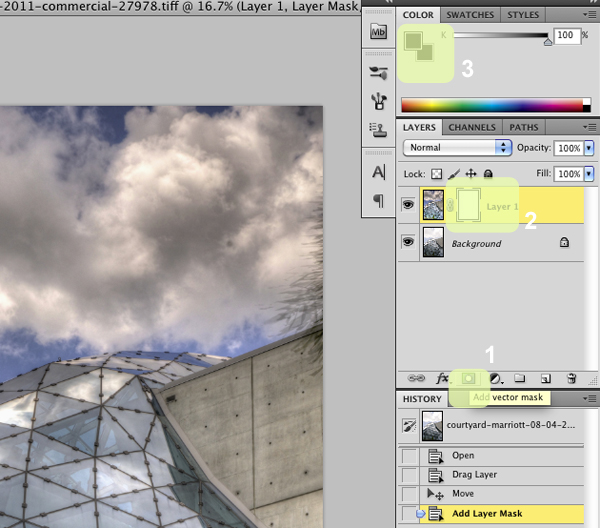
1. click on add layer mask (sorry, shows vector) 2. click on layer 1 3. paint with a black brushBlending two images together is not a difficult time consuming process using Photoshop.  The screenshots in this post are using CS5, but other versions should basically be the same.

First, open the single exposure photo and 7-bracket HDR image in Photoshop.  Drag the 7-bracket HDR image on top of the single exposure photo.  Once you do this you will only see the 7-bracket HDR image.  The single exposure photo is completely hidden underneath.  Our goal is to reveal only the parts of the single exposure photo we want, in this case, the clouds and sky.

After you have dragged the 7-bracket HDR image on top of the single exposure photo, follow the three steps highlighted in the screenshot above: 

  1. Click on "Add layer mask"
  2. Click on "Layer 1"
  3. Select the Brush tool: soft brush setting, black, 60% opacity (or similar, just not 100%) 
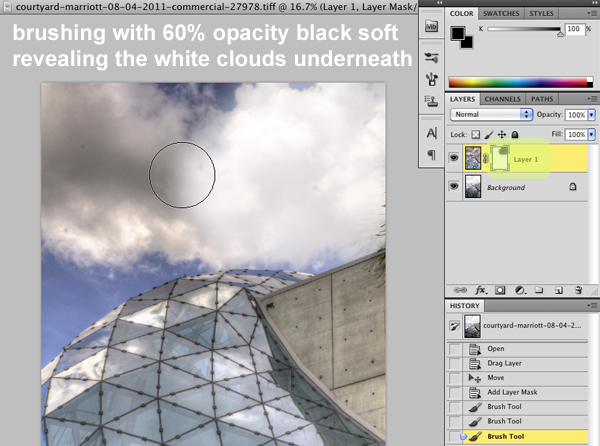
Now using the Brush tool at the settings described above, slowly brush the areas you want to reveal.  The 7-bracket HDR image starts to disappear revealing the single exposure photo below.  In the above screenshot you can see that I already revealed the nice white clouds on the right side.  Here is an extra tip:  I also used the Brush tool on the concrete wall of the building that looked too black & dirty to reveal the cleaner wall from the single exposure photo.  If you make a mistake and reveal something you did not want to, set the Brush color to white and the top image will return.
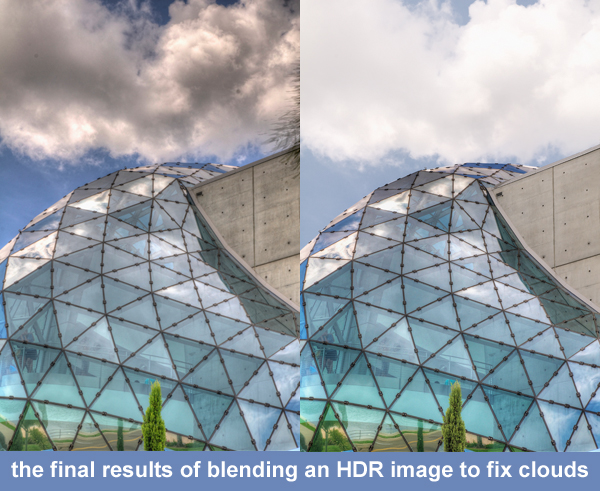
Here again are the before and after results.  By using a layer mask you can create a dynamic hdr image and still maintain the clean look of clouds, walls, etc in the image.  This vector mask technique is great for other photography tricks too.  Want to change the background on a portrait?  You can do that following this same process! (see results here)

Try the vector mask process on some of your images and be sure to post links to the results in the comments below. 

  • Read more photography tips
  • Reserve your own 1-on-1 DSLR Photography Lesson with Jason today!
  • Learn more about the lessons
  • Off Camera Flash Strobist Beach Portrait Photography Lesson Florida

    Jasmina practicing off camera flash with a single strobe on Sunset Beach, Treasure Island, FloridaIt was bright and sunny an hour before my lesson with new DSLR Photography Lesson student, Jasmina.  She called me to see if the lesson was still on because it was raining where she was to the south.  I said it's all sunshine here and it was so right up to the start of our lesson.  Then the clouds began rolling in, but no rain at all so it was just a bit chilly on the beach as I began showing Jasmina my off camera flash and strobist techniques for making beach portraits.

    She brought a willing model with her which was great news for me because this meant I did not have to be both model and teacher!  Actually, I did have one role in addition to teacaher, and that was human light stand.  We used Jasmina's Nikon SB-900 Speedlight for single strobe technique at first, but added one of my own strobes to show the benefit having two lights sources has.  

    It was a fun and intereting lesson for me as I do not often get to teach strobist stuff, which is one of my favorite types of photography.  I look forward to seeing Jasmina's future off camera flash portraits on the beach and off.

    Photograph the same subject during the day & at night

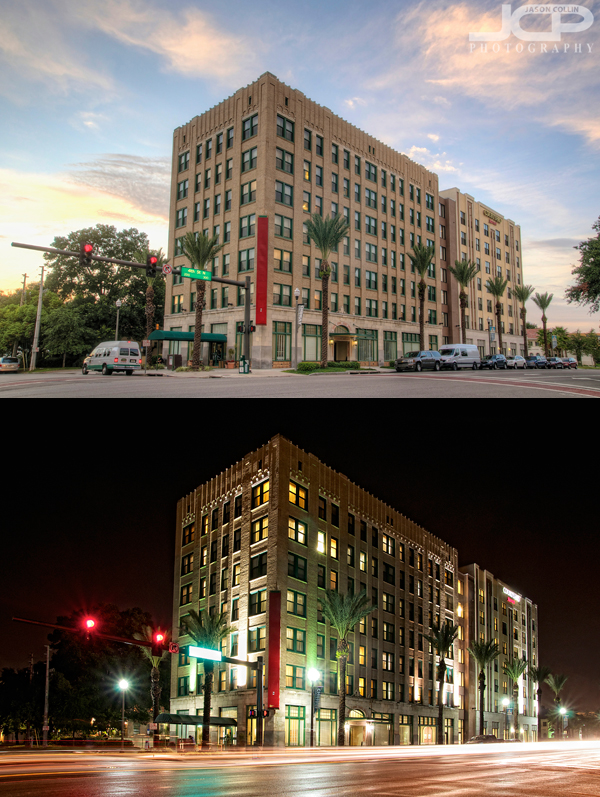
    The Courtyard Marriott Hotel in downtown St. Petersburg, Florida: top in late afternoon, bottom at night after a rainstormThe client wanted both daytime and nighttime exterior shots of their hotel.  I shot the daytime one first.  Several days later I went to photograph the hotel at night, having to wait out a sudden rainstorm that sprang up as I was making the 5-minute drive from my home to the hotel!  The daytime image is a 7-exposure HDR image and the bottom is just a single long exposure.  

    I did not make a shot from the same spot necessarily on purpose, but I am glad I did as it was a chance to see how a specific subject appears in a photograph in two totally different lighting situations.  So this photography tip is more like a photography project: 

    • Photograph the same subject during the day and then at night 

    As you can see a hotel in a city makes for a pretty good day & night subject.  Anything that has cars passing in front of it or on it will allow for making a light trail long exposure night shot.  

    Be sure and include a link to your day and night shot in the comments below. 

  • Read more photography tips
  • Reserve your own 1-on-1 DSLR Photography Lesson with Jason today!
  • Learn more about the lessons
  • Nikon D7000 DSLR Photography Lesson with Naomi in St. Petersburg Florida

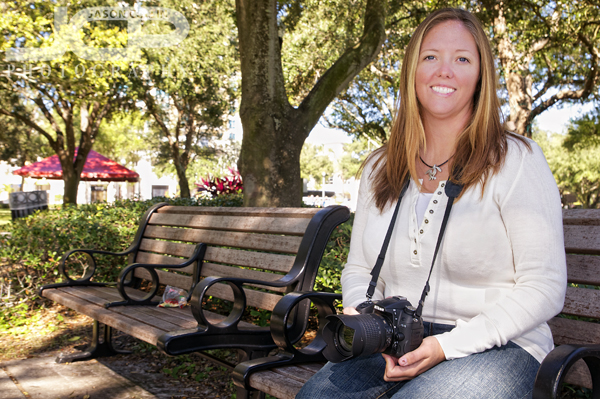
    Naomi with her Nikon D7000 in Straub Park St. PetersburgNaomi first contacted me way back in December of 2010 about the DSLR Photography Lessons I offer.  I would have to say it was the longest first contact to first lesson, but I am glad to have done so as I really like helping people to get started using their DSLRs.  It was also my first time to get hands on with the Nikon D7000, which explains why it took me a bit of time to figure out how to change the focus mode on it.  It seems Nikon got too clever with its switch design not bothering to even label it!

    It was a very crisp 1st of December morning, with the usual brillian Florida sunshine.  It was actually nice to be in the sun, which I was as we practiced using AF-C focus mode.  Naomi is into kite boarding, so we AF-C is the focus mode for moving subjects, although this time the target was me, not a kite boarder.  

    I look forward to seeing Naomi's actual kite boarder shots.  I came across a few people doing this before and it seems like a great subject for producing exciting action shots.  

    The Future is on the Street

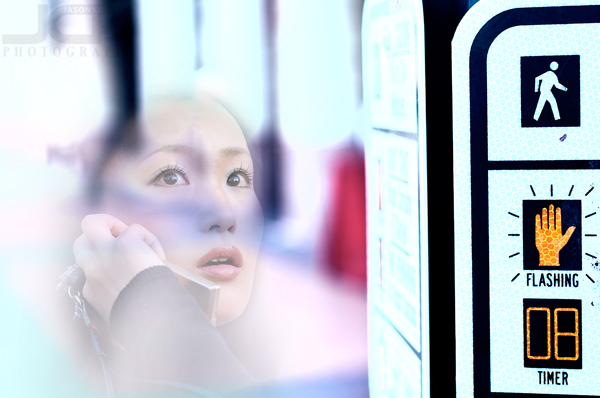
    I did not edit this photo, so much as I imagined it . . .I do not want to explain the technical aspects of the above image.  I made it based on a feeling I had this evening.  I was thinking of the street and of the future.  A home can be a cocoon, especially on a cold day.  Desire to go outside lessens in favor of remaining inside, in warmth.  However, the street is always out there.  On the street is a network.  There is a potential to go anywhere, do anything.

    The future is on the street too.  The future is not going to come from within one's home.  Pieces of the future can trickle into it, but they will not spring from it.  

    How is photography connected to the street and to the future?  That is up to the individual photographer to express.

    Photography Tip:  make an image based on a thought, not thinking of exif data

    Color Efex Pro 3 - Make Fake Autumn in the Park

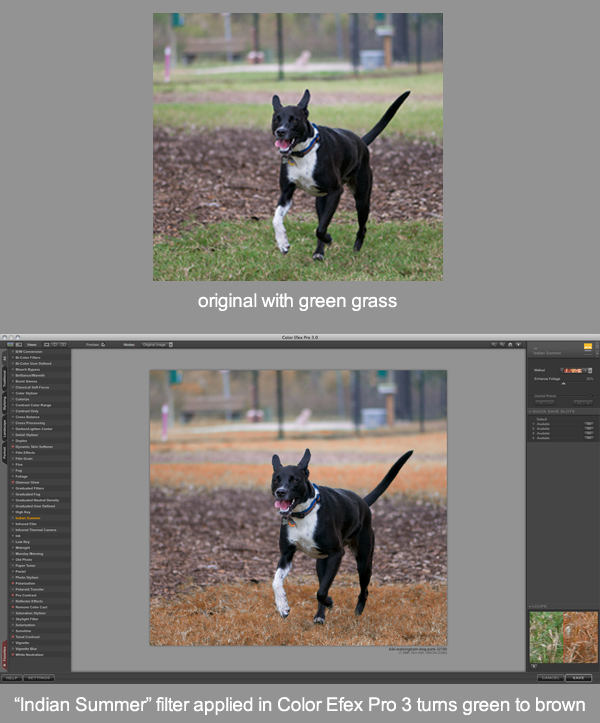
    Kiki running on grass turned brown by Color Efex Pro 3 - Nikon D300 Nikkor AF-S 105mm VR micro f/2.8G @ f/2.8 ISO 400 1/800thI really like that Florida is such a green and lush place nearly year round.  This, however, means there is a near complete absence of autum colors.  At Walsingham Dog Park last weekend, even though it was in the second half of November, all was as green as always.  However, as you can see, Kiki is running on brown grass.  This transformation was done with just one mouse click.

    I really recommend the plugin app Color Efex Pro 3.  I have it for Aperture 3 and use its filters on everyone of my photographs.  It is very easy to use wiht a list of filters on the left that are applied with a single click.  The effects can be modified down to very fine details if desired by using the fine tuning controls on the right column.  The "Indian Summer" filter does just one thing - turn greens to browns.  So with just the application of that single, simple filter, photographs can have that autumn look to them no matter what time of the year they were shot.

    Kiki at Walsingham Dog Park - Nikon D300 Nikkor AF-S 105mm VR micro f/2.8G lens @ f/4 ISO 200 1/500thThe green leaves that make up the bokeh of this shot were made to look like autumn colors once again by applying the "Indian Summer" filter in Color Efex Pro 3.  As you can see, Kiki's markings and collar retain their correct colors since none of them included green.