Photography Tips

Photography Tip - Rockin out Photoshop faux Polaroid template

Having a little fun with a Polaroid Photoshop templateA couple of times a year I get the urge to experiment with Photoshop.  This time I was searching for postcard templates.  I did not find any of those that I liked (I ended up designing my own), but I did find this faux Polaroid Photoshop template.  For awhile I was keeping a photo of some keyboardist-singer hanging around that I took a few months ago wondering what I could do with it.  I liked the emotion, but I could not really find a fit for it.  After I found the faux Polaroid template, I thought they might go together.

HOW TO CREATE YOUR OWN FAUX POLAROID PHOTOGRAPH

First, download the faux Polaroid template from this site.  Then open up the .psd file in Photoshop.  Also open up the photograph you want to use in the template in Photoshop too.  The faux Polaroid template has quite a few layers to it, not all of them I chose to keep.  
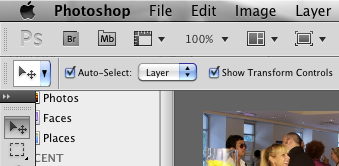
Using the quick select tool with these settings in the screencap above, I clicked on the layers I did not want and then just hit the delete key.  Now the template was ready for the photo to be inserted.  There was some resizing prep-work to be done on the photo first before it could be inserted into the template, however.  I resized the faux Polaroid template to 600px wide (the size of all images on the blog).  

Then I measured the actual pixel space available in the template, represented by the black area seen above.  I cropped the photo to just a few pixels less in each dimension then resized it.  Then it was just a matter of using the quick select tool to drag the photo onto the open black space on the template.  The last thing I did was change the text caption.
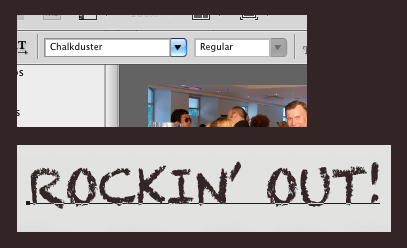
I once again selected the template layer with the quick select tool.  Then used the horizontal type tool to write "ROCKIN' OUT!" using the Chalkduster font.  

Here is the final image again:

Photography Tip - two strobe off-camera-flash setup

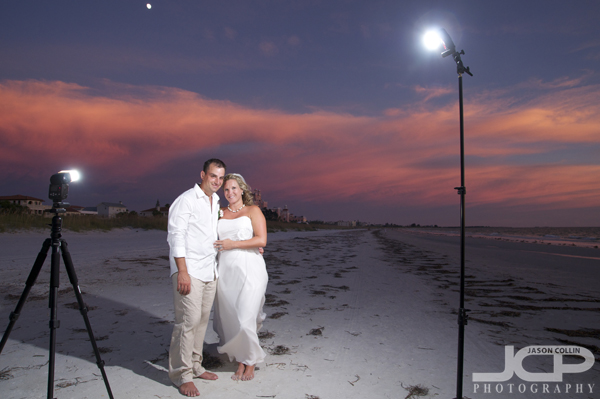
Nikon SB-600 Speedlight on tripod to frame left & Nikon SB-800 Speedlight on light stand to frame rightIt is no secret I am a big fan of strobist photography, which simply put is the use of off-camera-flash.  To me it is the key to great sunset portraits, and really portraits of any kind for that matter.  The photo above (taken on St. Pete Beach, see more here) may look like a big undertaking with a complex setup, but with a little practice and the right gear anyone with a DSLR can be doing it in no time.  That said, here is the gear list I used:

  • Nikon D300 DSLR
  • Tamron XR Di II 17-50mm f/2.8 lens
  • Nikon SB-800 Speedlight (with diffuser cap)
  • Nikon SB-600 Speedlight (with diffuser cap)
  • Yongnuo RF-602 wireless flash trigger and 2 receivers
  • generic light stand with swivel flash bracket umbrella holder
  • basic tripod

The Yongnuo trigger and receivers only need to be setup once ever, which just involves setting them all to the same channel.  The trigger just attaches right to the DSLR's hotshoe and works automatically.  So that takes care of getting the two strobes to work remotely.

Setting them up just means screwing them onto the swivel flash bracket on the light stand and the tripod plate.  For positioning, that depends on the angle of composition, the background elements, etc, but mostly I put the light stand at that height above and down onto the subject and the tripod at eye level to the subject in front or to the side.  So that takes care of the physical aspect of the lighting.

Both strobes need to be setup manually, as the trigger/receivers do not work with any TTL modes.  Put each strobe into its Manual Mode and then select the power, which often is 1/2 power for the strobe on the light stand and 1/4 power for the strobe on the tripod, though of course the power setting is greatly dependent on how much available light there is and the distance the strobe is from the subject.  Sometimes I use much less power.  Now all the lighting is setup.

All that's left to do is get the settings dialed in on the DSLR.  For the above shot I used: 

  • Manual exposure
  • f/5.6
  • ISO 400
  • 1/60th
  • WB - sunny
  • RAW + JPG mode 

Again, these settings vary wildly based on available light.  The sun was already set by the time this shot was setup, thus I used a larger aperture than normal (usually f/8 of f/11 for such a shot) and a slower shutter speed and a bit higher ISO (normally I always use the lowest ISO).  I did not want to use any larger aperture than f/5.6 because I wanted to make sure both people were in sharp focus and to be able to get background elements in some detail.  I did not use a slower shutter speed because I know I can handhold 1/60th no problem, but any slower might introduce blur because of my shakiness or the couple's.  Thus, I increased ISO to 400 so I could maintain the aperture and shutter speed limits I wanted to.

Finished shot edited in Aperture 3, Color Efex Pro 3 and Photoshop CS5

Photography Tip - keep your DSLR batteries warm in cold weather

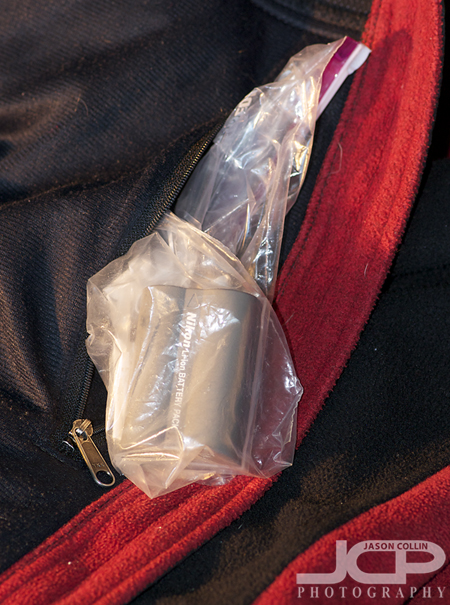
Using an interior jacket pocket works best to keep your spare battery warm & chargedFor many reasons, I do not like cold weather.  That is why I live in Florida.  One photography related reason to not like cold weather is the effect is has on your DSLR's batteries.  Cold weather drains batteries much faster than warm weather.  If you live in a cold area, or live in a supposedly warm area (like Florida) but receive an unwelcome arctic cold front from Canada, this is a real problem for extended outdoor shooting.  Even if you have spare batteries, if they are still exposed to the cold they will drain before you even put then into your DSLR.  Is the inside of your camera bag warm enough?  No!  I recommend putting your spare batteries into a zip lock plastic bag and putting them into a jacket pocket that presses against your body.  An interior chest pocket works best.  Your body heat will help to keep the spare battery warm and greatly help its ability to hold onto its charge.

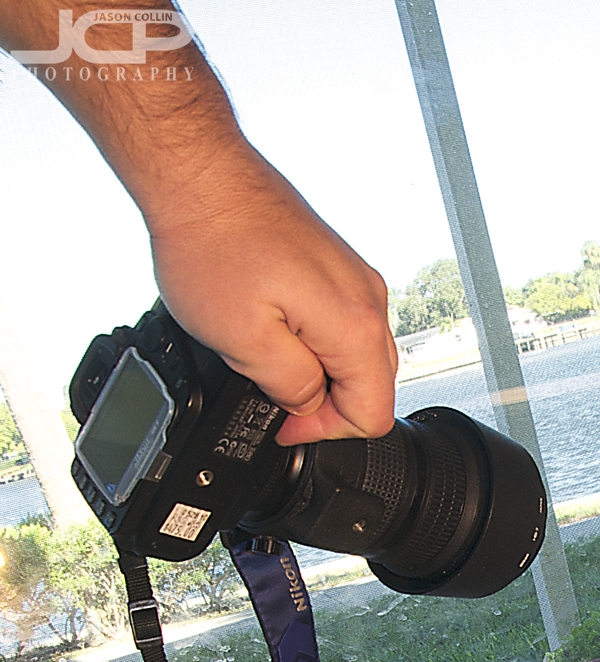
Use hand heat for the battery in your DSLRWhat about the battery in your DSLR?  For that I would just try and keep my hand tightly covering the battery compartment area in between shots, preferably with two hands, though in the photo above I had to keep my right hand for using another camera to make take the shot.  Try holding the camera close to your body as well.  

Using these practices will help you keep shooting in cold weather longer.

Photography Tip - always close your camera bag

This is a true story -- I was walking in downtown St. Petersburg toward The Pier with a student while we were having a lesson.  A woman with a Canon DSLR and large camera bag walked past us.  Ten seconds later we heard a crash and a scream.  The woman had not closed her camera bag all the way and some of her gear fell onto the sidewalk.  Even before this I was already obsessed with closing my camera bag immediately after taking out what I needed, even if I knew I would be going right back into my bag only a minute later.  It is a pain in the neck no doubt to zip and unzip and zip and unzip all the time, but that minor annoyance is nothing compared to the ill feeling that woman with the spilled gear might have felt.  

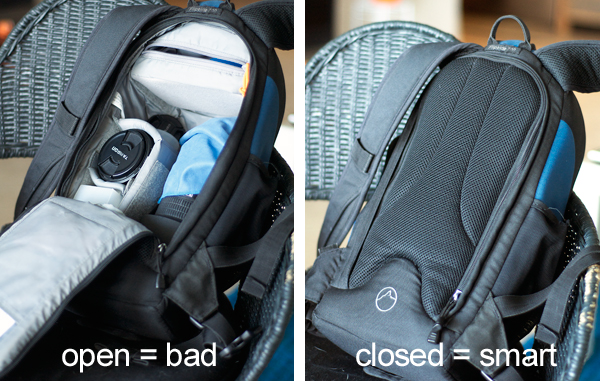
Even if your camera bag is not in motion while left open, I still think it's dangerous.  In the photo above my camera bag is set in a chair.  I made sure it was firmly in the chair.  However, I have set countless things firmly in chairs, on countertops, totally sure there is no way those things could fall over, yet many have.  At least if my bag falls out of the chair closed, the ample, stiff padding of my Lowepro bag will protect it.  

What if you see something interesting and you just grab your bag and head towards it?  If it's open you will maybe risk spilling stuff just grabbing it, or at the least you'll have to take a few seconds to close it up then go, which you may know in photography, a few seconds can make all the difference between getting a shot and getting nothing.

Therefore, I recommend becoming obsessive about closing your camera bag right back up.

Photography Tip - recharge your batteries, right away!

Eneloop rechargeable batteries hold their charge well, so I do not worry about leaving them in my camera bag for weeks.So you have a spare battery for your DSLR camera and even an extra set of batteries for your external flash.  That's great!  Are both sets of batteries fully charged right now?  Often the last thing a photographer wants to do after shooting a 4-hour event or an 8-hour wedding when getting home is taking out the old battery charger and loading it up with drained batteries.  Yet recharging your dead batteries right away is a photography tip I highly recommend.  There are several reasons for this: 

  • What if you suddenly get a big job the next day? 

This happened to me just last month.  A contact at the Treasure Island Yacht & Tennis Club called me up saying there was an event going on right now that they wanted a photographer for.  At the time I was on the other side of Tampa Bay, an hour away, and did not have any of my gear with me.  I was still able to take the job though because there was still time for me to cruise across the Howard Franklin (traffic free at that time) grab my camera bag, and head to the yacht club.  If all my batteries were not already charged, I would have had to of either shot conservatively over the 3-hour job (totally not ideal) or further delayed my arrival on the job site by stopping to buy some AA batteries at CVS.   

  • One less thing to worry about before shooting an all day wedding 

In the days before shooting a long wedding (6 to 10 hours) there are a lot of things a wedding photographer has to make final checks on.  Therefore, I do not want to have recharging all my batteries on that list as well.   

  • What if the job goes long? 

Maybe the event planner underestimates the time they needed a photographer for.  You were told it would just be an hour long job.  Only one set of batteries was charged, but you knew that would be more than enough for just an hour of shooting.  Then they want you to stay on for another two hours.  It would be terrible to have to say no because you do not have the batteries to do it, or have to leave the site to get more batteries, assuming the piece of gear you need batteries for does not use proprietary ones. 

  • I'm not a pro photographer, should I be so strict about keeping my batteries charged? 

Yes!  Just like a wedding photographer the day before a wedding, a parent on the day before a big family day trip has a mile long checklist of things to get ready.  Recharging batteries could easily get forgotten or not remembered in time.  It is extremely wise policy for the hobbyist shooter to adopt as many pro photographer habits as possible.  This is from personal experience.  I used to not be as serious when just photographing my family and friends on day trips, etc, but then there were just too many "forgot the memory card," "left bracketing on," mistakes so I prepared to photograph those fun, personal events just like (almost) I would a paid professional event.

Aperture 3 and Photoshop CS5 Keyboard Shortcuts Quick Guide

DOWNLOAD PDF version

Aperture 3 and Photoshop CS5 are two key applications in my digital photo editing workflow.  I have been increasingly teaching my DSLR photography students my post processing workflow, in addition to in the field making photograph lessons.  I rely heavily on keyboard shortcuts for greatly speeding up my editing, which is necessary when I have to deliver hundreds of images to clients in a short period of time.  

So I put together a quick guide of the keyboard shortcuts I most commonly use in Aperture 3 and Photoshop CS5.  Most of these keyboard shortcuts should also work in older versions.  I learned them by looking through the menus and seeing the shortcut letter, by accident and by reading other photography websites.  

Let me know any additional keyboard shortcuts you use in the comments below. 

  • More photography tips
  • Reserve your own 1-on-1 DSLR Photography Lesson with Jason today!
  • Learn more about DSLR photography lessons
  • Browse past lessons with all of my students 
  • Photography Tip - always wear appropriate footwear

    Waterproof trail running shoes make great go anywhere do anything photography gear

    All of my adolescent and adult life I have worn very high quality footwear.  I believe in this strongly.  When I see the flip-flop wearing trend of recent years I just cannot fathom it.  Never in my life have I ever exposed my toes to trauma, or filth, in public.  Footwear is also a key piece of photography gear.  Yesterday I was out trekking in Brooker Creek Preserve.  A sign said that some of the 2-mile trail may be flooded as they want to keep the natural trail grade.  For the first half mile I did not even see any mud, but the middle mile was walking down a track of 2-5inches of water over a bed of what looked like green angel hair pasta.  The trail was not such that one could just skirt around the water the whole time.  Mostly the water was unavoidable.  

    If I had not been wearing my dominant Salomon XA Pro 3D Ultra GTX trail running shoes (they have a waterproof Goretex XCR membrane) I would have had to of either turn back and not get any shots that day, or walk a mile with soggy socks.  I had no idea that the trail would be flooded, but I knew that hiking anytime in Florida's forests in summertime means that flooded paths are possible.  

    Not only do my Salomon's protect me from water, but their cushioning and support help me get through all day wedding jobs as well.  They are one more piece of gear that I have absolute confidence in, which in turns contributes to my overall confidence in my ability to do photography.  When I am doing photography work, I want to have no weak links in either my camera bag or on my person.  Thus, to me, wearing the right footwear for a job is as important as using the right lens.

    What is your footwear of choice for what kind of photography?  I have worn Salomon's for the past seven years and they keep getting better with each new model.