Photography Tips

DSLR Street Photography & Macro Lesson with Eric

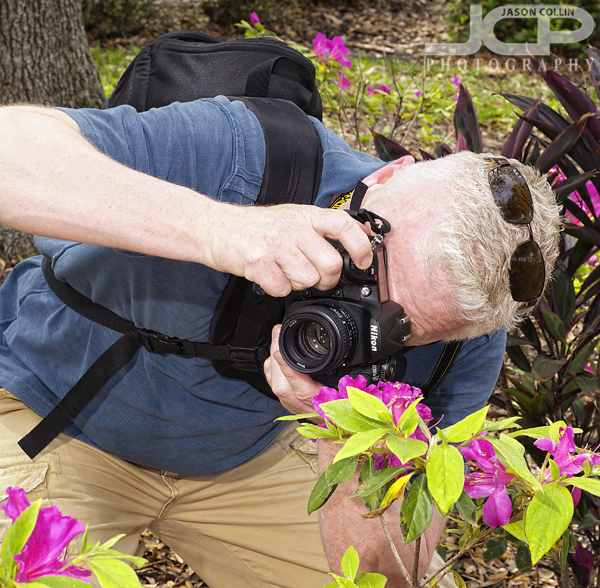
Eric aims his Nikon D300s at some flowers during the macro portion of our DSLR photography lesson in St Petersburg

On a warm Saturday early afternoon, referral DSLR photography student (thank you Libby!) Eric and I visited St. Petersburg's downtown Saturday Market to practice some street photography.  The market certainly did not disappoint as there were plenty of interesting people, including an extremely talented hula hoop dancer.  

Eric recently upgraded to the Nikon D300s and had other pro gear like the fantastic Nikkor AF-S 24-70mm f/2.8G lens, arguable the sharpest zoom lens Nikon makes.  He knew his way around all his gear well, but wanted to see what more he could do and get from his gear, as well as to see what practices I could pass on to him.  One of the first was to make sure you always place the palm of your left hand under your lens, in order to hold your kit in the most stable position.  

I shared some of my street photography strategies, which Eric quickly put into action.  We finished the lesson by trying DSLR macro photography without a dedicated macro lens.  I have Nikkon's flagship macro lens, the 105mm VR f/2.8G micro, but that stayed in my bag as I showed Eric what his Nikkor AF 50mm f/1.4D lens was capable of.  A while back in Japan I produced one of my favorite flower shots with my 50mm f/1.8D len.  There were, unfortunately, no cosmos hills around, but we worked on an out of the way patch of flowers in a small park.  After dialing in the best settings on his D300s and 50mm lens, I showed him the even better results we could get using off camera flash.

I had a very good time during our lesson and it was a fun coincidence to find out we both have ties to Rhode Island and an appreciation for quality automobiles. 

Photography Tip -- vanishing point

Vanishing Point example: f/11 ISO 200 1/640 -1 +/- handheld

This marks the first in what will be a continuing series of photography tips I will offer.  You can follow them if you find them useful by subscribing or checking back regularly.

The above photograph is an example of vanishing point composition.  The train tracks are of course parallel to each other, but they appear to converge at a distance.  Where they converge is the vanishing point.  This adds a sense of depth and dimension to a 2D photograph.  Besides train tracks, other subject matter that can be photographed using the vanishing point technique include:  tunnels, winding roads, guard rails, high walled paths.

These train tracks are across from the University of Tampa campus.  I know there are also train tracks in downtown Tampa and near the brewery at Busch Gardens.  If you live in an area that has a subway system, then you will have lots of vanishing point photography opportunities.

Vanishing point composition does not need to follow the rule of thirds for composition.  In fact, centering the vanishing point is often the most pleasing composition.  For train tracks, I like to put the camera as low to the ground as possible.  Using a tripod is a good idea too.  As always, set your focus about 1/3 of the way into the frame. 

Please post a link to your own vanishing point photograph in the comments below!

How I edited the photograph: 

  • RAW processed in Aperture (Nikon D300 default setting)
  • Exposure correction in Color Efex Pro 3
  • Tonal Contrast filter used in Color Efex Pro 3
  • Unsharp Mask in Photoshop CS4
  • Holga effect filter in Silver Efex Pro 3 

50mm DSLR Photography Lesson in the rain at Crescent Lake Park!

Danielle trying to master the tough task of manually focusing a 50mm f/1.8 lens

Many past DSLR Photography Lessons have very nicely managed to end right before rain arrived.  Well, this Sunday the luck ran out as most of Andrea's 5th! lesson (1st, 2nd, 3rd, 4th) was in at least light rain.  That was not the only thing that made today's lesson unique, it was also the first lesson to exclusively use a 50mm lens and the first to be all manual focusing too!

Ah, and another first, the first lesson at Crescent Lake Park in St. Petersburg.  Andrea recently bought the Nikkor 50mm f/1.8D lens, but I did not point out in time that her Nikon D3000 will not be able to autofocus it because the D3000 lacks an internal focusing motor.  Thus, today we practiced manual focusing.  

Even with autofocus, the 50mm f/1.8 lens is very tricky to use.  It has a very shallow DoF even through f/2.8, and even beyond.  Then add in the challenge of trying to stay dry in the second hour of the lesson, and I ended up very impressed with Andrea's determination to get a good, sharp shot with appealing bokeh.

50mm manually focused bokeh, in rain

The above shot was the kind we set as our goal for that day's shooting, though the conditions were not conducive to it.  The first photograph of mine that got any attention was a green leaf bokeh shot (view it here).  

Andrea did well in the very challenging conditions taking time to ask questions and making sure she understood why we changed the settings on our DSLRs.  In the end we were able to make a few photographs that met our preset goal for the day.  Thank you Andrea for being so tough and patient!

John's Pass Village DSLR Lesson with young Libby

John's Pass Village has convenient statues like this pirate for helping with a DSLR Photography Lesson

Libby is my youngest DSLR Photography student to date.  She is a teenager with aspirations of a career in photography or journalism, or perhaps photojournalism?  Her parents told me she carried a camera (Nikon L100, superzoom model) with her everywhere she went.  I always like to hear things like that.  I was even more glad to hear that a generous family friend gave her his old Nikon D40x just the night before!  She did not have a lens that could autofocus on the D40x, so I let her use my Tamron XR Di II 17-50mm f/2.8 lens for the whole lesson.

Her L100 had basically no manual functions so we started from the very beginning, which was an explanation of what aperture is and does.  In my own photography work, the setting I adjust first on my D300 is the aperture.  From that aperture foundation, I then base all the other settings the scene requires.  I try to instill this practice into all my DSLR photography students as well.  

During our lesson at John's Pass Village, I revealed to Libby how shooting a shaded flower actually produces a better exposure than shooting a flower in direct sunlight.  Then if you add a bit of well placed flash into the equation, you can really bring out a flower's detail.  Of course, the best thing to do would be to just shoot the flower in natural sunrise or sunset light, but when that is not possible, shading the flower with your own shadow is a useful trick.  

I had a very good time listening to Libby's plans for the future and seeing her excitement for photography.  I look forward to our next lesson and seeing what she has done with the skills she learned at John's Pass Village.

Kelly a Canon 7D and 2 Strobe DSLR Photography Lesson

Kelly checks the angles for his 2 off camera strobes during our 4th lesson - UT Campus

Very quickly Kelley has taken his 4th DSLR Photography Lesson with me (1st, 2nd, 3rd).  Also, the streak of lessons on the University of Tampa campus continued today (follow me on Gowalla to confirm this).  Though not without a few hiccups still, it is getting easier to setup Kelley with his two Nissin strobes and Canon 7D out on location, and get the 7D to trigger the two strobes remotely without using a dedicated trigger and receiver.  

We also put into practice our "street model" practice to best effect today.  In all we were able to get nine people to let us make their portrait today!  I will be putting up a dedicated post on the street model methodology soon.

We continued to practice using manual settings to achieve the strobist results we wanted.  However, we also witnessed how Aperture priority mode, with the exact same shutter speed, can produce a different exposure!  There are still ghosts in machines in 2010.  

A lot more attention was paid today to the setup and position of Kelley's two strobes in order to achieve the least amount of shadows on the person's face, as well as controlling the ambient light using shutter speed to show as much or little of the background that we wanted to.  This skill proved necessary when photographing a person being backlit by two open windows.  Increasing the shutter speed all the way to the max flash sync speed of 1/250th (max for a Canon 7D) allowed us to make a well exposed portrait subject and not blow out the windows behind the subject.  

Kelley will be doing some traveling abroad in the next few weeks.  His 7D will of course be traveling with him and I hope he practices the street model style in Amsterdam!  I look forward to seeing his travel photographs!  Have a good trip Kelley, see you when you get back.

Angie's first DSLR Photography Lesson - UT Campus


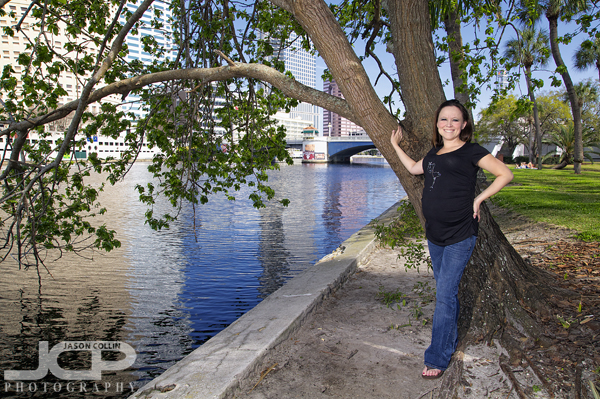
We found this shady portrait spot during our DSLR Photography Lesson at the University of Tampa

Angie drove all the way from Hudson (!) to the University of Tampa campus for our first DSLR Photography Lesson together.  Thank you!  Angie has a Nikon D40 with the two kit lenses.  She is interested in photography people, especially making portraits of babies, and she is learning on a bit of a deadline as her own newborn baby will be arriving soon!  

So we started right away getting into how aperture controls the amount of light let into the camera and the DoF (depth of focus).  One of the main reasons to get a DSLR is to be able to control the DoF and produce portraits with a pleasing bokeh.  Since there were no babies around to practice on, we just made due with a knob on a top of a pole, which we actually pretended was a diamond!

We made our way down to the river and practiced making portraits using flash.  We tried the same shot with and without flash just to see the radical difference it makes in portrait work.  Even just using the camera's pop-up flash helps a lot, although I recommended to Angie, and to anyone, that getting an external flash like the Nikon SB-600 Speedlight is eventually necessary to get the best portrait results.   

Melanie's DSLR Photography Lesson at University of Tampa

Our 3rd DSLR Photography Lesson began on the roof of a parking garage at University of TampaThis was my first DSLR Photography Lesson on the University of Tampa campus, a location I have used for portrait work in the past.  During Melanie's 3rd lesson (2nd, 1st) we mostly built on what we had done the previous two lessons.  The UT campus was a refreshing change of scenery from the usual downtown St. Petersburg locals and since we had to park at the top of a 5-story parking garage, we were able to start the lesson with a few cityscape shots of downtown Tampa.

We focused more on composition and making a photograph this third lesson.  I was constantly having Melanie try for non-eye level shots of the UT campus, which often required taking the shot on one knee or even in a fully seated, bent over position.  However, doing this allows for images that you cannot see from just standing in the same spot, which to me is one of the steps toward making a photograph.

Melanie has greatly improved her camera holding technique and her ability to navigate her Nikon D90's menus.  Now with the composition skills we practiced in our third lesson, I look forward to seeing what shots she can make on her own.