Photography Tip - adjust highlights slider to recover detail

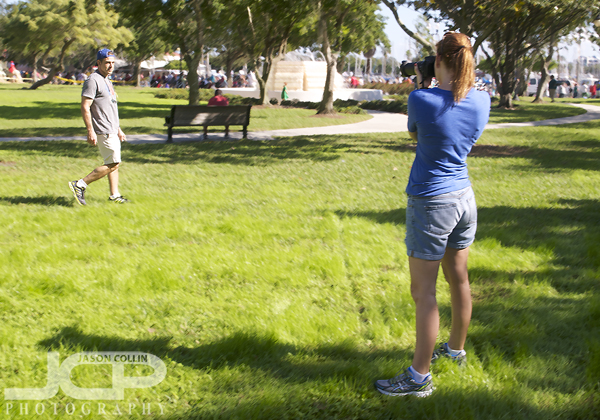
When shooting outdoors in the harsh Florida sun, it is not uncommon to blowout the highlights in a photograph, especially if there are any white colors in the shot or there are reflective surfaces.  In the above example you can see one thing that fascinates me about St. Petersburg - its trash cans.  On windy days when the trash cans are empty, the trash bag itself gets kind of turned inside out and blows out like a tongue.  These wave and thrash in the wind and it amuses me to see this phenomenon.  

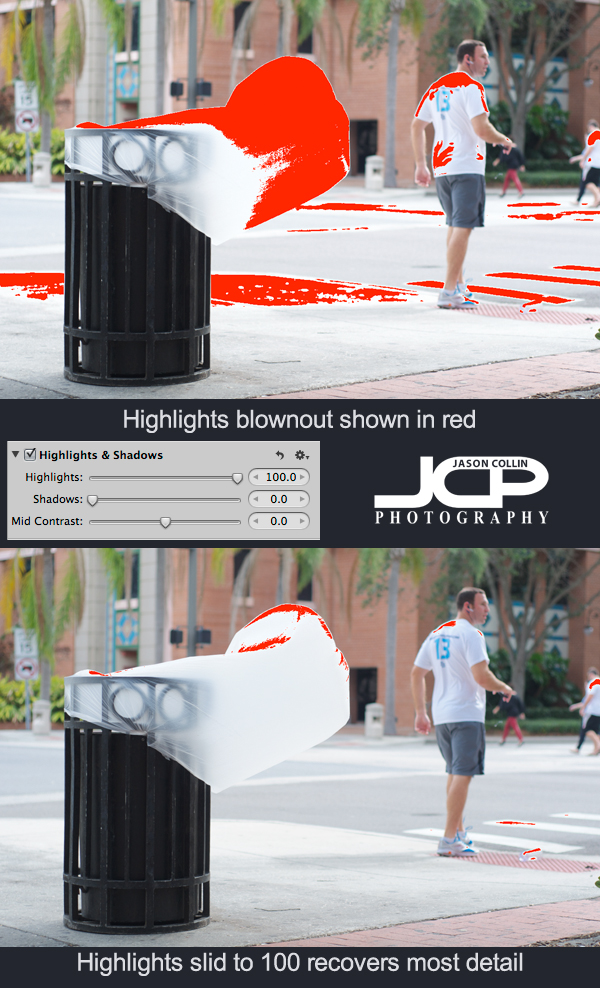
In the shot, the trash bag is the lightest thing in the whole frame.  Most of the shot looks exposed correctly, but the white trash bag is catching a lot of light and that results in it looking blownout.  Using Aperture 3 I turned on the show Highlights/Shadows view which paints red over the parts of an image that are overexposed (blownout).  Sometimes detail can be recovered in blown highlights and it is very simple to do.  

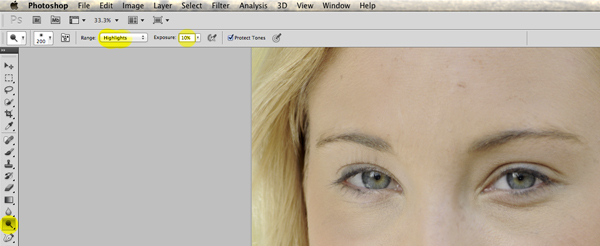
---> Just use the Highlights slider to get back details 

In this case it had to go all the way to 100%, but usually less is needed.  In the second screenshot after the Highlights slider has been adjusted, there is much less red visible.

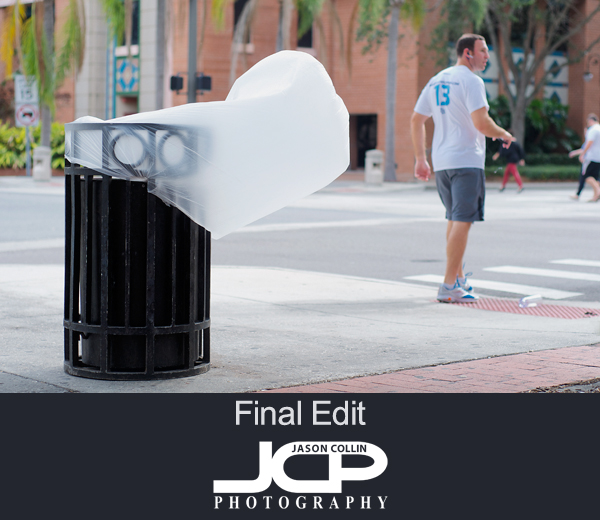
After doing all my usual editing to a photoggraph, the results allow the viewer to see the trash bag as more than just a pure white cylinder.  Try adjusting the Highlights slider when editing your photographs to recover as much details as possible, especially when shooting out in bright sunny conditions.

Nikon D7000 1-on-1 DSLR Photography Lesson in St. Petersburg Florida with Bart

Bart aims his Nikon D7000 for a more creative composition style in St. Petersburg FloridaI first met Bart earlier this year when he took my photography class at the Morean Art Center.  Since then he has been out shooting a lot keeping in practice and adding some new items to his camera bag as well.  He contacted me recently for a 1-on-1 DSLR Photography Lesson to give him some advice on the large body of work he has made in the past year and offer suggestions for further improving his shooting.

We met at the usual spot in downtown St. Petersburg and had a small Q&A session to start out with.  From looking at some of his photo galleries I offered my thoughts that his shots could use a little bit more focus, and that even landscapes could have more distinct central subjects which could be made by anchoring a foreground subject.  Along with a few other tips and practicing them in the field during the lesson, I showed Bart a few new features of his DSLR body, like the AEL lock button.  I will be looking forward to seeing how he applies these new tips and techniques in his next few months of shooting!

Canon DSLR Photography Lesson in downtown St. Petersburg Florida with Christina & Chris

Christina practicing photographing a moving subject (Chris) during our DSLR photography lesson in downtown St. Petersburg FloridaThere was a "snowfest" and parade happening in downtown St. Petersburg Florida during a Canon DSLR Photography Lesson with Christina and Chris, but the weather could not have been warmer for a December day.  In fact, there was a woman in a bikini sunbathing right in front of the parade route and just a block over from where kids were sliding down a small hill of surely not long to last snow.  C & C had similar Canon DSLRs and were looking to learn how to make better photographs, which led to them finding me and coming up from Sarasota for the lesson.  They said they could not find anyone in the Sarasota area, and to my knowledge I am the only full-time professional photographer that offers 1-on-1 photography lessons in the field.  I have taught well over 300 lessons to date!

Chris had done a good bit of reading about photography and knew some about my 5-step process for making a sharp and well exposed photograph in any shooting conditions.  What books do not tell, or do not make that clear, is the exact process to use in the field to get the exposure you want when shooting in manual mode.  Photography is a creative art, but there exists an exact process for at the least getting the exposure correctly . . . composition, that is something else!

It was a nice change to teach two people instead of the usual 1-on-1 lesson, most of all because it means one of them could be the subject for practicing photographing action on! (see photo above)  I look forward to seeing their improved photography results now that they know how to properly shoot in manual mode and can focus more on being creative.

Nikon D600 1-on-1 DSLR Photography Lesson St. Petersburg Florida with Heather

Heather with her new Nikon D600 during our 1-on-1 DSLR photography lesson in St. Petersburg FloridaOn a way too hot for December Florida afternoon I met Heather with her new Nikon D600 for a 1-on-1 DSLR Photography Lesson in downtown St. Petersburg.  This was not her first DSLR, she had a Canon for several years, but only had been using it in auto-mode.  Even with the new Nikon D600, it was more auto-mode so in order to be able to make better photos of her two young children, she decided to take a photo lesson.  

Even though we were shooting outdoors the entire time, I advised her on settings she would need to be able to make photographs of her kids indoors.  The technique for both indoor and outdoor or really any kind of photograph is the same.  There are five things you ever need to set.  There is just better starting points for settings indoors or outdoors.  For example, no need to use the lowest ISO on your DSLR when shooting indoors, 95% of the time you need to use at least ISO 800.  

After the 2-hour lesson and with the help of the 140+ photo tips on my site, Heather has the resources to start getting the most out of her DSLR and make photos of her children that will only increase in value as years go by.

Jason & Kiki Holiday Family Portrait 2013

Me and Kiki Holiday Portrait November 2013 at photography student Stacy's house in Treasure Island, FloridaThere are not many chances to get a portrait made with me and Kiki.  When I try self-portraits, Kiki looks like she is being tortured.  Otherwise, I have to resort to composite photo gimmicks.  So I was glad that photo student Stacy was able to make one of Kiki and I using the same lighting setup I had just used to photograph her daughters in her house for their Christmas Card photo.  Kiki still looks a bit tortured, but at least she is looking at the camera this time!

Editing digital photos tip - Use Dodge Tool in Photoshop to whiten eyes & brighten eyes

With Photoshop, there is always a very complicated way to do a particular digital photo edit.  The key to getting proficient at Photoshop is learning the "quick & dirty" ways of doing the same complicated edit.  You may not have 15 minutes just to brighten eyes in a portrait, or the 30 minutes to follow a complicated tutorial for how to do it.  I use a much simpler process to whiten eyes that is as easy to do as any other Photoshop edit.

To whiten or brighten eyes in Photoshop:

  • Select the Dodge tool (O)
  • Set the Range to:  highlights
  • Set the Exposure to:  10%

Setting the Range to highlights means only white areas are mostly affected by the Dodge tool, perfect for the whites of eyes.  It is very easy to overbrighten the eyes, which is why I set the Exposure low to 10% and click as needed.  I find that a subtle brightening works best and keeps the eyes looking natural.  I set the brush to be within the upper and lower eye-lids then click first on the iris of the eye to give them a little pop, then on the white to one side and then the other.  

Even a little eye brightening can have a large impact on the overall face of the subject.  Look at the graphic above and see how it appears that the entire face has been brightened.  The only difference in the photos is that the lower one has had the eyes brightened using the Dodge tool.

O selects Dodge Tool, then change Range to highlights and Exposure to 10%

Lawyer Headshot in St. Petersburg Florida with Katie

Business headshot done for a lawyer in her office on location in St. Petersburg Florida - Nikon D300 Nikkor 80-200mm @ f/5.6 ISO 200 1/100th - Strobist: SB-800 in brolly & SB-600 in shoot through umbrellaI came to make headshots for Katie in St. Petersburg Florida because she works with a past photo lesson student, Bill.  He has been working out of state, but is back in St. Pete and asked me to come in to photograph his colleague.  It is always nice to see past clients and catch up.

Natural setting business headshot in St. Petersburg Florida - see photo above for setupKatie was a natural in front of the camera so for me it was just a matter of squeezing my lights into her office so they did not cast shadows on the background walls.  Bill had some of his own headshots made out of state which showed him in more of a 3/4 view in a working environment, so he asked me to make similar images of Katie instead of the typical neck high only business headshot.  That was fine with me I am always glad to be able to create something a little different than usual.