
With Photoshop, there is always a very complicated way to do a particular digital photo edit. The key to getting proficient at Photoshop is learning the "quick & dirty" ways of doing the same complicated edit. You may not have 15 minutes just to brighten eyes in a portrait, or the 30 minutes to follow a complicated tutorial for how to do it. I use a much simpler process to whiten eyes that is as easy to do as any other Photoshop edit.
To whiten or brighten eyes in Photoshop:
- Select the Dodge tool (O)
- Set the Range to: highlights
- Set the Exposure to: 10%
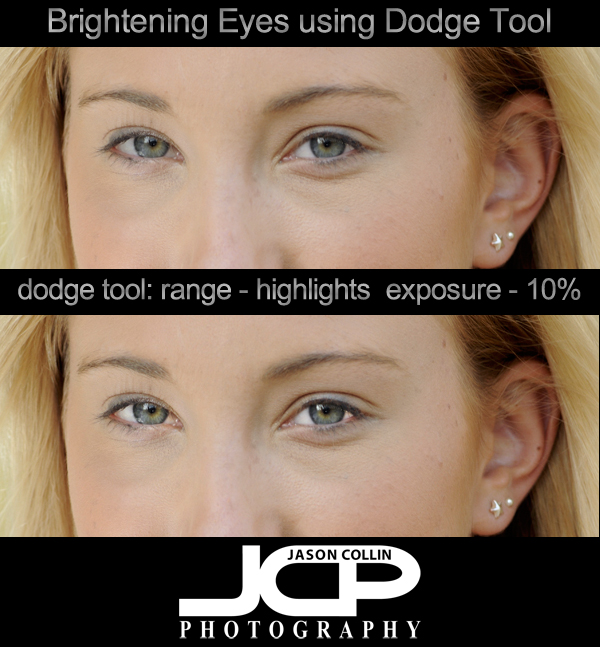
Setting the Range to highlights means only white areas are mostly affected by the Dodge tool, perfect for the whites of eyes. It is very easy to overbrighten the eyes, which is why I set the Exposure low to 10% and click as needed. I find that a subtle brightening works best and keeps the eyes looking natural. I set the brush to be within the upper and lower eye-lids then click first on the iris of the eye to give them a little pop, then on the white to one side and then the other.
Even a little eye brightening can have a large impact on the overall face of the subject. Look at the graphic above and see how it appears that the entire face has been brightened. The only difference in the photos is that the lower one has had the eyes brightened using the Dodge tool.
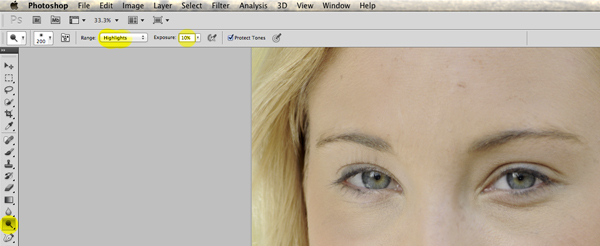 O selects Dodge Tool, then change Range to highlights and Exposure to 10%