Photography Tips

DSLR Photography Lesson with Karin on product shots

A sample incomplete product shot of a Guy Harvey designed pillow in a homemade lightbox.New DSLR Photography Lesson student Karin has a booming pillow and cushion business featuring embroidered designs by Guy Harvey.  She has literally hundreds of variations of the pillows regarding design, color and border and she wants to have photographs of everyone one of those iterations on her business website for customers to browse and buy.  

She setup a very nice homemade lightbox (see my DIY attempt) in her office with multiple hot lights.  However, she was having white balance and overall image quality problems.  Well, I was able to sort out the white balance problem very quickly by setting her Canon XT with a custom white balance.  Thanks to Natasha who had a lesson earlier in the day and also has a Canon XT and showed me how to set the custom white balance on the XT!

After this we spent the rest of the lesson better arranging the proportions of the lightbox and discussing what photography gear Karin should next invest in.  Let's just say she is ready to make a significant investment!  I will be helping her get all her new stuff setup and running during our second lesson already scheduled for next week.  I am looking forward to continuing the interesting photography lesson-project with her! 

  • Reserve your own 1-on-1 DSLR Photography Lesson with Jason today!
  • Learn more about the lessons
  • Browse past lessons with all of my students 
  • DSLR Photography Lesson with Natasha at Tyrone Mall

    Motion blur with flash practice inside Tyrone Mall during our 3rd DSLR photography lessonFor out third of four lessons Natasha (1st, 2nd) wanted to practice getting the correct white balance and exposure when photographing under indoor lights.  So we took a much welcomed break from the increasingly hot Florida spring and headed to the air conditioned oasis of Tyrone Mall in St. Petersburg.  I have used this location before for a lesson and was very pleased with the relative freedom we had to do photography within various places in the mall.  I find the TV section of Sears on the second floor particularly friendly!

    Natasha is still limited to using her Canon XT 's pop-up flash, but we made the most of it eliminating early all shadows from portraits on both light and dark backgrounds.  Over the course of this third lesson I got to learn some more interesting stuff about Natasha herself.  She has second language skills and will perhaps someday work abroad for Gallup!

    We ended the lesson with a little motion blur practice.  We were in far from ideal conditions to do it, but I shared with Natasha what techniques and settings I have used in the past.  The key is getting just the right shutter speed, and just the right flick of the camera as you push the shutter to create the blur, but freeze the subject.

    Natasha will be helping out on a wedding photography shoot this upcoming Saturday, everybody wish her luck! 

  • Reserve your own 1-on-1 DSLR Photography Lesson with Jason today!
  • Learn more about the lessons
  • Browse past lessons with all of my students
  • DSLR Photography Lesson #2 with John & his wife in Oldsmar

    John & Lisa photographing the lake behind their home in Oldsmar during our DSLR Photography LessonJohn has been very prolific in adding to his already substantial photography gear list since our last DSLR Photography Lesson at John's Pass village just two weeks ago.  For our second lesson, but first for his wife Lisa joining us, I ventured out to their home in Oldsmar by special request.  I knew they lived on a lake, but I did not know they had five dogs!  This was a pleasant surprise.

    John already had a Nikon D300s and the awesome Nikkor AF-S 105mm VR micro f/2.8G lens, to that he added another D300s for Lisa and the Nikkor AF-S 17-55mm f/2.8G wide angle lens!  On top of that he has boosted his software for editing digital photographs as well with the both Lightroom for his PC and Aperture 3 for Lisa's Mac!

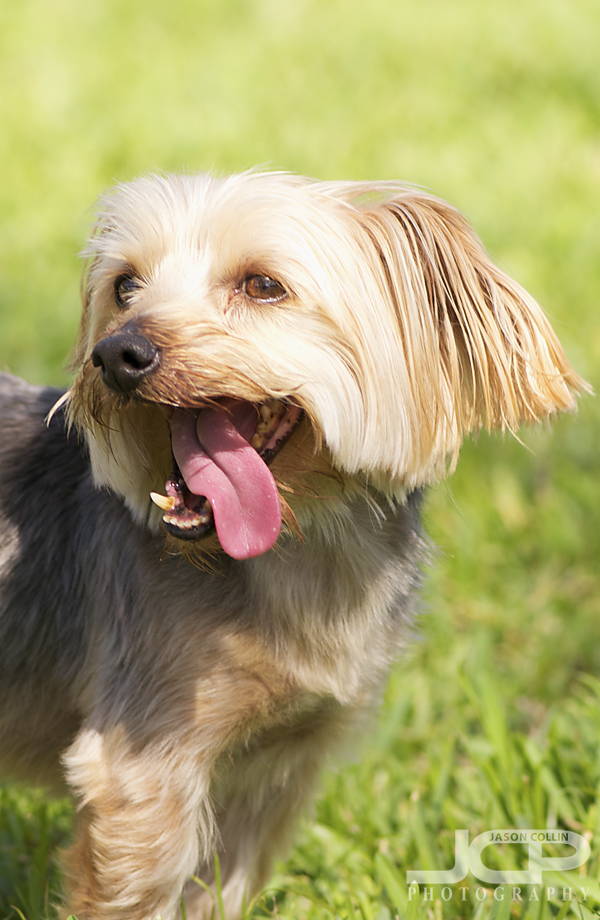
    One of their four Yorkshire Terriers and one of their five dogs total! They were very friendly.We started out wide shooting landscapes by the lake where I showed them how you can spice up an oft photographed scene by getting really low to the ground.  John was not afraid to get dirty at all and lied down right on his stomach (recommended).  To Lisa I suggested tilting the horizontal axis to add a dimension of interest.

    After a quick retreat from the sun we were back outside to photograph a different subject matter entirely, dogs!  After setting up their D300s's with the best manual settings for the harsh afternoon sunlight I led the dogs on several romps around their backyard as John and Lisa shot away from as close to eye level as they could get to their small dogs.  It did not take long for them to realize that the percentage of in focus shots when photographing running dogs is not high at all.  It is definitely a type of photography that takes practice, the right gear, and then more practice!

    We ended up back inside starting to edit some of the photos they took in Lightroom and Aperture.  I showed Lisa the PDF of shortcuts I made specifically for Aperture 3 that will help her get efficient when using the app.

    It was a very different type of lesson for me on a number of accounts and also a lot of fun.  Thanks to John and Lisa for their generous support of my lessons. 

  • Reserve your own 1-on-1 DSLR Photography Lesson with Jason today!
  • Learn more about the lessons
  • Browse past lessons with all of my students 
  • DSLR Photography Lesson #2 with Teresa off camera flash & editing

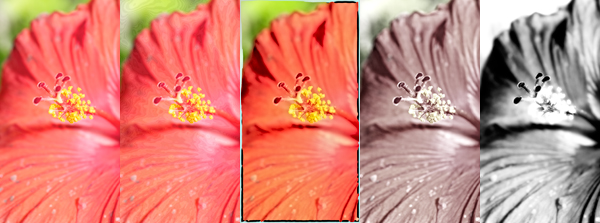
    Strobist hibiscus photo with various Color Efex Pro 3 filters applied to it (original photo by Teresa)Teresa once again made the journey down from New Port Richey for our second DSLR Photography Lesson (the 1st).  One of the best benefits of the Canon 7D over its less expensive Canon family members is its ability to trigger a flash off camera with no additional accessories.  Now, perhaps setting the 7D up to trigger a Canon brand flash is easier, but with Teresa's Nissin flash we had a heck of time making it work despite having all the settings on the 7D and Nissin correct.  What we discovered is the 7D must be in manual exposure mode for it all to work.  This is strange, but actually ok since I prefer to shoot in manual mode for strobist photography anyway.

    We had to use yours truly as the model for the first part of the lesson, and used the covered walkway in front of the Museum of Fine Arts as the location.  I actually like that location a lot and have shot actual models there before.  Using the flash off camera allowed Teresa to use her favorite lens, the Canon 70-200mm f/4 because the flash could be positioned close to the subject (me) while allowing her to be the necessary distance away from me to use the 70-200mm lens at its full 200mm focal length.  I have spared you by not included the closeup shot of my face in this post!

    A hibiscus bush in bloom was our last subject matter for the day (see above).  After taking a few strobist shots of the flowers with me acting this time as the light stand, we went to the St. Petersburg Chamber of Commerce (of which I am a member) and used a conference room there for practicing editing.  Teresa had gotten my favorite filter editing app, Color Efex Pro 3.  I showed her the selected filters I use on almost every single photo I take, indoors or out (see this post for detailed info on my editing process).

    In this way the three-hour lesson went by very quickly.  We already have another three hour lesson scheduled for next week with more shooting and editing on the itinerary! 

  • Reserve your own 1-on-1 DSLR Photography Lesson with Jason today!
  • Learn more about the lessons
  • Browse past lessons with all of my students 
  • Cosmos Flowers of Tachikawa Japan

    Cosmos of Tachikawa Japan with bokeh - my personal favorite flower photo~These photographs are some of my own early DSLR photography work.  All were taken with the Nikkor AF 50mm f/1.8D lens (save the portrait).  At this time I did not exactly know what I was doing all the time.  I was still stunned by the bokeh produced by the 50mm prime.

    This selected collection of cosmos flowers were all made on the same afternoon at a place called "Cosmos Hill" in a park in Tachikawa, Japan.  The above photo is available as an iPhone wallpaper.  Since it was my first time out really with the sole purpose of photographing flowers with my first DSLR, I remember it clearly.  I was most certainly not the only one with the idea to go photograph these cosmos as there was a veritable line of photographers, like paparazzi at the Oscars, all photographing them too.  It was also one of my first times to really use my new 50mm f/1.8D lens.  I was not getting great results with my Nikkor 18-200mm f/3.5-5.6 (it was soon sold!) so after I put on the 50mm, it stayed on the rest of the afternoon.
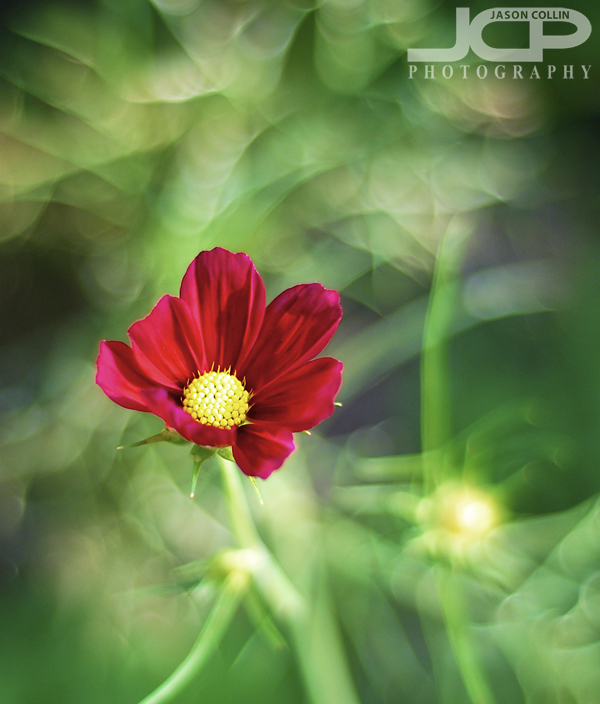
    red cosmos blooming in Tachikawa Japan - Nikon D80 Nikkor AF 50mm f/1.8D @ f/1.8 ISO 200 1/1,250th -0.33 EVI did not really know any better at the time to not shoot wide open (largest aperture) at f/1.8 so as to produce sharper images.  I was still just in the process of teaching myself how to become a more serious photographer.  I was still dazzled anytime I made a shot with bokeh in it, and the 50mm @ f/1.8 produces tons of bokeh.  When I went home to look at the shots they seemed unreal to me, which in fact, they are.  This is also what I think makes a photograph a photograph, showing something that cannot be seen at standing eye-level.  The human eye cannot see bokeh, therefore making a photograph with bokeh will tend to interest one's eye more.
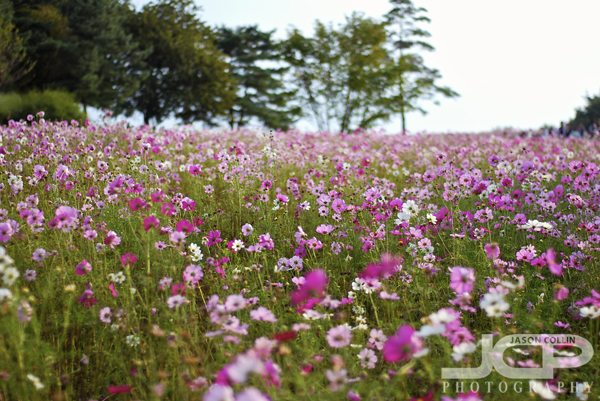
    Cosmos Hill Tachikawa Japan - Nikon D80 Nikkor AF 50mm f/1.8D @ f/2 ISO 200 1/4,000th -0.33 EVI even used the 50mm lens to make landscapes at a large aperture.  At the time this may have been more of a happy accident (see above) than a previsualized shallow DoF sea of flowers shot.  Such is the way things go when teaching oneself photography.  Mistakes still teach me to this day new things about photography, since I did not intend to do them, the results are sometimes pleasantly surprising and the next time I make sure to do it on purpose!
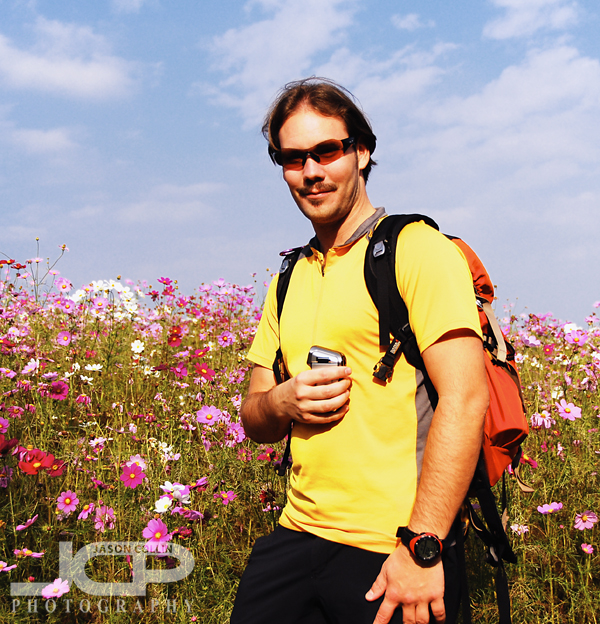
    Yours truly, circa October 2008 in Tachikawa, Japan in front of Cosmos HillI have included the above portrait of me to show you how little things change for me over time, in this case 2.5+ years.  I literally wore that exact same shirt today (coincidentally), and also the same sunglasses and watch.  I am very loyal to my wardrobe and do not add, and certainly do not remove, items from it lightly.


    DSLR Photography Lesson with Teresa & her Canon 7D


    This week starts off with a DSLR Photography Lesson with new student Teresa and her Canon 7D.  As you might expect from a Canon 7D owner, Teresa already has photography knowledge.  What I helped her do in this first of four lessons she has already booked (which gets her a discounted price) is pull all that existing knowledge together and add to that my own process for dialing in the best settings that produce the exact exposure, DoF and sharpness I want.  

    Teresa is already entering into action pet photography and hopes to break into newborn photography as well, especially since a family member will be having a baby soon.  She has a nice assortment of lenses and a new Nisson external flash, so first it is a matter of finding out what gear is best for each type of situation.  Using her Canon 70-200mm f/4 lens we practiced photographing moving subjects in strong mid-day Florida sunshine, which she will often need to do in her pet photography work.  We started out using aperture priority to see what shutter speeds it would give us, and they were all over the map.  Varied results are exactly what one does not want.  Thus, we switched to manual mode.

    Knowing that to freeze most action a minimum shutter speed of 1/500th is required, we set the shutter to 1/640th to make sure we had enough, then adjusted our aperture and ISO settings to yield the best possible exposure given the non-ideal light conditions.  In this manner we locked in settings that consistently produced results we were happy.  Once one locks in the best possible settings, the photographer is then free to concentrate just on shooting, composition, etc with no worries about exposure or other technical aspects of shooting.

    Our next lesson will be how to make use of her external flash for portrait work as well as how to use Color Efex Pro to edit digital photos.  It will be a longer lesson than usual, but Teresa is a self-declared photography sponge right now, which makes having lessons fun for me as well.  I am looking forward to it since external flash and Color Efex Pro are two of my favorite photography related things! 

  • Reserve your own 1-on-1 DSLR Photography Lesson with Jason today!
  • Learn more about the lessons
  • Browse past lessons with all of my students
  • Photography Tip - correct lens distortion & straighten up edges

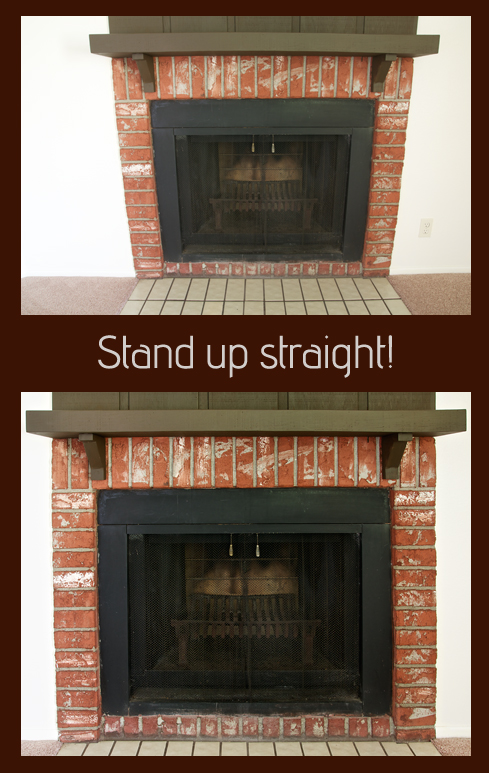
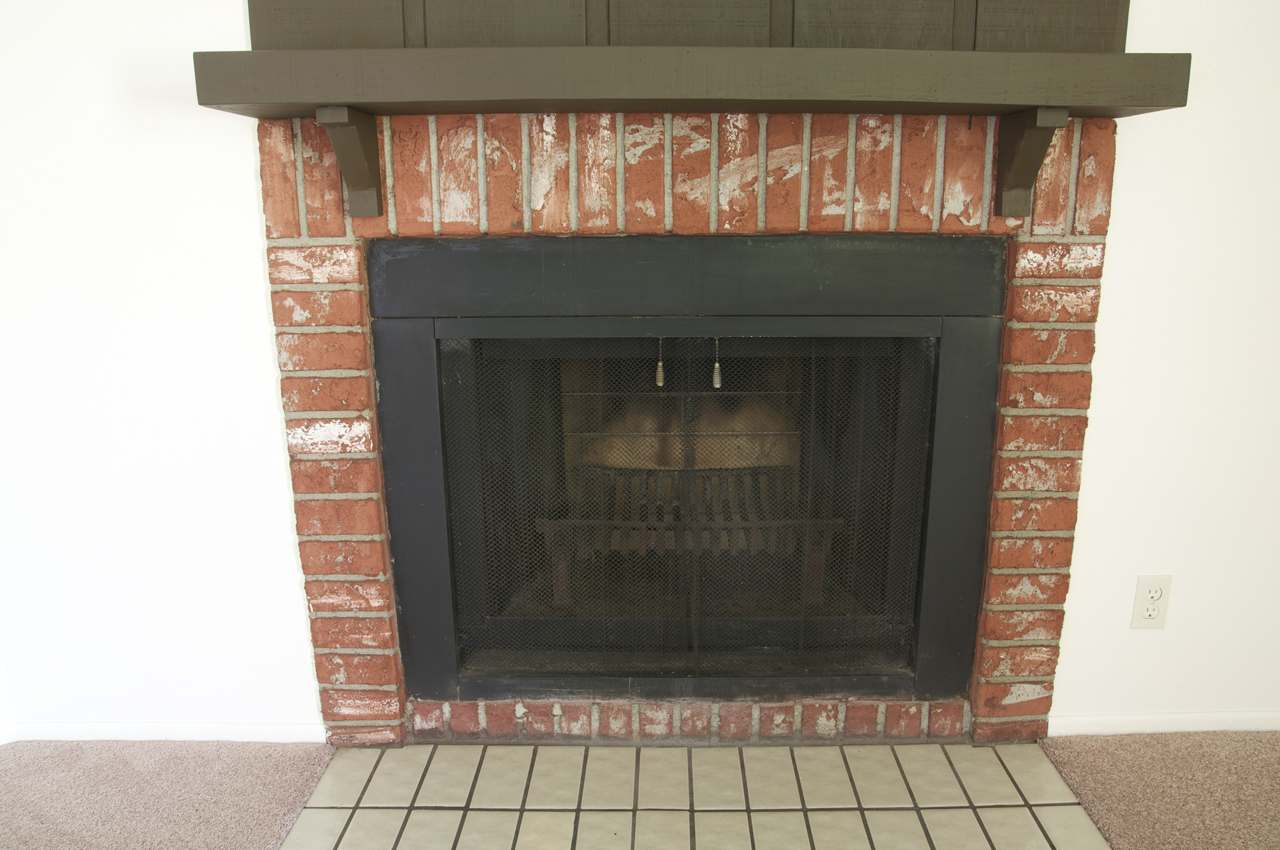
    Using Photoshop CS5 the fireplace was made to appear normal, not distorted by the wide angle lens.

    Wide angle lenses cause distortion.  Depending on the subject of the photograph, the distortion can be very apparent or very hard to notice.  If there are tall straight lines in the photo, especially at the edges of the frame, then the distortion will be very easy to see.  If the photo is free of geometric shapes, then the distortion will not be obvious.  Wide angle lens distortion is very easy to see when photographing buildings or other rectangular shaped objects, like the fireplace above.  It was shot at 17mm causing the walls to pinch inward and the mantle to appear to have a bulge in the center.  Here is how I used Photoshop CS5's lens correction filter to straighten it up:

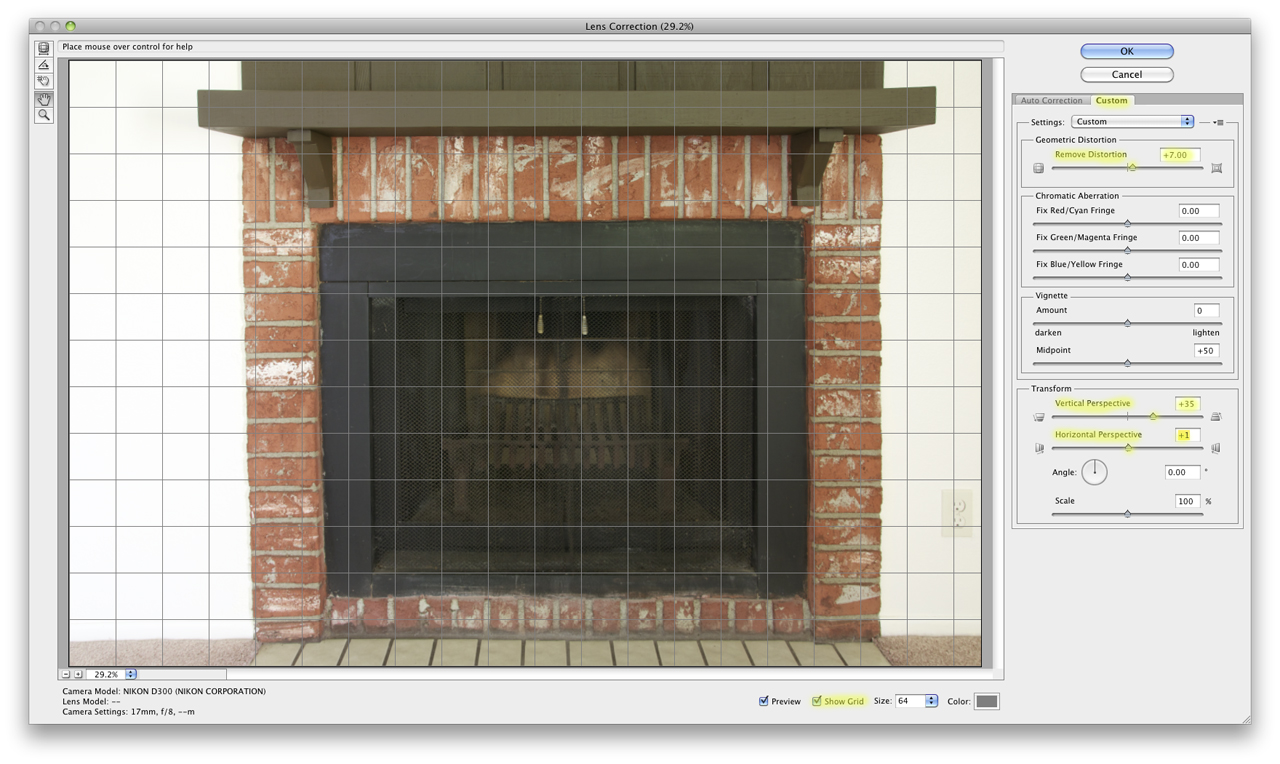
    Click on the image for a larger version - Photoshop CS5's lens correction window with grid onIn Photoshop CS5, the keyboard shortcut for launching the lens correction filter is SHIFT-CMD-R.  Or, you can just go into the Filters menu and select it there.  The auto correction by choosing camera and lens model does not work for me, so I always go into the custom tab.  For the Tamron 17-50mm f/2.8 lens I used for wide angle shooting, I always have to Put the Geometric Distortion slider into positive territory, as I did here (+7).  Then what I do from there depends on the individual shot, but I mostly adjust the Vertical and Horizontal Perspective sliders as needed.  I turn the Show Grid option on and adjust those sliders as needed until a horizontal/vertical line in the photo becomes parallel with a horizontal/vertical grid line.  I also toggle Preview on and off to see the differences made.  Click OK and Photoshop does the rest!  

    Lens Correction Workflow:

    • SHIFT-CMD-R in CS5 to launch the lens correction filter
    • Toggle on Preview and Show Grid
    • Slide Remove Distortion to positive side as needed
    • Adjust Vertical/Horizontal Perspective sliders as needed following grid lines for guidance

    Practice yourself!

    Show us your practice results with a link in the comments below.  If you correct one of your own images send me a 600px wide version of the original and corrected one and and I will feature it in this post.