Photography Tips

Brolly & snoot ice cream sundae strobist lighting setup

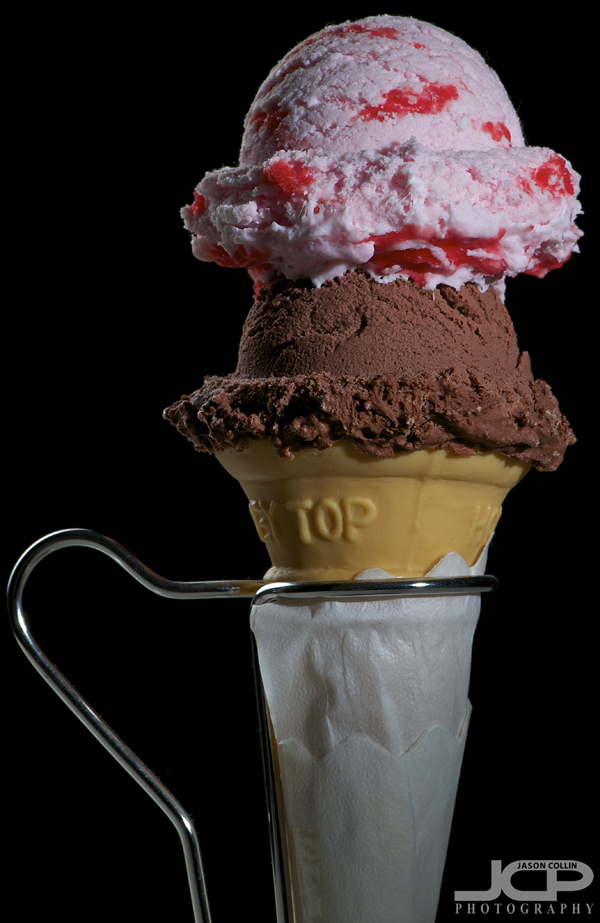
Would you eat this ice cream? Nikon D300 with Nikkor AF-S 105mm VR micro f/2.8G lens @ f/16 ISO 200 1/250th Strobist: Nikon SB-800 Speedlight in 42" brolly @ 1/4 power behind to left & Nikon SB-600 Speedlight @ 1/8th power in Honl snoot to frame right triggered using Yongnuo remotesThis ice cream sundae is one of my favorite possessions.  It looks good enough to eat right?  However, it is made by a famous company in Japan that produces realistic food models for display in front of restaurants.  It is common, almost required, for a restaurant to put many of its dishes on display in front of the restaurant to entice passersby to come eat there.  I had been waiting for an opportunity to photograph it, so I finally decided to use it as a subject for a demonstration on what each light does in a two-light strobist setup.  The above shot is the completely lit final image.  I got the idea to show how adding lights changes a shot from this video of a photographer setting up $60,000 worth of lights to get a shot of a Lamborghini Aventador.  I cannot recommend watching the video enough as it is outstanding.  This post does not compare at all to that video, but it is something you can practice in your living room assuming you do not have access to $60k of lights and/or a Lamborghini.  
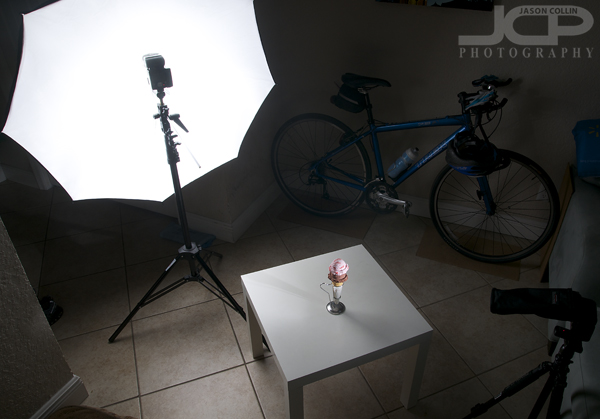
This is the off-camera-flash setup I used right in my (cramped) living room space.  My trusty new 42" brolly is on the left with a Nikon SB-800 Speedlight shootoing into it.  In the lower right corner you can see a Nikon SB-600 Speedlight with a Honl snoot attached.  The SB-800 was @ 1/4 power and the SB-600 @ 1/8th power.  I set my shutter speed to 1/250th (the fastest I can sync with the Yongnuo radio triggers) in order to produce a black background (read more about how to make a black background).  I had to carefully position the lights so neither bounced light off the wall behind the ice cream, which from where I shot was the wall space next to the rear wheel of the bicycle.  In a studio or larger space this shot would be much easier to setup.
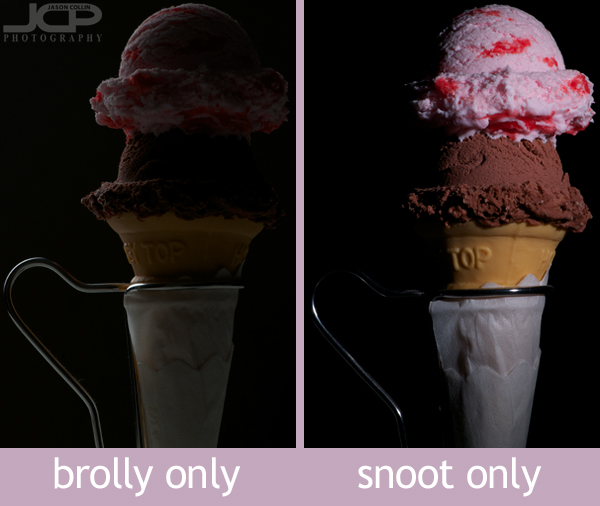
From the angle I was shooting at you can see that the brolly though the largest light source does not add much light to the subject.  If I had just used the snoot, the handle and back part of the ice cream would remain too dark.  The top image in this post shows what both lights combined can produce.  

Try making a shot like this at home with using multiple light sources and see the effect adding, moving or removing a light source has on how your subject looks.  Be sure and post a link to your results in the commments below. 
  • Read more photography tips
  • Reserve your own 1-on-1 DSLR Photography Lesson with Jason today!
  • Learn more about the lessons
  • Canon 7D 1-on-1 DSLR Photography Lesson in St. Petersburg Florida with Amy

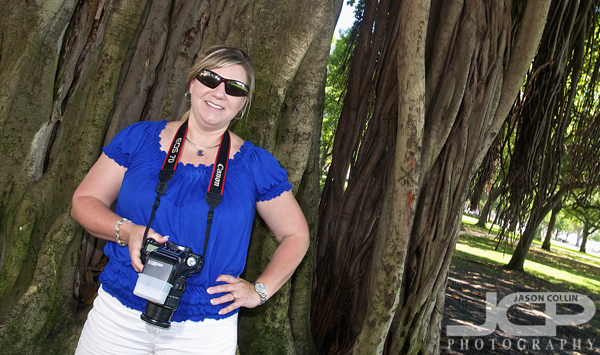
    Amy with her Canon 7D & 430 EX II Speedlight in front of a famous downtown St. Petersburg banyan treeI met Amy on a rather warm spring St. Petersburg morning for our first 1-on-1 DSLR Photography Lesson.  Amy has been doing paid work with her Canon 7D for sometime, but was looking to learn from our lesson some of the very practical tips and tricks for how to make better photographs that are not found in books, videos or even in a photography classroom.  Since I am a self-taught photographer with years of expeirence I have a lot of real-world photogrpahy practices I can share with my students to not just improve the final results of their photographs, but how to make it easier to produce a good photo before ever pushing the shutter.

    Amy had been shooting in "P" mode on her Canon 7D after receiving some bad advice from another photographer.  With her experience and with the subject matter she shoots I told her she should be shooting in manual mode exclusively, which is where we set our exposure dials for the entire lesson.  To further polish her professional way of shooting I turned off the "beep" on her 7D when getting a focus lock which is a most unwelcome sound when photographing in a quiet setting.  Then I showed her my very stable way of shooting by placing the left palm under the lens and shooting from a near sideways feet apart position allowing for both elbows to be against the body for support.

    We finished the lesson at one of the two famous banyan trees in North Straub Park.  We started using her Canon 430 EX II Speedlight on the camera as she usually shoots, but then moved to using the Canon 7D's built-in remote flash trigger ability to get the speedlight off camera.  

    I look forward to seeing how Amy applies all the things we practiced and discussed today in her future work.  If you live in or near Plant City, Amy's photography website can be found here.

    Nikon D90 & D3100 DSLR Photography Lesson with Bill and Ria in downtown St. Petersburg Florida

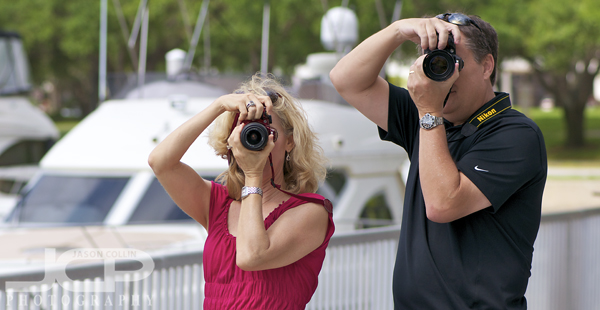
    Ria & Bill show good form as they prepare to photograph me as I walk down a sidewalk during our Nikon photography lesson.Last Saturday I ended my day with a DSLR Photography Lesson with husband and wife Bill & Ria and this Saturday I began my day with our second lesson together, this time in the usual downtown St. Petersburg spot.  They both did some studying and practice since our last lesson which I highly recommend so that at the start of the next lesson they will have questions to ask and photographs to show me.  

    For our second lesson we continued with the 4-steps to setting up a well exposed and in focus shot.  We started with making sure we were aware of the position of the sun relevant to our subject, which whenever possible we want our backs to the sun and our shadows pointed at the subject.  This is of course useful when photographing still and moving subjects.  The latter we practiced much more this time on passing cyclists and also yours truly as you can see Ria & Bill preparing to do in the photo above.  They are both using my suggested hand holding technique for portrait orientation, with the DSLR grip up in the right hand which allows the left elbow to become a point of stability against your body.  They lined up side-by-side like that on their own, it is a candid image!

    I look forward to seeing what shots they make with a second round of photography knowledge.

    Pentax K-5 1-on-1 DSLR Photography Lesson in St. Petersburg Florida with Heather

    Heather with her new Pentax K-5 during our first 1-on-1 DSLR Photography Lesson in St. PetersburgHeather contacted me about my 1-on-1 DSLR Photography Lessons for help with her new Pentax K-5 DSLR.  Like many of my past students, she had upgraded from a point and shoot camera and tried studying using books and videos, but there is nothing like getting direct, real time feedback for learning DSLR photography.  We met in the usual downtown St. Petersburg spot and had all the sun we wanted from mother nature.  Soon, I will have to only have lessons from 9am as the midday sun will just be too strong.

    Heather had done some research into photography terms and what not, which was helpful when I explained my 4-step process for setting up a well exposed and in focus shot.  Since she had just a 18-55mm variable aperture lens, I advised her that for now all she needs to worry about are apertures f/5.6 f/8 and f/11 and when shooting in broad daylight like we were mostly, for still subjects, stick to f/11.

    Actually Heather is having doubts about whether to keep her Pentax K-5 or switch to a Nikon D7000.  I like some of the ergonomics of Pentax bodies, but after a few minutes of searching both for a button and in the menus I could not find a way to change the drive mode, which I had never failed to do before with any of the dozens of DSLRs I have hands on during hundreds of lessons.  

    Today was just our first of four lessons, as Heather chose the discounted 4-pack of lessons so I will be seeing her again soon.  I look forward to seeing the photographs she takes of her young children between now and then.

    Seashells in Black & White Macro fine art images

    Nature's spiral black & white seashell macro image - Nikon D300 Nikkor 105mm VR micro @ f/32 ISO 200 2.5s tripod mounted with cable release Strobist: Nikon SB-800 Speedlight @ 1/4 power in 42" brolly to frame left using Yongnuo radio triggersPhotography is mostly about observing.  To be a good observer, I believe one needs to practice silence in mind and body.  The seashells featured in this photo story would not found along a quiet beach where I was taking a contemplative stroll.  They were, in fact, found in the middle of the chaos of my neighborhood dog park, but since my mind was silent, I was able to observe them.

    This seashell reminds me of an anklyosaurus - Nikon D300 Nikkor 105mm VR micro @ f/22 ISO 200 1.6 sec tripod mounted with cable release Strobist: Nikon SB-800 Speedlight @ 1/4 power in 42" brolly to frame left using Yongnuo radio triggersBy the newly installed water station there is a ring of seashells, not crushed, but small and mostly whole.  As I pushed the nozzle to let Kiki drink, I observed this unusual fact.  Mostly one finds crushed seashells used in landscaping purposes so to see a bed of intact seashells surprised me.  You have to bend over quite a bit to trigger the water flow allowing me to notice the details in the shells.  I thought to myself, "I will take a few home to make macro photographs of."

    Into a cavern of a seashell opening - Nikon D300 Nikkor 105mm VR micro @ f/22 ISO 200 1.6 sec tripod mounted with cable release Strobist: Nikon SB-800 Speedlight @ 1/4 power in 42" brolly to frame left using Yongnuo radio triggersIt fascinates me to think that such objects once resided untold miles away at untold depths in the sea.  Where were they from?  How old are they?  Of all places they end up in a dog park, albeit one very close to the sea.  In fact, you can see a part of Tampa Bay from the park.  Now these seashells have journeyed a few more miles to inside my apartment.  They have felt air conditioning.  However, I shall return them shortly to the dog park and their water fountain resting place.  

    How did you get cracked seashell? Nikon D300 Nikkor 105mm VR micro @ f/32 ISO 200 2.5 sec tripod mounted with cable release Strobist: Nikon SB-800 Speedlight @ 1/4 power in 42" brolly to frame left using Yongnuo radio triggersPHOTOGRAPHY TIP:  always be observing, and you will always be improving your photography

    Sony A55 1-on-1 DSLR Photography Lesson in St. Petersburg Florida with Jon

    Jon with his new Sony A55 during our 1-on-1 DSLR Photography Lesson in Vinoy Park at sunsetWith sunset coming well after 7:30pm nowadays the return of springtime weekday evening lessons starts with Jon and his new Sony A55.  It was my first time to get hands on with this particular DSLR.  It was smaller physically than I expected and has a useful flip down LCD viewfinder.  However, the motion sensor that turns off the back LCD as you put your eye into the optical viewfinder seems like a very useful feature at first, but I found that when reviewing a photo the screen it can too easily get motion detected off.  

    Jon had been using point and shoot digital cameras for awhile, and long ago even took a criminology based photography class, so he had some familiarity with photography terms like aperture, ISO, etc.  We started out shooting in aperture priority mode, but thanks to the light transition during our golden hour lesson I was able to show Jon how switching to manual mode really allows the photography to take control over the final image by including as much or as little of the vividness of the sunset sky.  

    For the first time in a long time during a lesson there was time to venture out to Vinoy Park for the final part of the 2-hours.  This allowed for a little sunset portrait practice.  

    Beyond photography Jon has also traveled in Asia so it was nice to talk about our experiences traveling there in between shooting locations.  I look forward to seeing where Jon's photography goes from here.

    Nikon D90 & D3100 DSLR Photography Lesson with Bill and Ria in St. Petersburg Florida

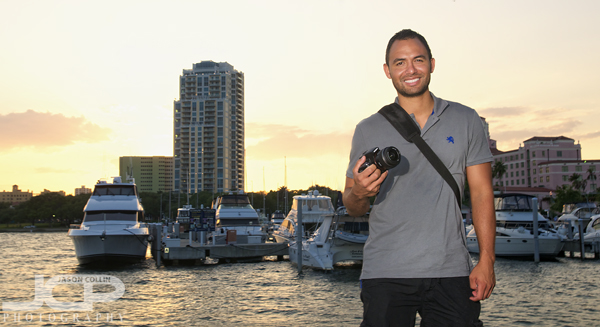
    Ria & Bill with their Nikons during our first DSLR Photography Lesson in St. Petersburg FloridaOnce again due to the Honda Grand Prix going on in downtown St. Petersburg, I used the small park at the end of Coffee Part Bayou as the location for a DSLR Photography Lesson with husband and wife Bill & Ria and their pair of Nikons.  It was my first time to see a vivid red Nikon D3100 body!  It looked pretty cool.  That was the DSLR Ria used during the lesson and Bill wielded the Nikon D90.  Though I market my photography lessons as 1-on-1, they are available to pairs as well.  It is actually nice teaching two people because that means I do not have to be the model for practice shots!

    Being very familiar with Nikon menu settings it was no problem to get both their D90 and D3100 setup and ready to start making shots in the manner I do with my own Nikon D300.  During the lesson we practiced how to frame a portrait shot to make best use of space and put the person in a flattering composition (i.e. not having the horizon bisecting their head).  Many people's instinct is to center the subject, but putting the subject just off center even, like in the photo above, adds more interest and better use of negative space.  

    It was a real fun time introducing Bill and Ria to the manual DSLR world, where before they were just using the D90 in auto-mode.  We already have our next lesson scheduled!