Photography Tips

Brown Pelican Bird in Flight St. Petersburg Florida Fine Art Nature Photography

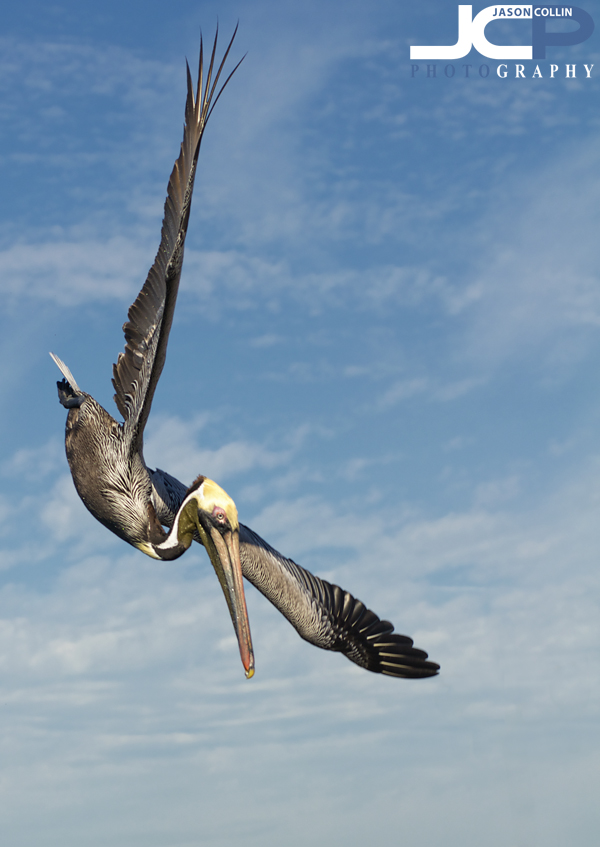
Brown Pelican preparing to dive St. Petersburg Florida - Nikon D300 Nikkor 80-200mm @ f/5.6 ISO 200 1/1250th

Regular followers of my nature posts will know that I am very fond of photographing the many local brown pelicans in my St. Petersburg, Florida neighborhood.  I have not yet achieved my long-term goal of photographing a pelican skimming just over the water, but I was glad to be able to add these images to my pelican portfolio.  On Saturday pelicans were regularly diving out of the sky into the water for fish around The Pier.  Once getting the settings dialed in using shutter priority mode and multi-point focus, it was just a matter of tracking the birds fast enough as they made their dives.
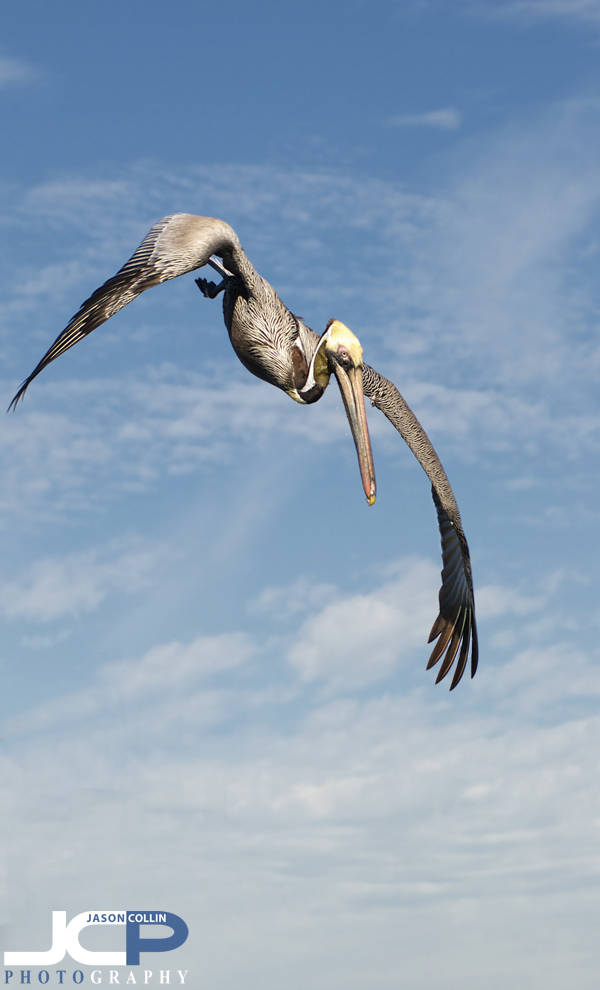
Brown Pelican on an aerial fish survey - Nikon D300 Nikkor 80-200mm @ f/6.3 ISO 200 1/1250thThis collection of pelican images focuses on the birds as they are about to make a plunge into Tampa Bay hoping to come up with a beak-full of small silvery fish.  Observing a bird's behavior is key to being able to capture the photographs one wants.  I watched where and how they circled and what they did with their wings right before their split second descents.
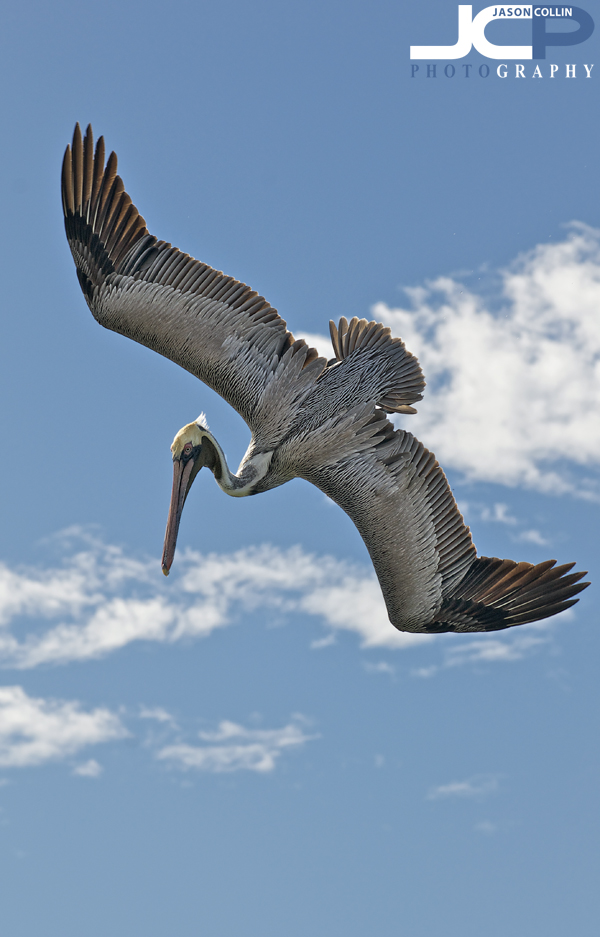
Brown Pelican wings arced for diving in St. Petersburg Florida - Nikon D300 Nikkor 80-200mm @ f/6.3 ISO 200 1/1000thDuring this shoot I also became, at long last, a believer in shutter priority mode.  With the pelicans diving from a bright blue sky background down to the dark waters of Tampa Bay, I knew what shutter speed I needed to freeze their flight, but adjusting the aperture constantly to maintain the correct exposure would have been nearly impossible.  Thus, shutter priority was the best exposure mode to use for these bird-in-flight images.
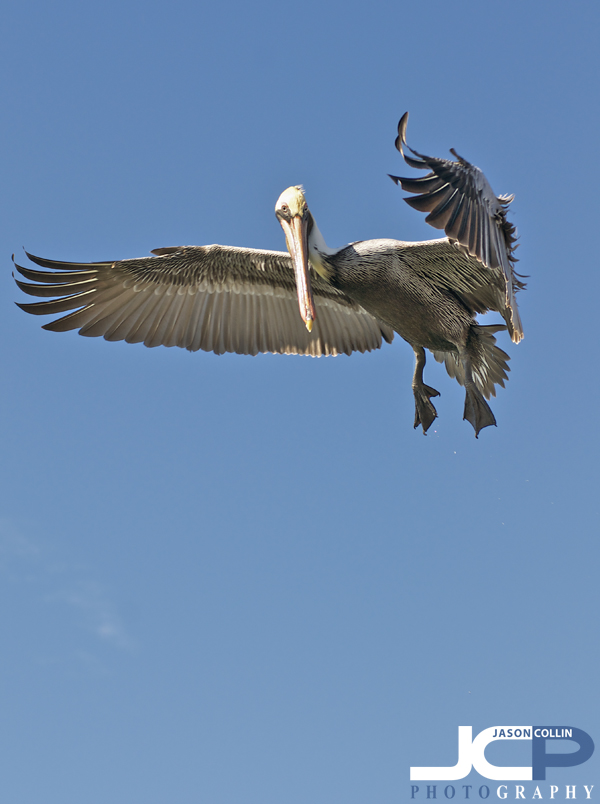
Brown Pelican hovering before diving in St. Petersburg Florida - Nikon D300 Nikkor 80-200mm @ f/4.5 ISO 200 1/1250thI also used multi-point focus because I was able for the most part to fill the frame with the pelicans, allowing the 21-focus points to act as a net.  If I could not fill the frame with the pelicans, well, I probably would not even push the shutter, but in that case I would use a single focus point to place right on the bird to distinguish it from any other possible background elements.  In relative close-up shots like these, the multi-focus point setting gave me the best chance of landing a focus point on the subject (pelican) where a single focus point might get lost under a single wing flap.

Visit The Pier for great pelican and bird-in-flight photography opportunities:

View Larger Map

  • License these images for business use or purchase fine art prints
  • View more pelican photo stories
  • Read more photography tips
  • Canon XS DSLR Photography Lesson Birds in Flight with Suzanne St. Petersburg Florida

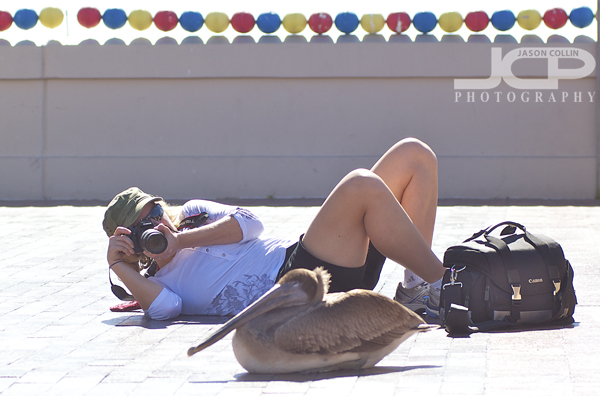
    Suzanne impressively was not afraid to get eye level to her subject even on surfaces of questionable cleanliness.Suzanne (see her photos made during this lesson) and I were back at The Pier for our third of four DSLR Photography Lessons.  Our goal this time was to capture birds in flight, one of the most challenging things to do in photography.  In particular, I wanted us to be able to make a shot of a pelican right before it breaks the surface of the water in a dive.  On our walk out to The Pier I advised Suzanne on the best settings we could use, namely: 

    • shutter priority mode @ 1/1000th of a sec
    • ISO set to lowest possible
    • WB sunny
    • focus mode:  AF-C (Ai-servo)
    • multiple focus points (since the birds would fill the frame from our location) 

    Thankfully, the pelicans at The Pier were in a near feeding frenzy with birds regularly diving all around us.  It is really something to witness this act of nature up close.  It is also really something to try and photograph the act as there is at most one second between dive and water entry.  

    I showed Suzanne my technique of using the lens as a scope to track the bird at distance, rather than keeping one's eye behind the viewfinder when trying to locate the bird.  Then once in shooting range, quickly dip your eye behind the viewfinder and the bird will be in frame, more easily ready to be photographed.  

    The weather was great and the bright sunshine felt welcome, as was the breeze, pretty much ideal DSLR Photography Lesson conditions.

    Make time for your photography

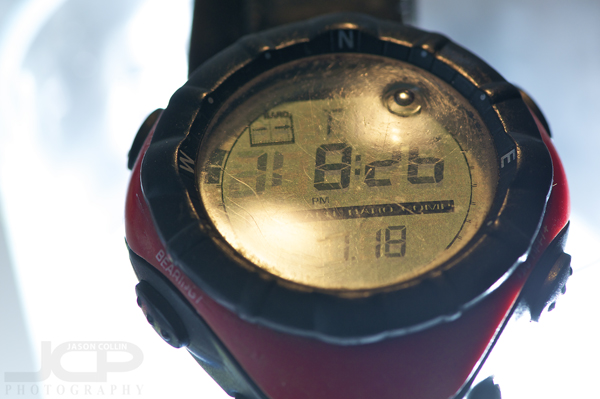
    Jason's own Suunto Vector watch that has been to the top of Mt. Fuji and the jungles of BorneoWhen was the last time you picked up your camera?  If you do not do photography for a living, it may have been awhile.  If you are a pro photographer, when was the last time you took your camera out for just some simple personal shooting?  Days can easily turn into weeks and your DSLR has not had a single actuation put on it.  Just like everything else, one has to make time for photography.

    This is certainly true for myself, as I very rarely go out on my own (no Kiki) to make photographs just for fun.  So this afternoon I made the time and went to Boyd Hill Nature Preserve for some macro photography (photos here).  Even though I really like macro photography, I had to make the effort and take the time to do it.

    So within the next week, be sure and make at least one morning, afternoon or evening just for shooting what you like, for fun.  Let me know how it goes in the comments below. 

  • Read more photography tips
  • Reserve your own 1-on-1 DSLR Photography Lesson with Jason today!
  • Learn more about the lessons 
  • Jumping Matrix Style with help from layer masks

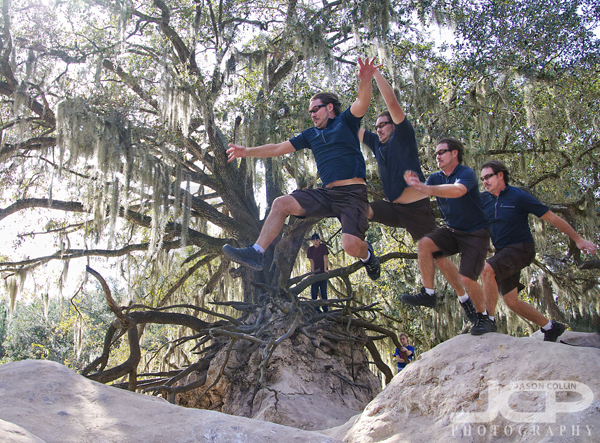
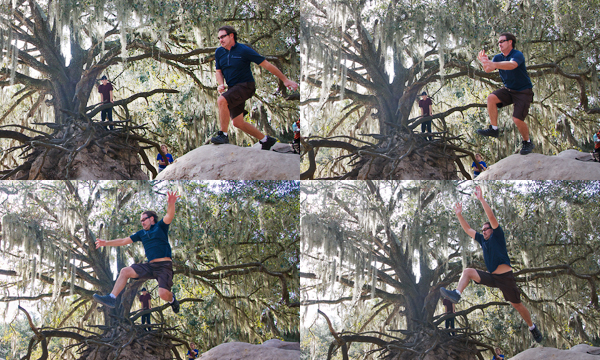
    Yours truly leaping a chasm! This is a blending of 4 different action shots using a simple layer mask technique.In case you missed it last week, I do take time away from being behind the camera to continue my love of rock hopping and leaping objects (see here).  I made the leap over the above chasm-ish span several times each time trying to go further.  I did not actually move fast enough to be seen multiple times in 1/500th of a second.  How I made the above image was to combine four of the shots taken in one burst of shots on my Nikon D300 (capable of 6 frames per second).  Since the DSLR was on a tripod all the background matched up perfectly, as does the exposure since that was set manually.  The only thing moving over the series of shots was me.  Then, it was just a matter of using layer masks in Photoshop to produce the multiple exposure, or Matrix, looking image.

    These shots layered on top of each other produced the above shot.Using layer masks to blend multiple images is not a difficult type of digital photography editing.  I have written a tutorial on how to use layer masks here.  Give this photography tip a try and post your results in the comments below!

    Edward Medard Park and Reservoir Trees HDR & Jumping

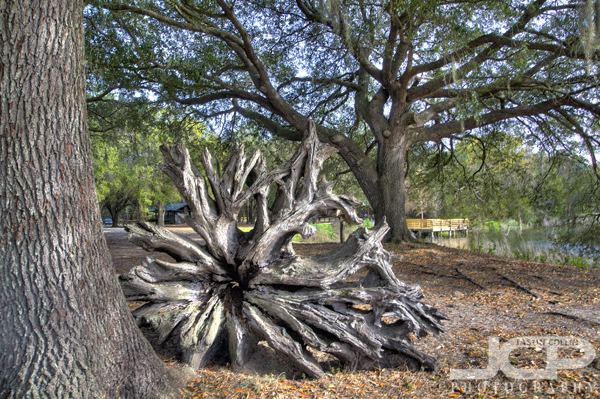
    Live Oaks showing their roots in Edward Medard Park - Nikon D300 Tamron 17-50mm @ f/8 ISO 200 7-exposure HDR tripod mountedIt had been too long since a couple of old college friends and I had one of our outdoor adventures together.  That was remedied by a recent visit to the surprisingly amazing Edward Medard Park and Reservoir in Plant City.  They said it had hills, so I was expecting some modest plain grass covered round and soft hills.  I never expected to step into an alien environment where live oaks sat perched upon angry hills of clay-like dirt with all their roots exposed in a display of their might.

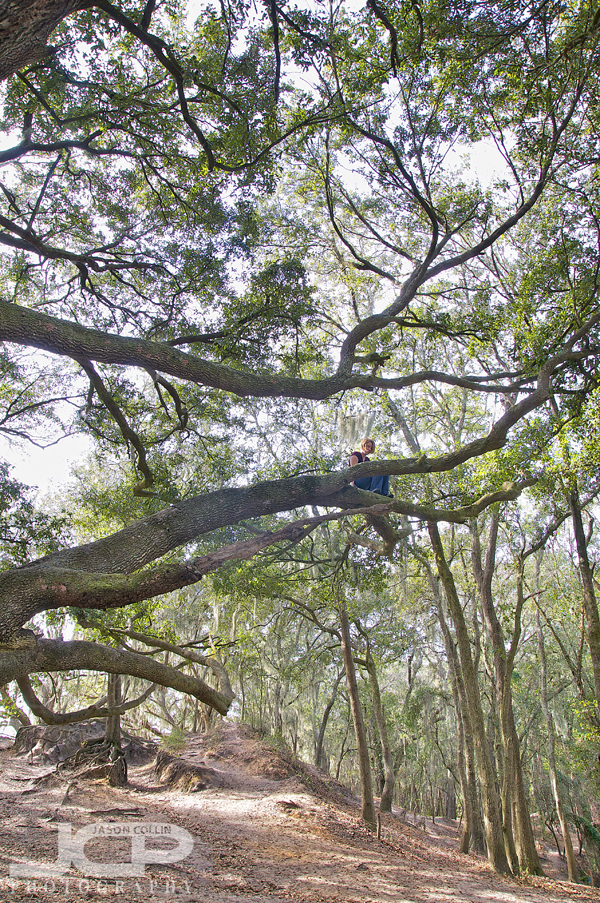
    A fearless tree climber in Edward Medard Park - Nikon D300 Tamron 17-50mm f/8 ISO 200 1/40th tripod mountedAfter a few handheld shots with my 80-200mm f/2.8 lens, I quickly relized that was not the setup ideal for photographing this environment and switched to my 17-50mm f/2.8 lens and mounted my Nikon on my Induro carbon fiber tripod the rest of the day.  Without that wide lens I would never been able to capture one friend who is an avid tree climber surprisingly high up in the branches of this long limbed live oak.

    uprooted tree in Edward Medard Park - Nikon D300 Tamron 17-50mm @ f/8 ISO 200 7-exposure HDR tripod mountedEdward Medard Park has more traditional looking Florida outdoor areas by the reservoir itself offering shady live oaks, with roots all neatly underground, well, save for one that was uprooted long ago.

    Jason performing trademark "Liu Kang" leap - Nikon D300 Tamron 17-50mm @ f/2.8 ISO 800 1/800th tripod mountedJust to show you I did not spend the entire time behind the camera, in the above shot you can see yours truly performing my patented "Liu Kang" method air leap over some roots perfectly shaped like hurdles on a tricky downslope.  Some of you who have know me well will already have seen my debut of this move, which was over a much more dangerous gap.  I set up this shot with my Nikon D300 mounted on my tripod with all the settings dialed in.  

    photography tip:

    As you can see shooting an action shot into the sun required some very unusual settings.  My DSLR photography lesson students should be able to see I used settings I have told them probably never are needed, such as using f/2.8 on a wild angle lens.  In order to expose the subject (me) enough, a long shutter speed is needed especially shooting into the sun like this.  However, to freeze the action, a fast shutter speed is needed.  The solution to this is to go ahead and set the needed shutter speed, 1/800th of a second, then adjust aperture and ISO until there is enough exposure to show me and not worry if the sky gets blown out.  So that is my photography tip for action shots into the sun!

    Using the tripod all day did not slow me down, but rather freed me much more to make the photographs I wanted to and still enjoy all the action with my friends.  Shooting on a tripod is not physically demanding and the setup is pretty easy to carry, so I did not get tired from having a camera hanging off me all day.  Plus, since I did not have to constantly keep taking a camera strap on and off, but rather just let the tripod stand up on its own, it was really easy for me to switch from photographer to adventurer.  I just had to leave the camera standing where it was on the tripod then explore the area as I liked.  

    As you can see Edward Medard Park, despite the unfortunate name, is a great place for photography and adventure!

    --official website and directions 

  • Read more photo stories
  • Reserve your own 1-on-1 DSLR Photography Lesson with Jason today!
  • Learn more about the lessons 
  • Canon 60D DSLR Photography Lesson in St. Petersburg Florida with Julie

    Julie with her great new Christmas present a Canon 60D during our first DLSR Photography Lesson in St. Petersburg, FloridaMy first DSLR Photography Lesson of the new year was with Julie who just got a new Canon 60D as a Christmas present.  She chose my 4-pack of lessons so I will have the opportunity to really help her get going with her photography hobby.  Today happened to be the coldest day of the season, by far, but as always the sun was still out and shining making it a fine afternoon for a lesson.

    Julie claimed to not really have any previous DSLR photography knowledge, but thanks to her great memory and some tips on aperture from someone she recently talked to at a wedding, she already had a working knowledge of aperture, to which I added ISO, WB and focus mode information.  I was impressed by how quickly she started to demonstrate skill in adjusting the necessary settings for the variety of types of shot we practiced.  

    I often give advice to my students as they always want to know what photographer gear they should get next.  For those who already have lenses that cover from 18mm to 200mm, I suggest getting a 50mm f/1.8 lens and also an external flash as both are very useful and are in the camera bags of pretty much every serious photographer in the world.  

    I am looking forward to the next three lessons with Julie and helping her get the most out of her Canon 60D.

    Canon XS DSLR Photography Lesson at The Pier St. Petersburg Florida with Suzanne

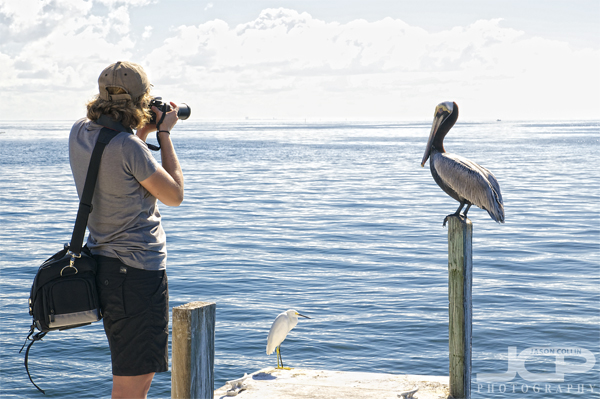
    Suzanne at The Pier in St. Petersburg chooses pelican or egret for her next shot on our second DSLR photography lesson.It seems Suzanne and I only meet for DSLR Photography Lessons on holidays!  Our first lesson together was right on Halloween evening, and today's second of four was on Christmas Eve, Eve.  By this reckoning I predict our next lesson might be on Groundhog's Day perhaps!  It was another exceptionally warm December day in Florida, some 10F above what is "normal" for this time of year.  Suzanne wisely wore her hat, I should of as well.  

    For this second DSLR Photography Lesson Suzanne said she wanted to practice making scenic shots.  Meeting at our usual spot on Beach Drive in downtown St. Petersburg, we made our way out to The Pier for that purpose.  We began by reviewing the four basic settings that need to be correct in order to make a properly exposed and in focus shot as we walked out to The Pier.  She showed me some of her recent San Francisco trip photos that did not come out as well as she would have liked, so the first order of business was to show her how using different settings would have helped those shots.  

    We ended with some bird photography which cannot be helped on any trip to The Pier as all the sea birds there are practically posing to be photographed.  For our third lesson, we will try to capture the birds in flight, a challenging photography skill.