Photography Tips

Nikon D300s DSLR Photography Lesson St. Petersburg Florida with Ron

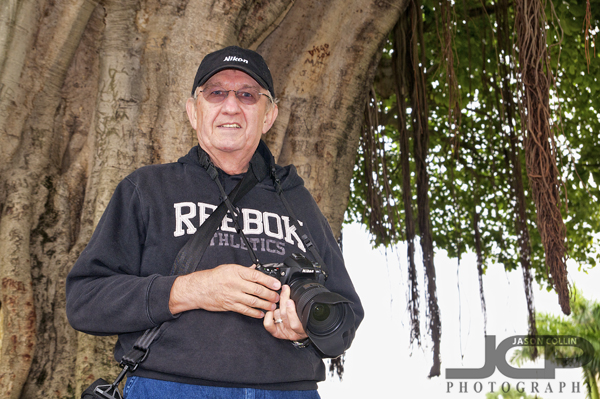
Ron with his Nikon D300s & Nikkor 28-300mm VR lens under a banyan tree in downtown St. PetersburgOn the first somewhat chilly morning of the year I met new DSLR Photography Lesson student Ron at my usual spot in downtown St. Petersburg.  Ron has two Nikons, the D300s and the D90, as well as a bag full of all Nikkor lenses (what Nikon brands its lenses).  He shot with film cameras before and knew what photography terms like aperture, ISO, bracketing, etc meant, so in our lesson I showed him how to apply and use them in the DSLR world.

Ron had been shooting in aperture priority mode which is fine.  However, he never changed his aperture so I can only guess all his shots were at the largest aperture for whichever lens he was using at the time.  I started the lesson with giving him an in-depth tour of the menus and buttons on his D300s since I am extremely familiar with it from shooting with a D300 for years.  

Throughout the lesson I got to learn about what an interesting life Ron has lived.  He currently runs a super successful home pet sitting & walking business that he said has him (and his wife) working every day of the week!  If you need a pet sitter contact me and I will pass your info on to Ron.

We concluded the lesson with a photo critique of all the dog photos Ron takes of his pet sitting clients as well as his other photography interests.  I was impressed with his mural and graffiti photo collection focusing on the central St. Petersburg area.  I look forwad to seeing Ron again soon for our next lesson.  

Photography Tip -- photograph green before Autumn colors arrive

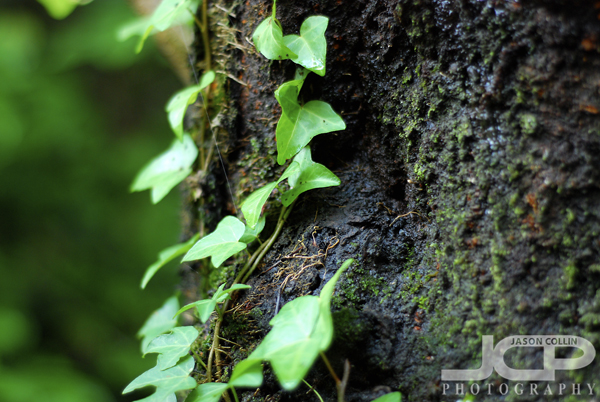
Shoot green in Autumn - Tokyo, Japan - Nikon D80 Nikkor 50mm @ f/1.8 ISO 400 1/100thWhile I was still living in Japan, a random photo of green leaves and bokeh (view here) happened to garner the most attention of any photo I had taken to that date.  I think it had more to do with the title than the shot itself.  I called the photo, "Last Green Leaves Before Autumn."  Tokyo has four distinct seasons so green leaves do not last year round like they mostly do here in Florida.  So my thinking for this photography tip was to go against the grain and recommend shooting green one last time before autumn foliage takes over the photography world.

PHOTOGRAPHY TIP -- photograph the last green leaves of Autumn


Show us the last green in your neighborhood with a link to your photo in the comments below.  Does anyone live where this already no green left?? 

  • Reserve your own 1-on-1 DSLR Photography Lesson with Jason today!
  • Learn more about the lessons
  • Read more photography tips
  • Photography Tip -- travel (or live) abroad

    Scenes from my 2-week trip in Cambodia July-August 2001, the greatest time of my life; Clockwise from upper left - Me with some children who live on a lake, sunrise over Angkor Wat, a Ta Prohm silk cotton tree before it was made famous by the Tomb Raider movie, yours truly surveying the jungle from Angkor WatI cannot state strongly enough how important I think it is to travel abroad, even better, to live abroad.  In July of 2001 I crossed the western Cambodia border from Thailand in the bed of a small truck.  This was my first time to visit Southeast Asia and the first time to really use my new digital camera, an Olympus 2040 EZ (2.1 megapixels).  This was still the very beginning of digital cameras, very, very few people had one.  I cite this event as my true birth into photography.  

    Therefore, my photography tip is a simple one:  travel abroad for as long as possible

    By long, I mean at least one month (four weeks).  If you have not yet gotten into photography as much as you would like, there is nothing like traveling abroad to be the catalyst to do it.  If you are already a frequent photographer, having a whole new world of subject matter will boost your creative output like nothing else can.

    You might just end up having the greatest experience of your life, and having the photographs to remember it years later.  

  • Reserve your own 1-on-1 DSLR Photography Lesson with Jason today!
  • Learn more about the lessons
  • Read more photography tips
  •  

    --I have never yet written extensively about my time in Cambodia, but creating a long photo story from my archives and journals is always on my mind. 

    Dali Museum DSLR Photography Lesson with Pam & her Canon 60D

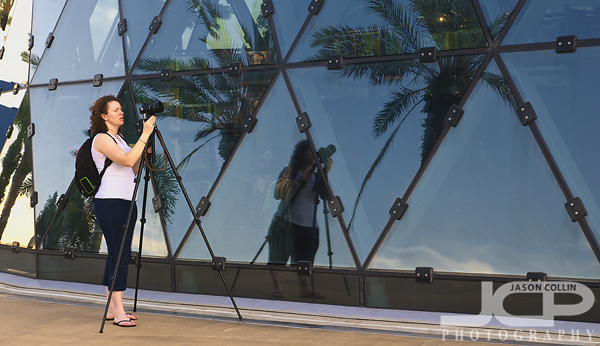
    Pam with her Canon 60D at the New Dali Museum during our 8th & final DSLR Photography LessonIn the two full years I have been teaching 1-on-1 private DSLR Photography Lessons here in the St. Petersburg area, Pam is now my most tenured student as last evening she took her eighth total lesson.  We went to my new favorite location for having a lesson, the new Salvador Dali Museum at the southern edge of the downtown St. Petersburg waterfront.  The museum offers the opportunity for architecture, macro and portrait photography, as well as night time tripod shots.  

    Over the course of our 16 hours of photography lesson time together Pam has learned well how to shoot in manual mode and to take control over exposure to produce a shot as she wants be it in daylight, twilight or full on night.  This is the most important skill one needs to be able to continually improve as a photographer, and to be able to start to teach oneself how to shoot better.  Therefore, I am confident Pam will be able to from this point on improve her skills on her own each time she goes out shooting.  

    Thanks Pam and I look forward to seeing your work in the future!

  • Reserve your own 1-on-1 DSLR Photography Lesson with Jason today!
  • Learn more about the lessons
  • Browse past lessons with all of my students
  •  

    --Professional Model DSLR Photography Lessons now available!

    Photography Tip - search your archives for photos you make like now

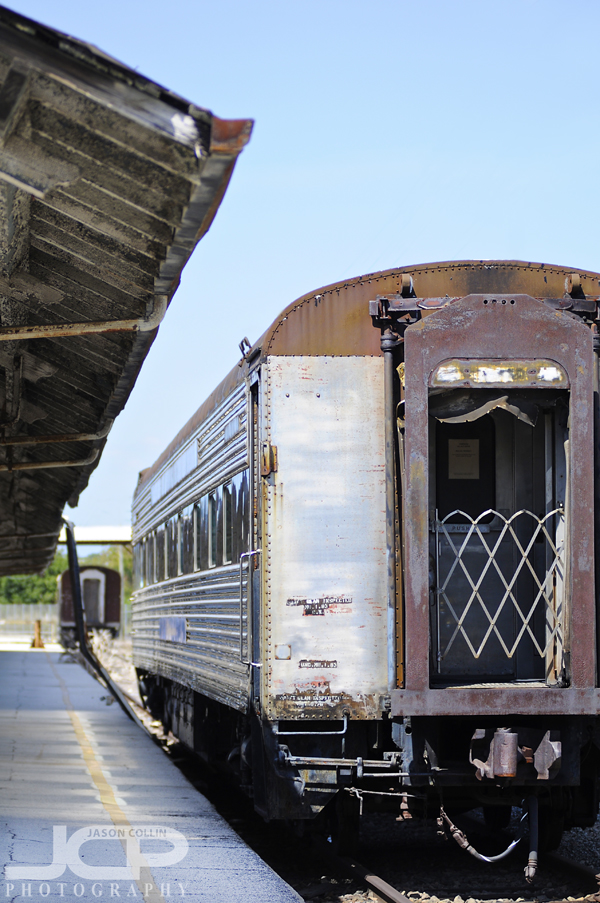
    Abandoned train car in Tampa, Florida - Nikon D300 with Nikkor AF ED 80-200mm f/2.8D @ f/2.8 ISO 200 1/2500thI have been going through my photography archives from the past three years looking for images to update my various portfolios with.  While looking for specific types of photos, I also found random photos that I had never edited, never given any attention to before, that for some reason now catch my eye (see above train photo).  This gave me the idea for . . . 

    Photography Tip -- go through your photo archives to find hidden gems & to see how your photography tastes have changed


    Not only may you find that what you think is an interesting photograph has changed, but if you have greatly improved your digital photo editing skills like I have over the past few years, you may find that you can save a photo that previously was left for the scrapheap.  

    Go through your archives this week and see if you find a forgotten photo that you now really like or even love.  Post a link to it in the comments below! 

  • Reserve your own 1-on-1 DSLR Photography Lesson with Jason today!
  • Learn more about the lessons
  • Read more photography tips 
  • Layer Mask Photoshop CS5 Digital Photo Editing Lesson with Ed

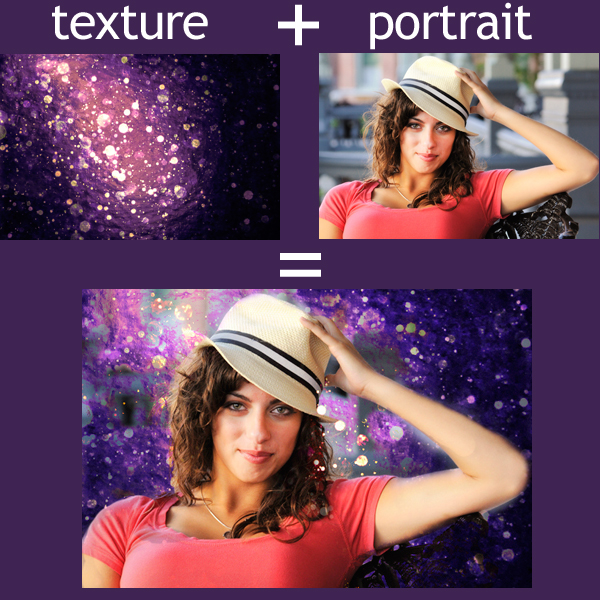
    Using a layer mask in Photoshop CS5 to change the background of a portrait - book your lesson today to learn tomorrow!

    I met Ed from Jacksonville again this morning for our second of two Photoshop CS5 centered DSLR Photography Lessons.  After giving him a crash course on the basics of using many common Photoshop tools yesterday, today we focused mainly on one thing:  layer masks.  As seen in the image above, if you take a texture, drop it onto a portrait, create a layer mask, then "brush back in" the portrait, you have a very quick and easy way of completely changing the background of a photograph.  You could also keep some of the texture visible over the portrait subject as well to create a different look to the entire frame. 

    This layer mask technique is also very useful for fixing clouds in HDR images, which often turn out too dark.  Using one of my own HDR shots as an example, I showed Ed how you can get the benefit of an HDR image without the drawback (dark clouds) by taking a single frame of the bracketed shots that has very white clouds and using it as a layer mask to blend into the HDR image.  I will be posting this tutorial using the HDR example later this week.

    The four hours (total) I spent showing Ed what I know about Photoshop went by very fast.  We easily could have filled another four.  He took detailed notes so I am confident that with what he learned during our intensive lessons he will be able to apply to his own images and begin teaching himself how to use more features of Photoshop.  

  • Reserve your own 1-on-1 DSLR Photography Lesson (shooting or editing) with Jason today!
  • Learn more about the lessons
  • Browse past lessons with all of my students
  •  

    --Professional Model DSLR Photography Lessons now available!

    Introduction to Photoshop CS5 Basics & Keyboard Shortcuts with Ed

    Grand Tetons photograph by Ed, editing by Jason - the lens correction filter in Photoshop CS5 sets things straight 

    I received a phone call from Ed all the way in Jacksonville (about 3 hours away) asking about taking extended 1-on-1 Photoshop CS5 lessons.  I am not a certified Photoshop expert or anything like that so at first I wanted to make sure he was not looking to learn how to do something like someone's face and put it onto another person's body.  My Photoshop skills lie mostly in the areas that pertain to editing digital photographs, not graphic design.  After talking for a few minutes though I realized that what Ed wanted to learn I could most definitely teach.  We booked two lesson sessions, one for today and another for tomorrow.

    Ed had his own photos to use during the editing lesson and I was pleasantly surprised to see the Grand Tetons.  Florida photographers of course have no local opportunities to photographs mountains of any kind.  Ed's photographs already looked good, but there is almost always something that can be done to improve any photograph, and for sure any published or portfolio photograph by a serious hobbyist or a pro has had at least some editing done to it.  I am not afraid to say that editing is often 50% responsible for the final look of a photograph.  

    The example above did not need that 50% level of editing.  I showed Ed my workflow which starts with cropping (I cropped the photo even more here than I did during the lesson to better show the edits we made) and then removing any dust spots on the sensor that appear as dirt blemishes in the photo by using the healing brush (keyboard shortcut - j).  Then I taught how to use the quick select tool (w) to highlight only the mountains for a contrast adjustment.  Then the foreground grass and fence were selected for a color balance boost.  Lastly, we used unsharp mask to increase the overall sharpness of the image resulting in more defined blades of grass and details in the fence and mountains.  

    Tomorrow we will move on to editing portraits and using layer masks.  

  • Reserve your own 1-on-1 DSLR Photography Lesson (shooting or editing) with Jason today!
  • Learn more about the lessons
  • Browse past lessons with all of my students
  •  

    --Professional Model DSLR Photography Lessons now available!