Photography Tips

Photography Tip - broken habits create new opportunities

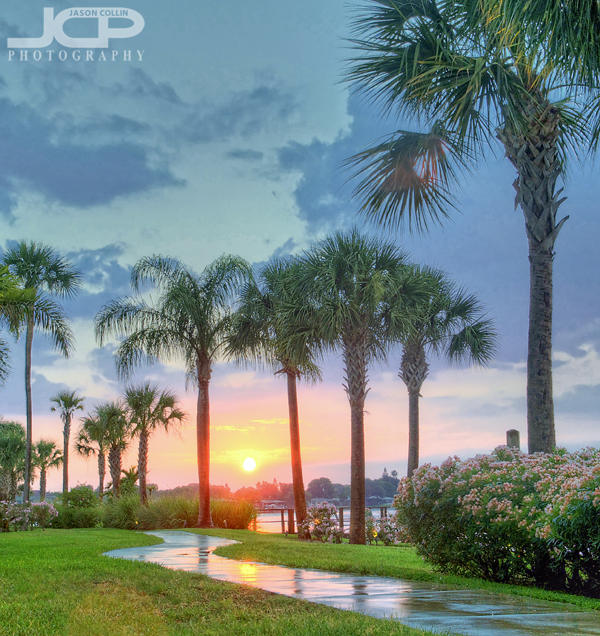
Snell Isle Sunset St. Petersburg Florida - f/8 ISO 200 3-bracket HDRThe most peaceful part of my entire day is when I take beloved puppy, Kiki, for our after dinner, sunset walk around the "big block."  We start out on the very path pictured above and walk along Smacks Bayou aways often spotting dolphins and manatees.  However, this evening just minutes before we were to set out on our evening stroll, a sudden heavy rain fell, then stopped, then started again.  Our walk was, sadly, washed out.

However, this break in our routine created the chance for me to photograph the above scene.  I still took Kiki out for a quick call of nature, saw the sunset, and thought to myself, "a real photographer would go back inside, grab his/her camera, then come back out and photograph this putting aside one's disappointment at not being able to go on a peaceful stroll.

So, an irritation produced an opportunity.  If your usual schedule gets sidetracked, look for new photography chances because of it.

Photography Tip - take the camera back out of the bag

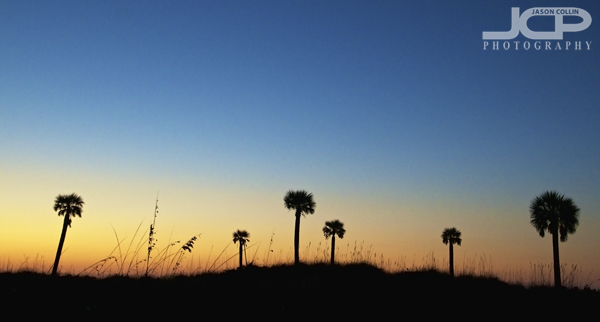
Madeira Beach twilight sunset - Nikon D300 Tamron 17-50mm f/2.8 @ f/4 ISO 800 1/60th handheld

  • use this image on your business website or decorate your office with a print -- contact for pricing 

I had just finished an hour-long portrait session on Madeira Beach and already packed up my camera and all photography gear.  My hand was on the back hatch of the Lexus to close it shut.  Yet I could see through the windshield a beautiful twilight sunset . . . but I was tired.  All my camera was already back in its bag.  I just had to close the hatch and get in the comfortable driver's seat and head home to shower and dinner.  Then I told myself in my mind what anyone who thinks themselves a photographer should think: 

  • Don't be lazy, a REAL photographer would make the effort to get the shot 

I took my hand off the back hatch, pulled my camera bag to the edge, opened it, took out my Nikon D300, took the lens cap off and was now once again ready to shoot.  You may note one lingering laziness, I did not use my tripod.  I handheld the above shot, but at 1/60th a second that is not hard to do if using proper DSLR holding technique.  

After taking about a dozen shots of various composition, I felt satisfied that I had both not been lazy and got the shot I wanted.  The portrait session was for my client and my business, the last sunset silhouette shots were just for me.  Even if you have already put your camera back in your bag, do not hesitate to take it back out and get a shot if you see one.  That's what a real photographer does.

Photography Tip - long lens for landscapes

Nikon D300 Nikkor 80-200mm f/2.8D @ f/8 ISO 200 1/500th - Pelicans in front of new Dali Museum St. PetersburgYou do not need to use a wide angle lens to make a landscape or panorama shot.  For the above photograph of two pelicans out on The Pier with the St. Petersburg waterfront in the distant background I used my favorite Nikkor AF ED 80-200mm f/2.8D lens at 80mm.  To create the panorama look I simply cropped the image.  Shooting at f/8 and 80mm allowed the distant background to not be totally blurred out (bokeh) while at the same time still create a unique sense of depth to the image that one cannot produce using a wide angle lens.  

In the comments below link to your long lens landscape/panorama shots.  

Photography Tip - selecting and cloning a clean Ferrari 458 Italia

2011 Ferrari 458 Italia at a car show in St. Petersburg Florida

  • Learn this digital photograph editing technique from Jason in a 1-on-1 lesson, reserve today!

Car shows are great places to see a large number of awesome cars in a small space.  However, that small space and numerous other car fans walking around create a nearly impossible situation for photographing the cars in full.  Detail shots are usually what I focus on, but still I want to have at least a few full car shots as well.  Some of you may know that the Ferrari 458 Italia is my current favorite car in the world.  At a recent St. Petersburg, Florida car show I had a chance to talk with the owners of the above 458 Italia who were very nice people.  I photographed their Ferrari at length.

I could not get a shot like I wanted to while there due to other cars being parked so close to the 458 Italia and of course because of many other people coming to peek at Ferrari's latest mid-engine super car.  So I had to settle for the best angle I could get taking into account the sun's position and just the space I had to shoot in.  Photoshop CS5 helped with the rest.

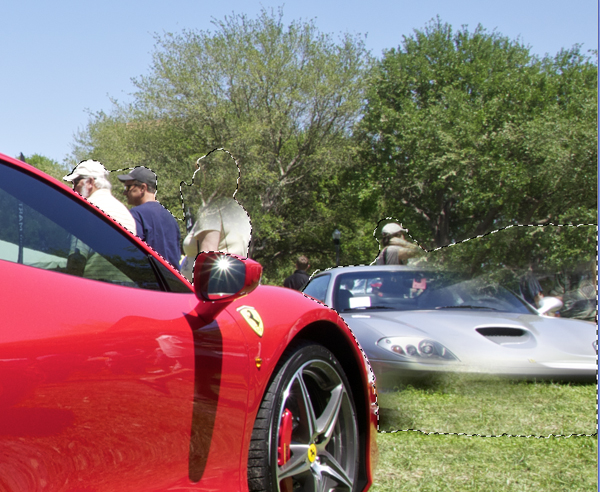
Too clone out things from complex surroundings, quick select them then clone stamp in safetyIn the above screen shot you can see how I first used the Quick Select Tool (W) to put a protective fence around the objects I wanted to remove (silver car, people, etc).  I do this because the Clone Stamp Tool (S) is very temperamental and very hard to use along a distinct edge like the front fender of the red Ferrari and the silver Ferrari.  Basically, containing the unwanted object in a quick select field allows me to not worry about coloring outside the lines, so to speak.  You can see I selected some grass from the foreground and already started stamping it onto the silver Ferrari.  The sharp edge of the red Ferrari fender will remain perfectly intact.

Likewise for the people above the red Ferrari.  I will clone some of the trees and stamp them on top of the people to complete the illusion that the Ferrari 458 Italia is alone in a field.  To close the quick select areas hit CMD-M (on a Mac).

Using this quick select and cloning method will allow you to cleanly and easily remove objects from complex surroundings.

Photography Tip - seeing a different reality - kapok silk-cotton tree

The famous kapok silk-cotton tree of downtown St. Petersburg in sepiaWhy did I make this photograph?  Because of the shadows the branches were burning into the ground.  That interested me.  As it was close to mid-day the shadows were vividly dark.  They appeared to me to be separate from the tree itself, not so much shadows, but rather an alternative existence for another kapok silk-cotton tree bordering two realities.  This I saw for just a moment in between a lot of other things, like teaching a DSLR Photography Lesson and cars passing by and people jostling past on the sidewalk and the sun uncomfortably heating my skin.

The photography tip is this:  see a different reality

My favorite artist is Van Gogh because he saw a different reality, not in his imagination, but through his normal eyes, or was his mind imaging what he say and his eyes believed it to be the reality of others?  Regardless, I believe he literally saw the world as he painted it.  When he looked at a night sky, it was all swirly.  Thus, his paintings are now masterpieces and hold the interest of millions.  If he had painted the sky exactly as it appears to look for most people, he would not be an artist of any significance.  

Being able to see a different reality is an extremely valuable skill to any artist, to any photographer.  I believe these different realities are not constantly around us though, they exist only for a moment.  Take the above photo for example.  If I returned to that spot a few hours later, the alternative branch shadow reality would not be there.  

To me an interesting artist/photographer skillfully and creatively shows others the different reality he/she sees on a daily basis.

Cosmos Flowers of Tachikawa Japan

Cosmos of Tachikawa Japan with bokeh - my personal favorite flower photo~These photographs are some of my own early DSLR photography work.  All were taken with the Nikkor AF 50mm f/1.8D lens (save the portrait).  At this time I did not exactly know what I was doing all the time.  I was still stunned by the bokeh produced by the 50mm prime.

This selected collection of cosmos flowers were all made on the same afternoon at a place called "Cosmos Hill" in a park in Tachikawa, Japan.  The above photo is available as an iPhone wallpaper.  Since it was my first time out really with the sole purpose of photographing flowers with my first DSLR, I remember it clearly.  I was most certainly not the only one with the idea to go photograph these cosmos as there was a veritable line of photographers, like paparazzi at the Oscars, all photographing them too.  It was also one of my first times to really use my new 50mm f/1.8D lens.  I was not getting great results with my Nikkor 18-200mm f/3.5-5.6 (it was soon sold!) so after I put on the 50mm, it stayed on the rest of the afternoon.
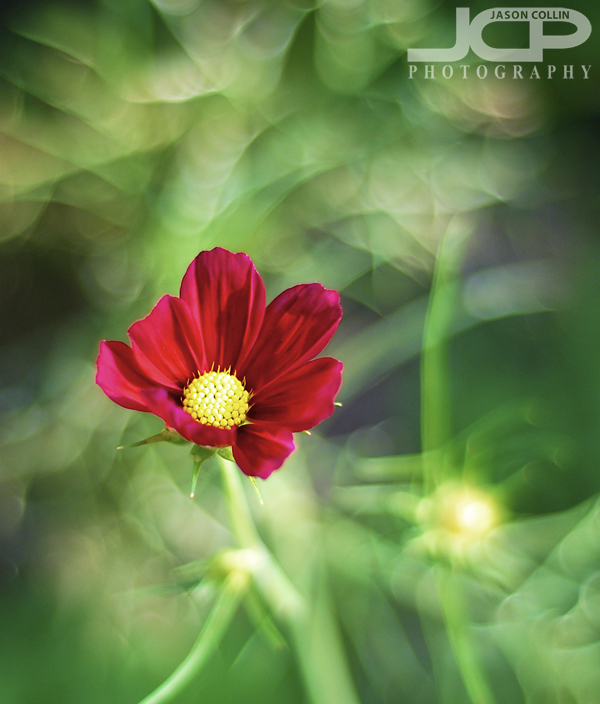
red cosmos blooming in Tachikawa Japan - Nikon D80 Nikkor AF 50mm f/1.8D @ f/1.8 ISO 200 1/1,250th -0.33 EVI did not really know any better at the time to not shoot wide open (largest aperture) at f/1.8 so as to produce sharper images.  I was still just in the process of teaching myself how to become a more serious photographer.  I was still dazzled anytime I made a shot with bokeh in it, and the 50mm @ f/1.8 produces tons of bokeh.  When I went home to look at the shots they seemed unreal to me, which in fact, they are.  This is also what I think makes a photograph a photograph, showing something that cannot be seen at standing eye-level.  The human eye cannot see bokeh, therefore making a photograph with bokeh will tend to interest one's eye more.
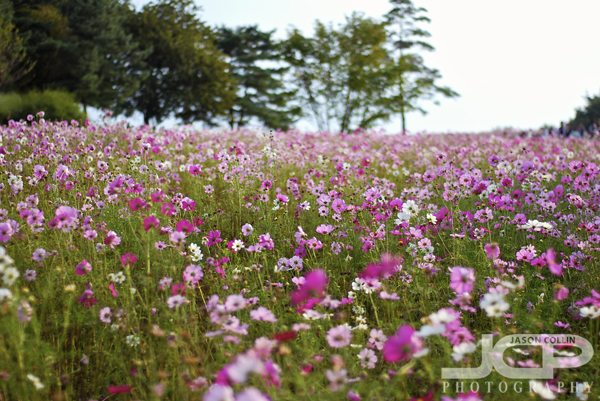
Cosmos Hill Tachikawa Japan - Nikon D80 Nikkor AF 50mm f/1.8D @ f/2 ISO 200 1/4,000th -0.33 EVI even used the 50mm lens to make landscapes at a large aperture.  At the time this may have been more of a happy accident (see above) than a previsualized shallow DoF sea of flowers shot.  Such is the way things go when teaching oneself photography.  Mistakes still teach me to this day new things about photography, since I did not intend to do them, the results are sometimes pleasantly surprising and the next time I make sure to do it on purpose!
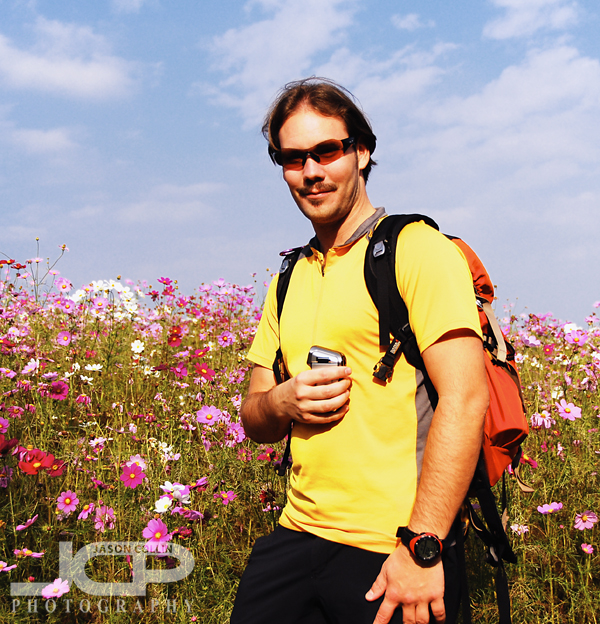
Yours truly, circa October 2008 in Tachikawa, Japan in front of Cosmos HillI have included the above portrait of me to show you how little things change for me over time, in this case 2.5+ years.  I literally wore that exact same shirt today (coincidentally), and also the same sunglasses and watch.  I am very loyal to my wardrobe and do not add, and certainly do not remove, items from it lightly.
Photography Tip - correct lens distortion & straighten up edges

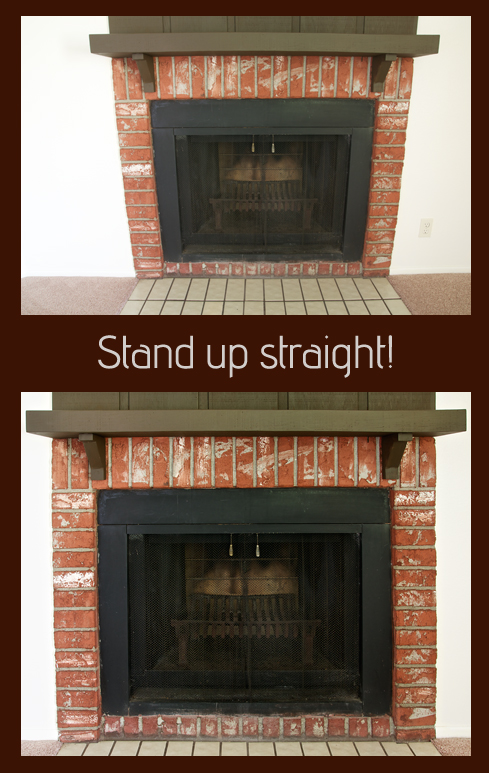
Using Photoshop CS5 the fireplace was made to appear normal, not distorted by the wide angle lens.

Wide angle lenses cause distortion.  Depending on the subject of the photograph, the distortion can be very apparent or very hard to notice.  If there are tall straight lines in the photo, especially at the edges of the frame, then the distortion will be very easy to see.  If the photo is free of geometric shapes, then the distortion will not be obvious.  Wide angle lens distortion is very easy to see when photographing buildings or other rectangular shaped objects, like the fireplace above.  It was shot at 17mm causing the walls to pinch inward and the mantle to appear to have a bulge in the center.  Here is how I used Photoshop CS5's lens correction filter to straighten it up:

Click on the image for a larger version - Photoshop CS5's lens correction window with grid onIn Photoshop CS5, the keyboard shortcut for launching the lens correction filter is SHIFT-CMD-R.  Or, you can just go into the Filters menu and select it there.  The auto correction by choosing camera and lens model does not work for me, so I always go into the custom tab.  For the Tamron 17-50mm f/2.8 lens I used for wide angle shooting, I always have to Put the Geometric Distortion slider into positive territory, as I did here (+7).  Then what I do from there depends on the individual shot, but I mostly adjust the Vertical and Horizontal Perspective sliders as needed.  I turn the Show Grid option on and adjust those sliders as needed until a horizontal/vertical line in the photo becomes parallel with a horizontal/vertical grid line.  I also toggle Preview on and off to see the differences made.  Click OK and Photoshop does the rest!  

Lens Correction Workflow:

  • SHIFT-CMD-R in CS5 to launch the lens correction filter
  • Toggle on Preview and Show Grid
  • Slide Remove Distortion to positive side as needed
  • Adjust Vertical/Horizontal Perspective sliders as needed following grid lines for guidance

Practice yourself!

Show us your practice results with a link in the comments below.  If you correct one of your own images send me a 600px wide version of the original and corrected one and and I will feature it in this post.