background

Dixon Hughes Goodman Accountant Headshots Clearwater Florida

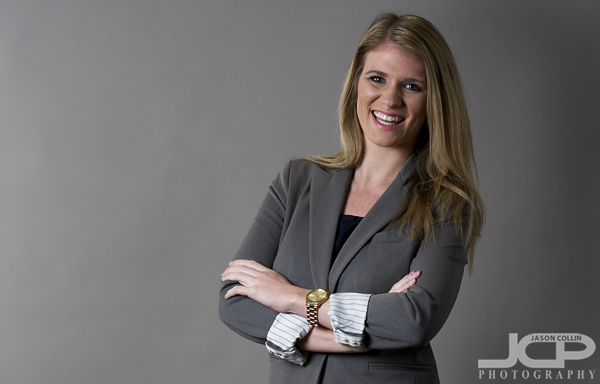
Corporate accountant headshot in Clearwater Florida - Nikon D300 Nikkor 80-200mm @ f/6.3 1/200th ISO 200 - Strobist: SB-800 in 43" brolly to frame left 43" reflector to frame right & SB-600 in shoot through umbrella on background

An accounting firm in Clearwater, Florida that has offices around the country needed new headshots.  They had hired a marketing firm to take charge of this and from them I was given very specific requirements for making headshots in the exact style they wanted.  This included being as specific as getting a particular "TV gray" background from BH Photo!  This was fine with me as the more details the more I can deliver exactly what the client wants.  Yet, despite all these guidelines, the final style of the headshots allowed for a good bit of creativity as the person being photographed could choose from one of 12+ different headshot poses!
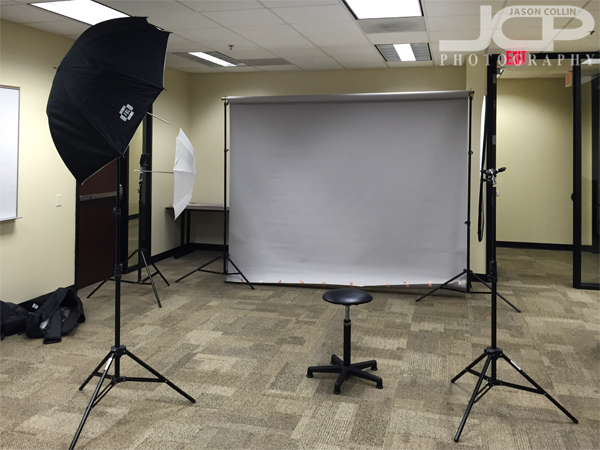
The most complex setup I have used for a headshot yet. From left to right: SB-800 in 43" brolly on light stand, SB-600 in shoot through umbrella on light stand, 9' wide TV gray paper background, posing stool, 43" reflector on light stand

This is the setup I used.  I had to order the TV gray background of course since I did not have one lying around already.  I also bought the large stand to hold the background, which in this case was 9 feet wide.  The stands can hold up to a 12 foot wide background.  
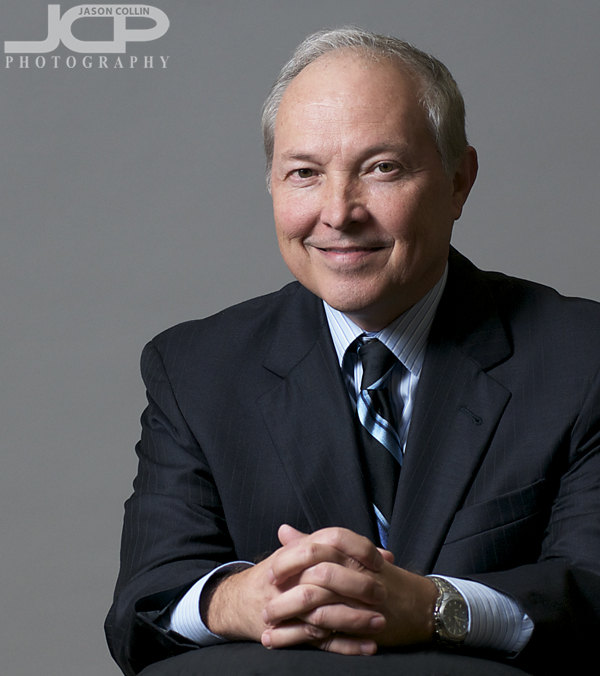
Using a posing stool for the first time for a headshot at Dixon Hughes Goodman accountants Clearwater Florida - Nikon D300 Nikkor 80-200mm @ f/5.6 1/200th ISO 200 - Strobist: SB-800 in 43" brolly to frame left 43" reflector to frame right & SB-600 in shoot through umbrella on background

This person used the stool for resting his arms upon, which was one of several posing choices the marketing company offered.  In another first, I had not tried this kind of composition before and now have it as an example I can offer to my own future headshot clients.  You can see how the marketing company used another headshot of this person in a final version on the company website.
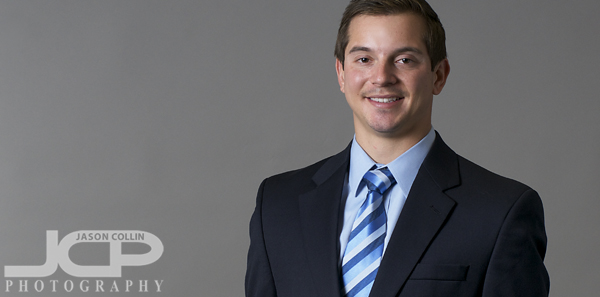
The client wanted empty space to the left of the subject for these business headshots in Clearwater Florida - Nikon D300 Nikkor 80-200mm @ f/6.3 1/200th ISO 200 - Strobist: SB-800 in 43" brolly to frame left 43" reflector to frame right & SB-600 in shoot through umbrella on background

Another requirement for all the headshots was to leave a lot of space to the left of the subject.  The marketing company would then crop the headshots to how they wanted.  I had great help from a staff member of the accounting firm in both setting up the photography gear and in choosing what poses worked best for each person.  It turned out to be one of the most fun headshot shoots I have had!

Photography Tip - do not photograph flowers in harsh light

Assuming you have a good subject, then light and background are the two make or break factors for any photograph.  Both flower photos above have complimentary backgrounds.  However, only one of them works due to the light.  The top flower photo was made in harsh light.  Even with a large amount of digital editing to try and recover detail in the flower, it was not possible.  In contrast, the bottom flower required very little editing as it was photographed in good, soft light.  

No matter how pretty the flower may be, if it is not photographed in good light, then it will turn out looking ugly in a photograph.  Look for soft light for flowers.  This can be done by photographing flowers in shade and basically avoiding the strong mid-day sunlight times.  Early morning or late evening are often prime times for this kind of light.  Then remember to make sure the background is good too!

Photography Tip - replace a busy background with clean sky Corvette Photography

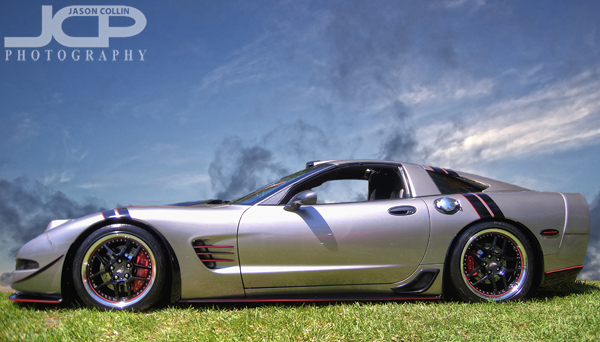
This Corvette is real, and the sky is real, but they were not really photographed together.

I went to a Corvette car show in South Straub Park this past Saturday mostly to meet the owner of the above customized Corvette.  I first photographed his car back in November.  He was not by his car at the time and only by chance found my photograph of it.  Since then I have been in regular contact with the owner, Bobby, about possibly doing a full shoot of his Corvette.  That still has not happened yet, but at least on Saturday I got a chance to go see him and say hello.  

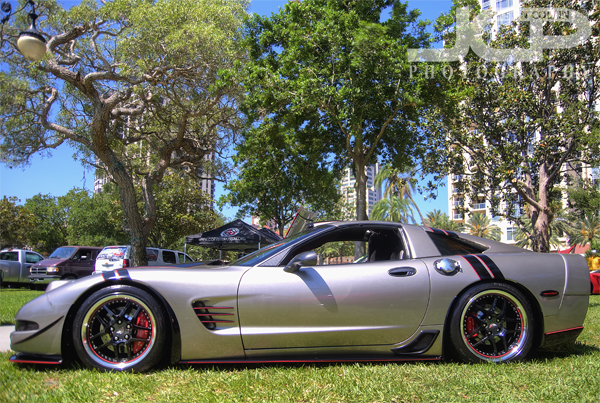
This is the original image as made on site at a car show in St. Petersburg FloridaI have written several times that shooting cars at car shows often results in less than desirable images, if you want the focus to be on the car itself.  This case was no different as the trees in the background compete for the viewer's eye just as much as the Corvette.  The solution for a busy background?  Replace it with a better one!

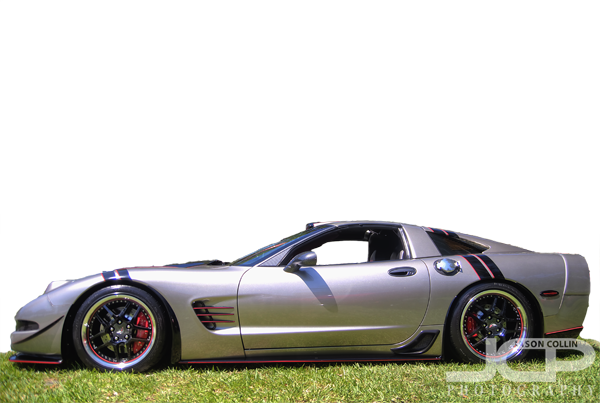
Corvette cut out from the background using Photoshop Quick Select ToolIt was pretty straight forward to remove the Corvette from its background using the Quick Select Tool in Photoshop.  I kept the grass foreground as seen above.  I was careful to of course not select the inside of the window so that too could be part of the background replacement.

The replacement background used in the composite image.I went into my photo archives to look for a suitable replacement background.  Using actual objects is rather hard to do as proportions can be very difficult to match (car looks giant, buildings look tiny, etc).  A sky background is usually a good and easy replacement background subject.  I used one I made of Sunset Beach on Treasure Island, Florida.

The new background slipped right behind the Corvette, window included.Then it is just a matter of slipping the sky background layer behind the Corvette layer in Photoshop.  I positioned it taking into consideration cloud placement.  I did not even need to cut out the sandy beach part because that is all hidden behind the Corvette.  The above image is the final composite photograph which allows the viewer to focus on the Corvette as the subject.

Motion blur added to a more advanced edit of the Corvette composite image

After getting a composite image I liked, I experimented with even more Photoshop editing.  I added a motion blur to the grass and a radial blur to the tires to create the illusion that the Corvette is speeding along on the grass.  I darkened the window and put in a silhouette of my own head to show a driver inside to help complete the motion illusion.  What do you think of the motion shot?  Is it convincing or not quite there yet?

Motion blur for creating background interest - Japanese temple statue

Using a slow shutter speed to create motion blur in the background - Nikon D80 Tamron 17-50mm @ f/2.8 ISO 400 1/40thI made the photgraph above three and a half years ago, still early in my DSLR photography career while I was living in Tokyo, Japan.  I noticed the wind catching and spinning this fan around like crazy.  I knew I wanted to juxtapose the stillness of the statue with the manic motion of the fan.  To accomplish this I needed to set a shutter speed slow enough to blur the fan blades, but not too slow that I could not handhold the camera steady enough to keep the statue looking sharp.  

I found that 1/40th of a second shutter speed produced enough motion blur in the fan without camera shake causing overall image bluriness.  If I had a tripod with me it would have been a simpler shot to execute.  It was actually lucky that there was a lot of shadow in this part of the temple garden which allowed me to use f/2.8 to try and produce a little bokeh, even though I was using a wide angle lens.   

So this weekend my photography tip and homework assignment is to go out and see if you can find some background object to catch in motion blur while maintaining a sharp, in focus subject.  Put a link to your photos in the comments below! 

  • Read more photography tips
  • Reserve your own 1-on-1 DSLR Photography Lesson with Jason today!
  • Learn more about the lessons
  • Photography Tip - Use Photoshop Clone Stamp Tool to clean backgrounds

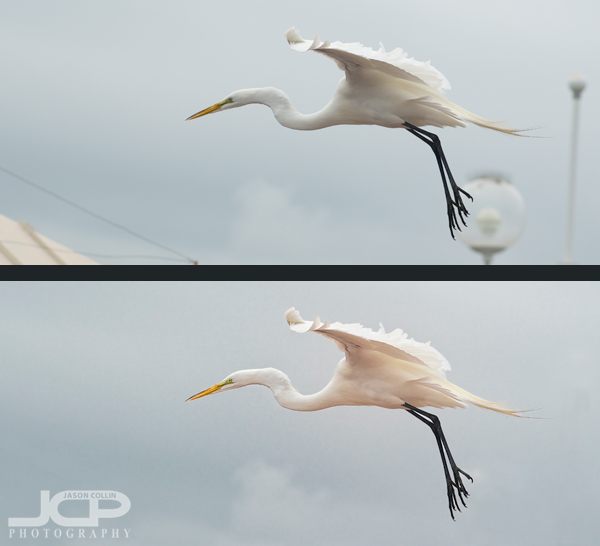
    Top: the original RAW image Bottom: after using clone stamp tool to clean background

    When I go around saying digital photography editing skills are 50% of what you need to produce a satisfactory final image, I really mean it even though every other photographer around would probably disagree with that.  I invite you to look at the above before and after shots and tell me in the comments below what percent digital editing had in helping the final image be all it could be.  

    For this photography tip I will just concentrate on: 

    • how I used the clone stamp tool in Photoshop CS5 to clean up the background, i.e. removing the light posts and wires 

    When I first pulled up this photo in Aperture 3, I really liked the bird in flight action.  The great egret was caught in an unusual mid-flap wing position.  However, the background was not clean and the egret's feet were overlapping a light post.  Then there was the corner of a roof intruding in the lower left of the frame.  Finally, there was a single tall light post on the right of the frame that was another distraction.  

    To me the two things that really make a photograph of a common subject matter standout are light and background.  You need good light for a flattering exposure and a clean background to let the subject stand out.  While it is entirely possibly to be at a location where one can get both of these things just right, I, myself, do not want to be limited to just those exact right circumstances.  Hence, I have worked on my clone stamp skills with earnest.  

    Now, if you have used the clone stamp tool in Photoshop you know it kind of has a mind of its own.  It almost never works like you want it too, especially if you use it in broad strokes.  First, in order to be able to use the clone stamp tool, you must have a source area in your photo you can sample from.  In the great egret shot, I have plenty of other gray clouds to sample to later stamp onto the light posts.  Really this is an ideal shot for using the clone stamp tool to fix because of the ample source cloning material, the relatively small amount of area that needs to be stamped on, and the fact that the subject does not much overlap any of the background distractions (just a bit of feet do).  

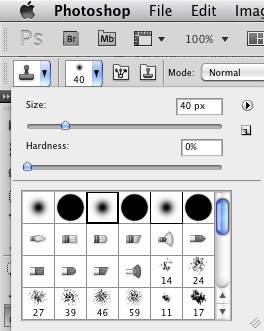
    The shortcut for selecting the clone stamp tool is "S" and the key to using Photoshop efficiently is learning as many keyboard shortcuts as you can.  To change the size of the brush use the bracket keys:  ] and [   To sample an area hold the Option key (on a Mac) then click on the desired spot.  I very rarely use the clone stamp at 100% as that makes is hard to control and often artifacts are introduced.  For this shot I mostly used 80% opacity.  Once I sampled a cloud I stamped in ver short strokes, never more than one or two at a time.  Then I would go back and sample the same or another area.  Also, I almost always use a soft brush (see screenshot).  

    So to summarize how I use the clone stamp tool in Photoshop CS5: 

    • "S" to select it
    • [ ] to change brush size
    • type 8 to change opacity to 80%, etc
    • Option-click to sample an area
    • Use short strokes
    • Resample every one or two strokes as needed 

    Try this clone stamping technique on one of your photos and post a link in the comments below to a before and after shot, or e-mail the shot to me and I will include it in this post.