SB-600

Nikon SB-600 Speedlight DSLR Photography Lesson St. Petersburg Florida

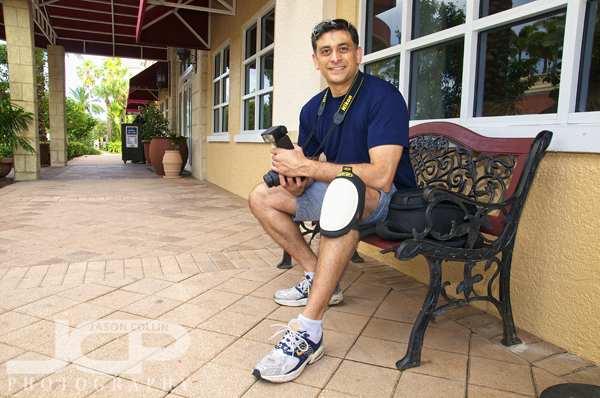
Sunil with very useful kneepad after practicing using his Nikon SB-600 Speedlight during our photography lesson in St. PetersburgFriday wrapped up a crash course in DSLR Photography with Sunil as he took his fourth lesson and seventh and eighth hours of 1-on-1 instruction.  Our first DSLR Photography Lesson on Monday covered the typical topics I do with any person on a first lesson.  The second was on night photography.  The third was exclusively using a 50mm lens.  This final lesson was all about how to best use his Nikon SB-600 Speedlight for portrait photography.

We met at the same spot as all the other lessons, in front of the Museum of Fine Art in downtown St. Petersburg, although on a Friday afternoon the area is much, much more lively than on any other week day.  I had Sunil mount his SB-600 to the hotshoe of his Nikon D50 and using two lenses, an 18-55mm and a 70-300mm, we practiced how to get the most out of on camera external flash.  We used the banyan trees on Beach Drive, then the covered walkway by the Ovation Building before ending up by the St. Pete waterfront.  

It was a good week with Sunil who I got to know a little bit as I shared a lot of my photography knowledge with him.  I look forward to seeing how his photography grows.

External Flash Nikon SB-600 DSLR Photography Lesson in St. Petersburg

Making use of the excellent columns at the Museum of Fine Arts in downtown St. PetersburgJust three shorts days after her first DSLR Photography Lesson, I once again met Linda in downtown St. Petersburg.  In that time she had gotten some new gear, a Nikon SB-600 Speedlight!  She wanted to be able to make portraits of her family when they visit her from Minnesota.  So with the SB-600 and her still new Nikon D3100 we practiced on the front porch of the Museum of Fine Arts how to take advantage of the directional aspects of her new external flash.

The top of the SB-600 can swivel around and angle forwards and backwards.  I told Linda my preferred method of bouncing the flash for the most part is in this order:  a wall behind me, a wall to the side of me, the ceiling.  Then we tried each way from the same spot and Linda could see the benefits/disadvantages/differences of each bounce direction.  

One of the famous banyan trees in downtown St. Petersburg provides a shady backdrop for portraits.

I also continued to teach her how to read and understand the histogram displayed on the back of her Nikon D3100.  With the very useful "show highlights" menu option enabled, any blown out areas of the image flash on the display alerting us that we need to adjust settings or flash direction to produce a properly exposed image.  

Linda has already booked her third lesson!  I look forward to building on what she has already learned in the lessons over the past week. 

  • Reserve your own 1-on-1 DSLR Photography Lesson with Jason today!
  • Learn more about the lessons
  • Browse past lessons with all of my students 
  • The Kiss - Florida Beach Sunset Wedding

    Nikon D300 Tamron 17-50mm f/2.8 @ f/8 ISO 400 1/200th strobist: SB-600 on light stand 1/2 power radio triggeredTherese and Mark chose Florida as their location to wed on a quiet weekday evening.  It is always semi-fascinating to me what is important to some people, has totally no meaning to others.  Of the people on the beach that Wednesday, too most it was just another great Florida sunset.  Perhaps to some it was the final day of their hard earned Florida vacation.  To Mark and Therese is was their wedding day.  That fact that this divergence exists causes some fascination to me.  What really is important?  What really matters?  

    Burrowing Owls of Cape Coral Florida

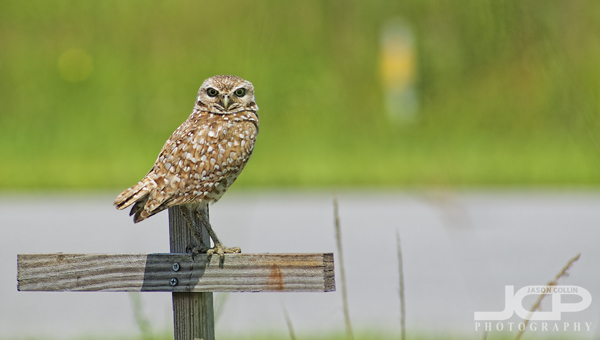
    Nikon D300 Nikkor AF ED 80-200mm f/2.8 @ f/4 ISO 200 1/3200th SB-600 hotshoe mounted in high speed sync mode

    I recently became aware that people were going all the way to my tiny hometown of Cape Coral to photograph the burrowing owls that live there.  Even Scott Bourne went!  Growing up there the owls were something to be feared, as if you got to close, they would screech at you and even take some swoops at your head!  Plus, they are super protected so even as a kid that put some fear of the law into me and I mostly just steered clear of them, never thinking them some great nature photography subject.  Then of course at that time I did not even own a camera.  However, I have visited Cape Coral several times in the past year with all my photo gear and it still never occurred to me to photograph them until I heard of others going there.

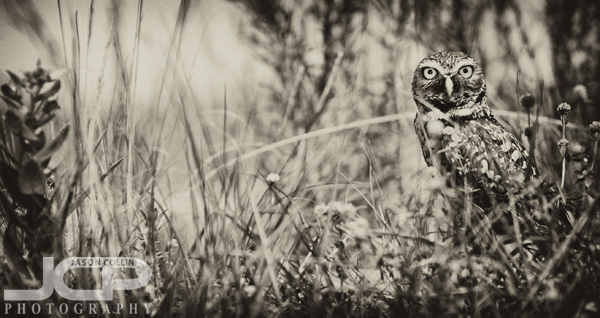
    Nikon D300 Nikkor AF ED 80-200mm f/2.8 @ f/4 ISO 200 1/3200th SB-600 hotshoe mounted in high speed sync modeSo during a brief overnight visit last weekend I thought if there are some owls living near my mom's condo, then I will finally photograph them.  When I did find some it was the middle of the afternoon and the light was of course not good at all, hence the unusual choice to make the above shots some form of black and white.  Add to it that the best shooting position (with my back to the sun) was obstructed by tall grass and their cross-shaped perch presumably provided by the government, I was not going to get any National Geographic level cover shots.  Still, I wanted to get experience shooting them so I could do a nice dawn rise the next time I visit and photograph them properly.

    Nikon D300 Nikkor AF ED 80-200mm f/2.8 @ f/4 ISO 200 1/2000th SB-600 hotshoe mounted in high speed sync mode

    With only a 200mm lens I did have to get a bit close, which I felt a little awkward doing because the owls definitely noticed me and one was angrily chirping.  I felt it was not cool for that to be happening so I rushed my shots also and was doubting myself the whole time, not a great thing to do while trying to make a shot!  Next time I will consider renting a 300mm or 400mm lens so as to let the owls be at ease while I photograph them.

    DSLR Photography Lesson #2 with Chris & SB-600s

    Chris demonstrating my "quick & dirty" off camera flash method - f/11 ISO 200 1/320th SB-600 held off camera just like pictured!I have recently mentioned my "quick & dirty" off camera flash technique several times, but had no photo to demonstrate it until now.  During our second DSLR Photography Lesson, I started to teach Chris the "quick & dirty" technique at John's Pass Village.  For the shot above I asked him to take the position, but we both forgot that his Nikon SB-600 Speedlight was still on and set to the same channel my Nikon D300's commander mode was, so it was a nice bit of luck that his SB-600 went off to help with the demonstration.  When you do not have a light stand or tripod with you, the "quick and dirty" off camera flash technique can still produce good results.  It just takes a bit of practice to balance a DSLR in just your right hand and maintain the strobe in your left hand pointing at your subject.  

    During our lesson I was the model allowing me to instruct Chris to point his strobe a little more this, a little more up, etc.  With practice, one can get a feel for pointing the strobe directly at the subject without having to even look at your left hand. 

    Another accidental firing of Chris' SB-600! Cool effect or just a fail shot? Make your comment below.

    For our next lesson we may try out the street portrait act that Kelley and I have done before and see who we can get to be models for us, as Chris' skills continue to improve and before he gets tired of only having me as a model for our lessons!

    DIY Lightbox Version 1

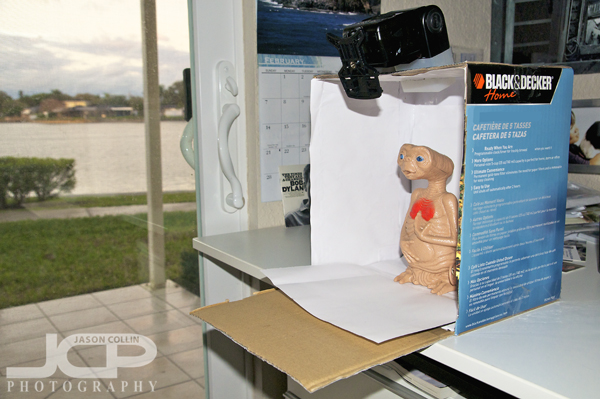
    Where did I get the idea of putting the strobe in the top like that? I already know it was a crazy idea.

    Some time ago I read a blog post about making your own lightbox and made a mental note to try it someday.  As such mental notes go they can remain in my mind for a few weeks, or even a few decades before they are actualized.  Fortunately for me Aya does not have such a lag between idea and doing, as well as a penchant for crafts.  So last week I came home one afternoon and Aya said, "tada, a lightbox."  I was impressed and excited to give it a try.  

    Somehow I got the idea that the strobe just goes into the top.  Umm, having now done an image search for "DIY lightbox" I realize that it is more important for the sides to be translucent and any opening in the top is optional.  Now I know how to get started on version 2!

    No shadows were deleted in this dead-on shot of E.T., who normally resides on my desk.

    I had no trouble choosing the first test subject for the DIY lightbox, E.T.!  I already realize that I need to pose these inanimate objects just like I would a human, otherwise the portrait comes out looking flat.  Next time I will photograph E.T. from a slight angle to add depth and a more interesting composition.

    Even at f/14, my Nikkor AF-S 105mm VR micro f/2.8G lens' DoF was too shallow to get both of E.T.'s eyes in focus.

    I definitely see now how having two light sources on the sides would make for a much better lightbox.  The light really makes E.T.'s right eye sparkle.  Getting both to shine like that would have greatly improved the image, as well as eliminated the shadow behind him to frame right.

    Apparently the Sweet Basil was so nervous to be photographed it broke out in a sweat!

    Even with just a single strobe above the subject and my D300's on camera flash, almost all shadows were eliminated, which was my first goal with this DIY lightbox experiment.  

    I learned a lot from this first try, and DIY lightbox version 2 will be greatly improved with side lighting, a single, long sheet of paper to eliminate that crease right at the base of the subject and maybe a larger box overall.  

    If you have made your own DIY lightbox please share the link in the comments below. 

    Starting the week of with a headshot

    On location ( Saint Petersburg) headshot challenging the rules of backlighting with only a SB-600!

    I started off my week by making the very short drive to downtown St. Petersburg for a headshot with Pam.  I met her last week at the new member orientation for the St. Petersburg Chamber of Commerce.  Networking pays off!  She also invited me to an exclusive meeting for select businesses in the area, with the one catch that it's at 7:15am!

    Pam was a great headshot client.  She knew how to pose without any coaching from me practically.  I just tried to find good backgrounds within her office and also out in the building's elevated walkways.  For the above shot, I thought I'd try to shoot the opposite way one would normally.  Instead of having the subject face the natural sunlight, I chose to use that light as the background.  

    For the shot below, there was this very cool orange wall in Pam's office.  Even though she has red hair, I thought I would again go against the rules and use it as a backdrop for a fun headshot. 

    A funky orange wall made for a very season autumn background.