 Engagement portrait session on Sunset Beach Treasure Island Florida - Nikon D300 Tamron 17-50mm @ f/5.6 ISO 200 1/125th - Strobist: SB-800 to frame left & SB-600 to frame rightThis past Saturday I photographed one of my family members professionally for the first time! My cousin whom I have not seen in over a decade due to living in different parts of the country moved down here to the Tampa Bay area. She got engaged and contaced me about an engagement shoot on Sunset Beach in Treasure Island Florida. I said sure, sounds great, you bring the romance and I will take care of the rest!
 Candid portrait during an engagement shoot with my cousin on Sunset Beach Treasure Island - Nikon D300 Nikkor 80-200mm @ f/6.3 ISO 200 1/200th - Strobist: SB-800 to frame right front & SB-600 to rear frame rightThey did their homework and had several photo ideas they wanted to try out, which is fine with me as I am always looking for new shot ideas myself. It was a frigid day, actually the coldest of the year, but they dressed Florida style anyway and were real pros!
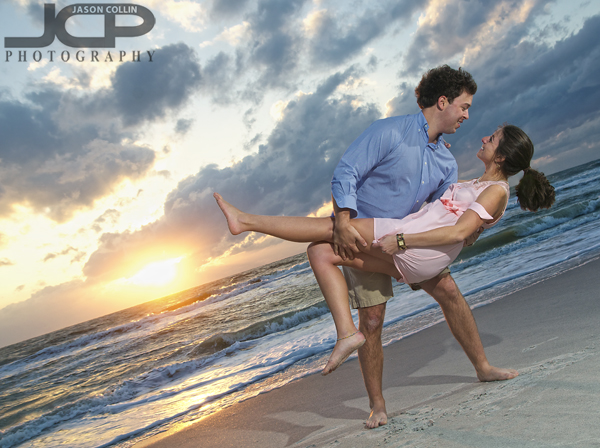
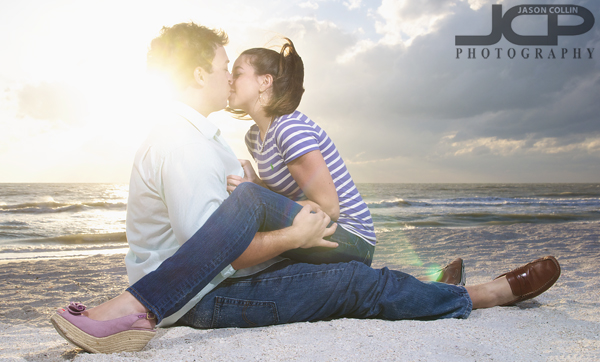 Sun melting engagement photo on Treasure Island Florida - Nikon D300 Tamron 17-50mm @ f/8 ISO 200 1/250th - Strobist: SB-800 to frame left & SB-600 to frame rightAs requested, they brought the romance allowing me to make candid portraits like the one above. I wanted to have the sun melt through the couple in this shot adding to the impact of the overall image.
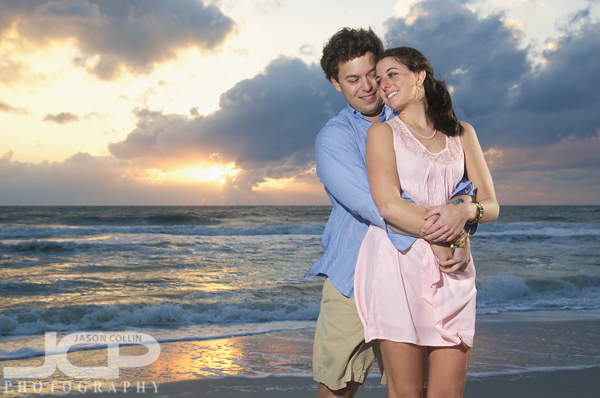 Dramatic sunset background engagement shoot on Treasure Island Florida - Nikon D300 Tamron 17-50mm @ f/5.6 ISO 200 1/125th - Strobist: see setup in photo belowBesides being cold, it was incredibly windy, but at least Mother Nature also provided a classic dramatic Florida sunset to use as a background in the photographs. I prefer there to be clouds in the sky as well, as I feel it adds more interest than if the sky were cloudless.
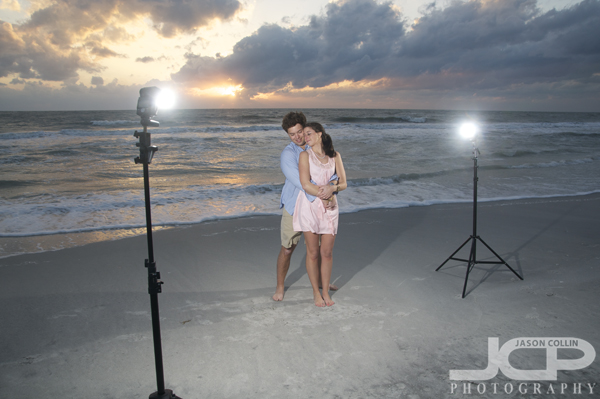 My unique two strobe setup for making my signature sunset portraits on Treasure Island FloridaI remembered to make a quick shot of my strobist setup this time. As you can see, I use two speedlights in my off camera flash technique for sunset portraits. There are just diffuser caps on the strobes as it was far too windy for an umbrella or anything like that.
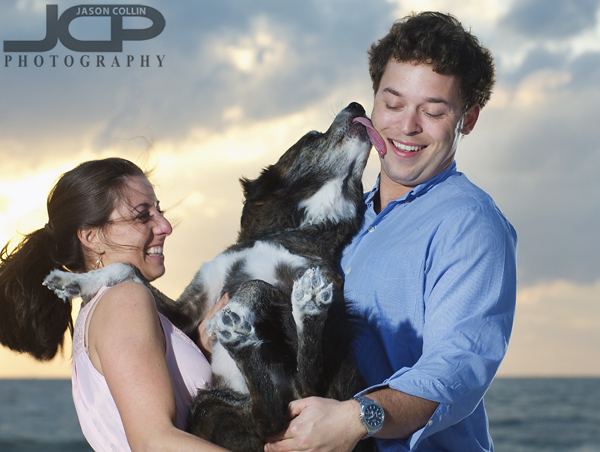 Getting a kiss from their dog during our candid portrait session - Nikon D300 Nikkor 80-200mm @ f/5.6 ISO 200 1/200th - Strobist: SB-800 to frame left & SB-600 to frame rightMy cousin and her fiance brought their dog, Bear, who was a good boy and watched patiently until it was his time to be in front of the lens where he immediately started dishing out big kisses!
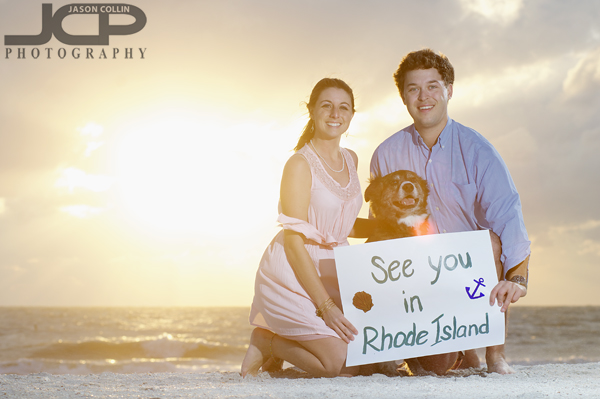 Engagement shoot in Florida, but wedding in Rhode Island! - Nikon D300 Nikkor 80-200mm @ f/5.6 ISO 200 1/200th - Strobist: SB-800 to frame left & SB-600 to frame rightMy cousin, like me, was born in Rhode Island and will have her wedding actual up in the Ocean State. It was great to reconnect with her, and her mom (my aunt) made a surprise visit too! It was a real reunion and a very fun engagement portrait session.
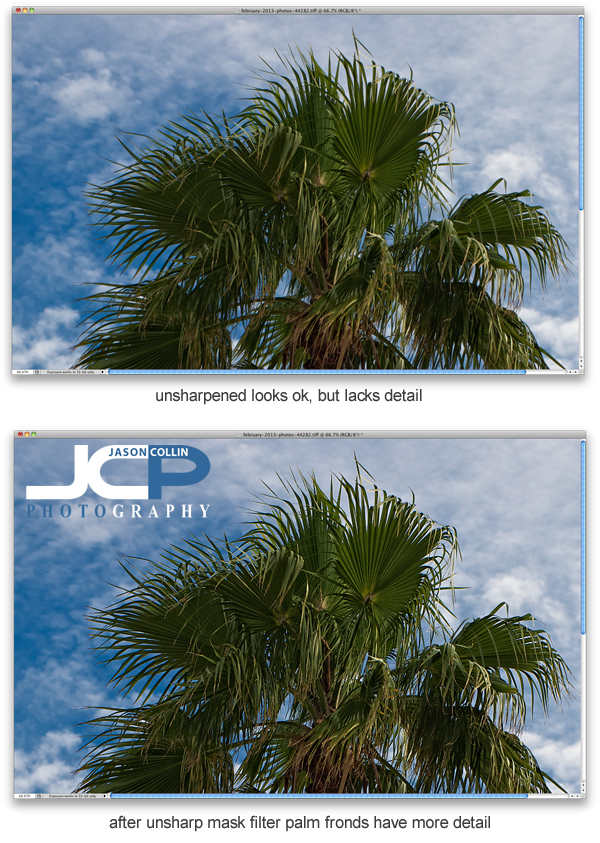
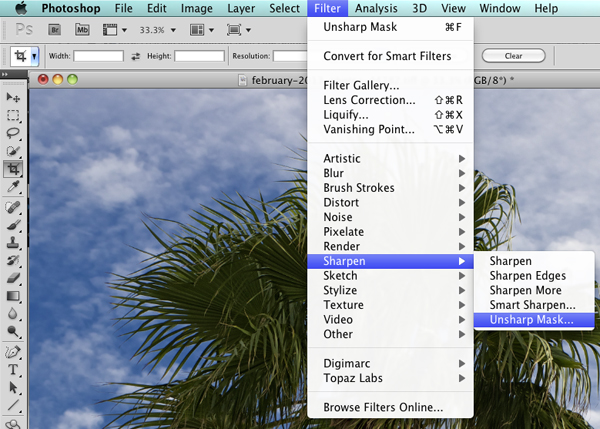
 |
 |