Photography Tips

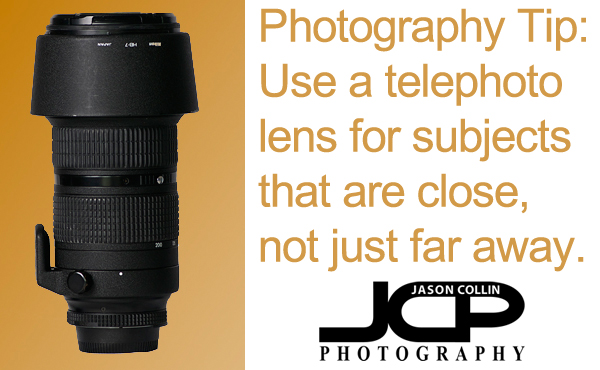
Photography Tip - use a telephoto lens for subjects that are close to you, not just far away

Many of the 155+ photography tips I have posted on my site come from the over 300+ one-on-one photography lessons I have taught over the past five years.  From a photography student's question, or from something I teach in the field, I find things that can make for a photography tip blog post.  Such is the case with the subject matter of this photography tip.  During a recent 1-on-1 photography lesson I had a student switch from a wide angle lens to a telephoto lens to help fill the frame with a subject and to make the background disappear and become bokeh.  This is something that I have had every photography student do during lessons, but only upon reading email feedback from this particular student did it occur to me that it may not be obvious to use a telephoto lens to photograph subjects that are close or even very close to you.

Using a telephoto lens for subjects that are close creates bokeh easily and adds another use for a long lens.He told me that he had not thought to use his 70-300mm lens for subjects that were close to him before, but only rather for subjects that were far away.  He went on to say this changed his entire perspective on using that lens.  Thus, I decided to make it a photography tip so that in case anyone else has not necessarily used their telephoto lens for close subjects before can do so and get the benefits of using a lens with a long focal length on a subject close to the photographer.

In the above portrait example, the model was very close to where I was standing, but I still used the lens' maximum focal length of 200mm to create a more personal composition and also of course bokeh in the background.  So try going out this weekend with your telephoto lens and photograph close by subjects and let me know the results. 

Photography Tip - turn on and use the view finder's grid display on your DSLR

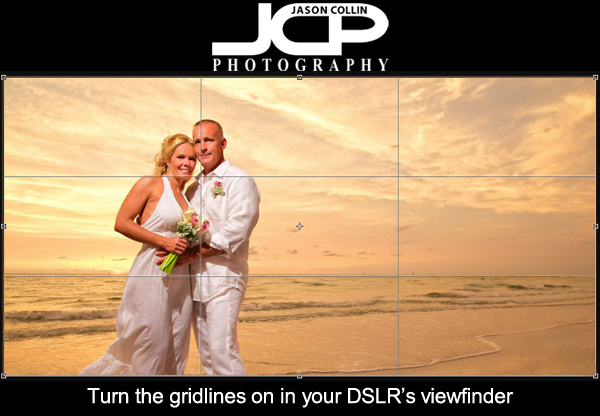
When people ask me for feedback on their photographs, one of the most common mistakes I see is a horizon that is not level.  This is a very simple thing to do and without it, the photograph is ruined.  To help get horizon's level, use the grid display in your DSLR's viewfinder.  Not every DSLR has this option, and not every DSLR that does has it on be default.  So look in your menus (for Nikon cameras check the Custom Settings Menu) to see if you can turn on something usually called "grid display."  Not only will it lay a grid over what you see so you can get horizons level, it also shows the framing for the rule of thirds.  

For the sunset portrait above, I placed the lower third grid line right on the horizon itself, insuring a level horizon.  Also note on the upper third lines interset right at the main focus point of the subjects (their heads).  This is a composition style you will see commonly in many of my photographs, even ones without people in them.  

So be sure and turn on your DSLR's grid lines in the viewfinder and get every horizon level with easy!

Photography Tip -- shoot gritty

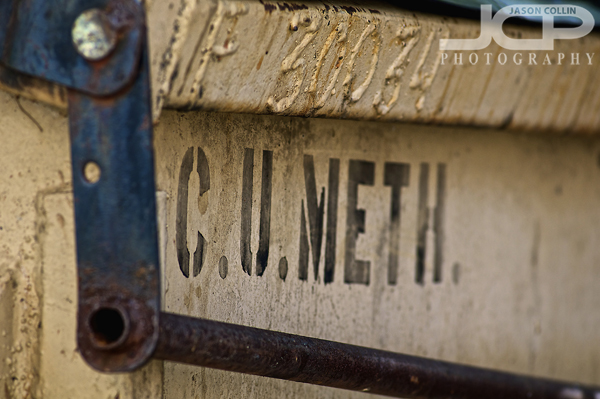
Just a coincidence in the name of this dumpster or a sly joke?It seems a majority of photographs are about beautiful subjects, like sunset landscapes, Aston Martins, flowers, etc.  Where you mostly get to see other types of photographs are in press photos.  When I lived in Tokyo, I used to always go to the World Press Photo exhibit and there I was able to see gritty photos.  

So the next time you go out shooting, try not to look for only beautiful subjects.  Go out with the purpose of photographing something gritty, something less than beautiful, something that will force the viewer to think.  

Photography Tip - turn your flash off sometimes when shooting indoors

I have recommended getting a speedlight (external flash) to many of my photography students who want to make photographs indoors.  In fact, I say it is a must have piece of gear for any photographer really.  Is use my speedlights off camera for portraits, and on camera for photographing events (where quick mobility is needed).  A speedlight is useful in so many ways for all kinds of shooting.  

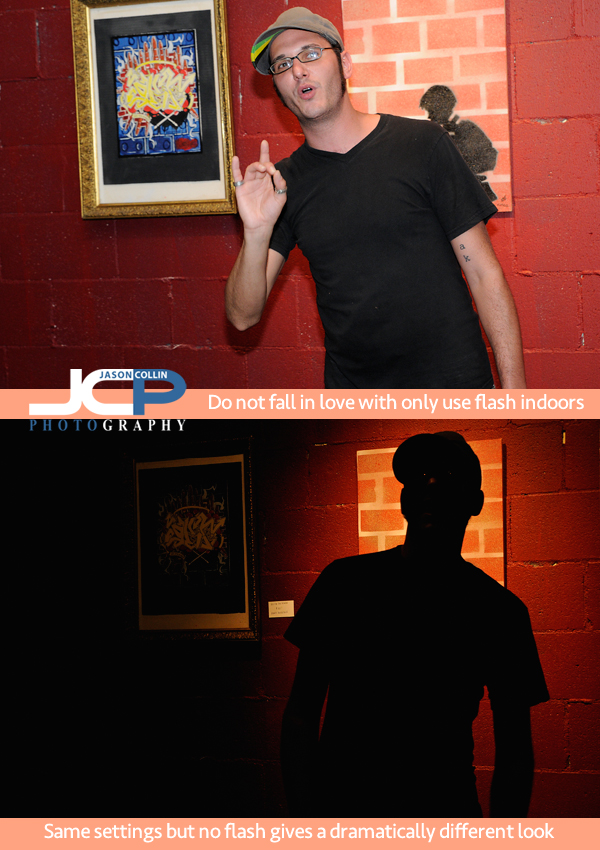
That said, a photography tip to add to your memory banks is to not fall in love with exclusively using flash for indoor event photography.  Using a speedlight for indoor event photography will produce very consistent results, which is a good thing of course.  If you are photographing a business conference where there is no need for creative shots, then keep that speedlight on.  However, for getting the most variety out of your event shooting, turn the speedlight off sometimes.  

In the above examples, the exact same camera settings were used.  In fact, the bottom photo was taken only 4 seconds after the first.  Everything about shooting was the same, except no flash fired in shooting the bottom photo.  As you can see, the photos are totally different.  Using the speedlight we can see all details in the artist and in the background.  The ambient light of the room is all but drowned out.  In the second shot we see only the slightest details of the artist and the ambient light provides a cool backlighting.  The impression the photos give the viewer end up being quite different.

Now I must confess the second shot was not done on purpose!  My flash could not recycle fast enough and simply did not fire.  Many the time though in my photography experience I have learned something from a happy accident like this.  So now when I photograph events that do not all require the uniform flashed look, I turn my speedlight off and use ambient light to create an entirely different photo.  Give this a try the next time you are shooting indoors.

Photography Tip - use harsh sunlight to backlight your subject

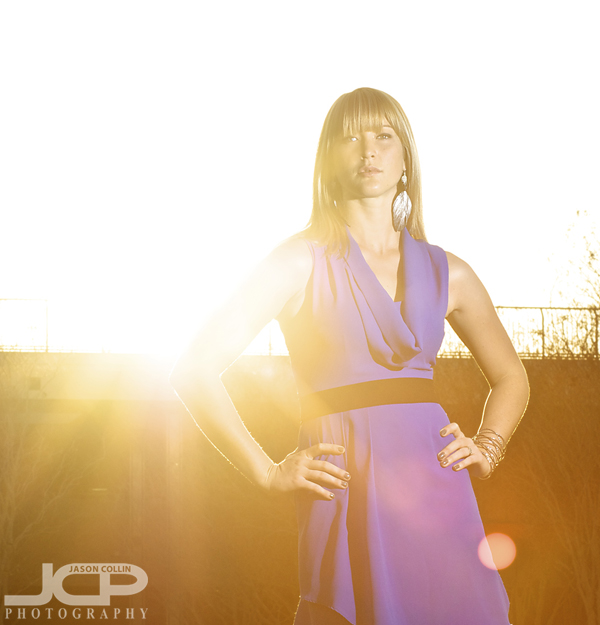
Photography Tip - incorporating harsh sunlight as a part of your photographIn Florida especially, there is often harsh sunlight to deal with when making outdoor portraits.  In the above example, I was working with a model on a portfolio shoot close to sunset time.  Having such an abudnance of light, I decided to make it an element of the photograph.  Putting the sun partially or entirely behind the subject can create a very strong, backlit effect.  Depending on your lens and position, some lens flare may be visible and add yet another element to the image.  I still used a speedlight off camera to frame right to help get enough exposure on the model then let the sun do the rest in the background.

Instead of fighting against the sun, try working with it to create unusual lighting effects in your portraits.  

Photography Tip - use a single focus point for moving subjects not filling the frame

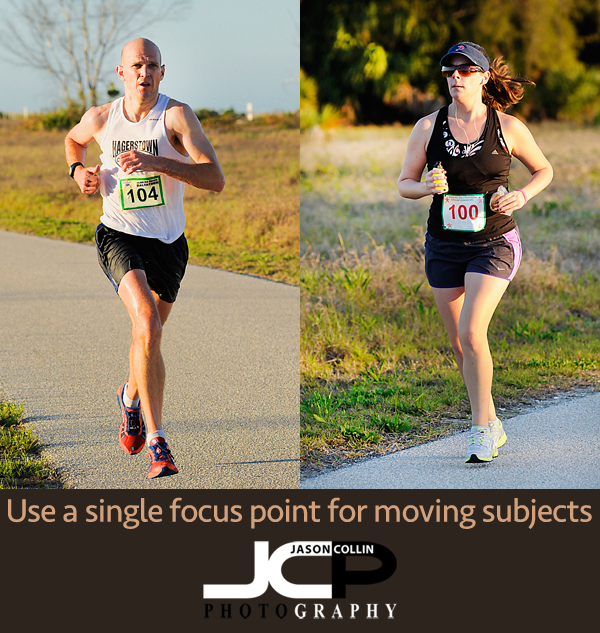
There are a number of reasons why a moving subject may appear out of focus in a photograph.  One reason could simply be because the focus point(s) were not on the subject.  For still subjects, I always use a single focus point.  For moving subjects where the subject is not largely filling the frame, even in the examples above of runners, I use a single focus point as well.  By using a single focus point (in the center) when photographing the runners I could track them as they ran past me and I knew for sure that I was getting them in focus because the only focus point available was right on them.  There was no risk of back-focusing on the background which can happen when using multiple focus points (11, 21, 51, etc).  In this case, I did not want the camera trying to pick out the subject from the background which is what happens when using multiple focus points.  I selected a single focus point, kept it center, and kept that locked onto each runner.  Of course I was using AF-C (One Shot) focus mode and a minimum shutter speed of 1/500th--the other two things needed to have any chance at freezing of moving subject in a photograph.

So if you find you are having trouble getting a moving subject in focus (or even a still subject), use a single focus point (often in the center) and put it right on the subject you want to be in focus in the frame.  

Photography Tip - leave your DSLR camera on!

If my Nikon DSLR was not on and ready I would have missed this surprise chance in Vinoy Park FloridaPoint & shoot digital cameras, especially early ones, really used up batteries a lot.  So much so that people would turn them on and off between shots all the time.  I have noticed this practice continues with some of my DSLR photography students as well.  However, with a DSLR camera, there is no reason to turn it off between shots.  These cameras automatically go into a meter-off (sleep mode) that you can choose to happen in a set amount of time, and with the meter off and the backscreen off, a DSLR uses basically no battery power.  Thus, there is no reason to turn your DSLR off until you are putting it back into your camera bag at the end of shooting.

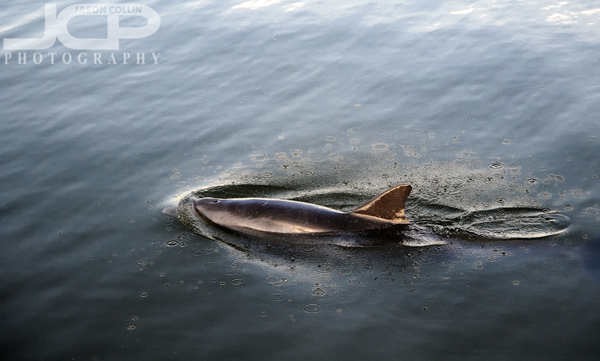
In fact, this practice of turning off the camera can lead to missing shots.  I was walking along the seawall in Vinoy Park one time and all of a sudden a dolphin surfaced right below my feet!  My Nikon was on and already set in default settings for getting a good shot in the light I was in, which allowed me to in just a split second be able to make the above dolphin photo.  Having to turn my camera on would have caused me to miss it.  Be sure and keep your DSLR on from the time you take it out of your camera bag until the time you put in back in to make sure you are always ready to capture any sudden photography opportunities.