Photography Tips

Canon 50D & 70-200mm f/4 lens 1-on-1 DSLR Photography Lesson with Ariel in St. Petersburg Florida

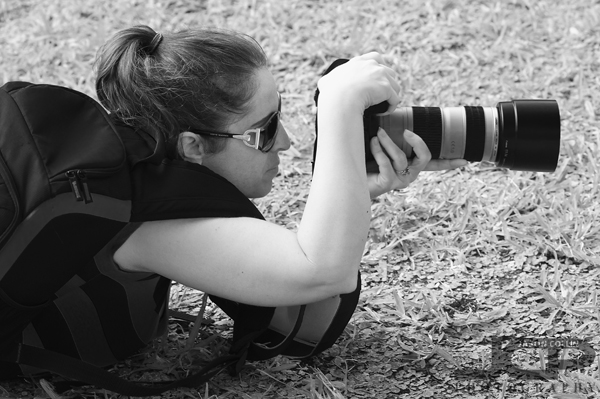
Ariel willing to get all the way down on the ground to get the shot during our 2nd photography lesson in St. PetersburgI met Ariel for our second of four 1-on-1 DSLR Photography Lessons in downtown St. Petersburg, although from there we made our way out to The Pier to photograph birds using her Canon 70-200mm f/4 lens.  We were in luck as besides the usual bunch of pelicans that are always hanging around, there was also a snowy egret conveniently standing on a box and a curious laughing gull who perched right next to us for five minutes.  In all I felt we were very lucky with bird spotting during our time at The Pier.  

In between shots we discussed what Ariel may want to branch into next with her photography, and we came to the conclusion off camera flash (strobist) is next!  I recommended the basic kit needed:  remote flash triggers, light stand and light modifier and once they are all delivered, our third lesson will be all about how to make great one light portraits.

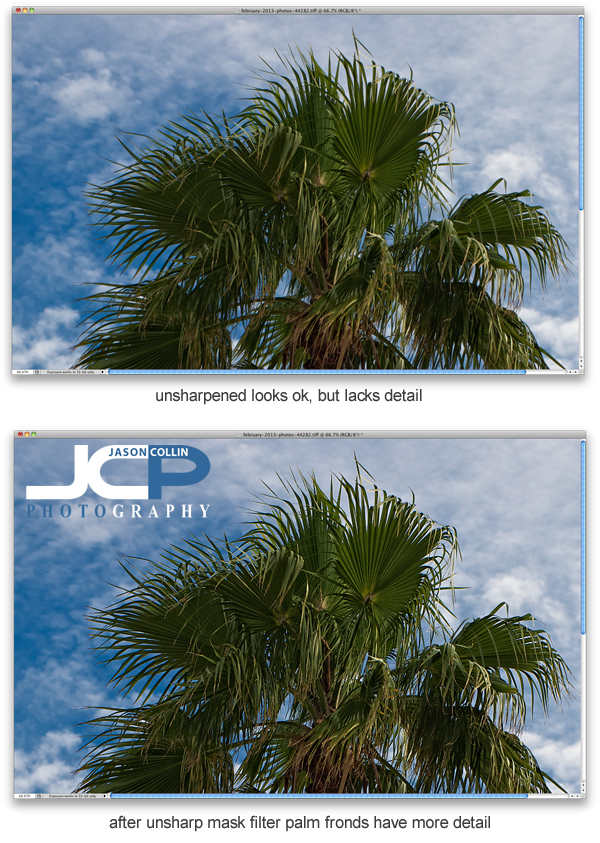
Photography Tip use Unsharp Mask for sharpening in Photoshop

Sharpening is a key part of editing digital photos and perhaps one that goes overlooked due to thinking sharpening is not needed.  On every shot I edit, I use the Unsharp Mask filter in Photoshop (I still use CS5).  In the above example of a cabbage palm tree, I did all my usual editing except sharpening.  The unsharpened image may look fine, but I know it can look better.  In the sharpened version much more detail is visible in the palm fronds, especially on the edges.  Another photography tip within a tip, I did all other editing first because sharpening should be the last thing done when editing an image.

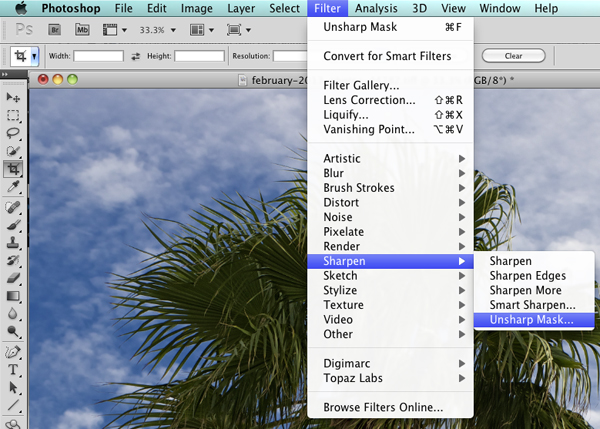
To find Unsharp Mask in Photoshop go into the Filter menu, then Sharpen, and there you will find Unsharp Mask.  I kow it sounds totally crazy to use something called unsharpen to sharpen, but that is just one of the thousands of quirks you either find charming about Photoshop or infuriating!  Note that if you used Unsharp Mask already, on a Mac you can just hit CMD-F to apply the same sharpening to the current photo you are working on.

You can see the settings I use in the Unsharp Mask filter in the above screenshot.  Radius and Threshold never change and are at settings I found I liked, though I learned these from another photographer and fine tuned them a bit.  The only setting of the three I change when applying the Unsharp Mask filter is the Amount percent.  For a very large majority of my photographs, I use 60%.  For portraits (single subject) I may use less.  For HDR shots, I may use more.  Each camera and lens may dictate more or less sharpening to be used.  

Try out the Unsharp Mask filter and let me know what you think in the comments below!

Nikon D7000 1-on-1 DSLR Photography Lesson in St. Petersburg Florida with Patricia

Practicing DoF with a 300mm lens during our photography lesson in St Petersburg Florida

On a warm February Saturday morning I met Patricia with her new Nikon D7000 in downtown St. Petersburg for our first of four 1-on-1 DSLR Photography Lessons.  She was very new to DSLR cameras, and photography in general, but my 5-step process for learning how to make a well exposed and sharp photograph works for total beginners as well as more experienced photographers.  We began the lesson with a lengthy tour of how to use her Nikon and in particular how to use the finger and thumb dials to make adjustments to the critical aperture and shutter speed settings.

In the second half of the lesson we wondered around the waterfront area practicing how to control DoF, in particular, how to make the background disappear into a nice, creamy bokeh.  This skill is very useful for portraits especially, as well as just adding a creative look to an image overall.  Using the paperboy statue out in front of the St. Petersburg Museum of History I showed Patricia how focal length and distance from the subject matters even more than using a large aperture in creating bokeh.  

For our next lesson we will head out to The Pier!

Nikon D3100 1-on-1 DSLR Photography Lesson St. Petersburg Florida with Jason

Jason using his Nikon D3100 tripod mounted for some long exposure shots on The PierWhile it is still open and still standing, I will still be using The Pier as a great location for my 1-on-1 DSLR Photography Lessons, and really cannot imagine what it will be like to not have it available come May 2013.  Friday evening I met Jason with his Nikon D3100 in downtown St. Petersburg.  He specifically wanted to practice long exposure night photography, which is fine by me as it is one of my favorite kinds.  We made our way out to The Pier and got setup on the open roof viewing area.  This type of photography of course requires a tripod because as by the end of the lesson we were using 30-second exposures, and even while there was still plenty of light in the sky (but no sun), exposures were in the 1 to 2 second range.  

In a way, night photography is kind of simple: put camera on tripod, leave shutter open, done.  Of course there are things that can be done to improve one's night photography, especially related to placement of the horizon and exactly how long to leave the shutter open.  These were the things we focused on mostly during our night photography lesson.  I look forward to seeing Jason's future long exposure shots!

Canon 50D 1-on-1 DSLR Photography Lesson with Ariel in St. Petersburg Florida

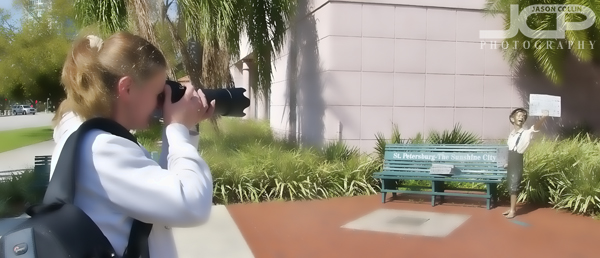
Ariel showing good form shooting with her Canon 50D during our DSLR Photography Lesson in St. PetersburgWhen I met Ariel for our first of four 1-on-1 DSLR Photography Lessons in downtown St. Petersburg, she already had good knowledge of photography terms and concepts.  I did not have to tell her that f/5.6 was a larger aperture than f/11 for example.  However, I still began the lesson with my 5-step process for making a well exposed and sharp shot in any shooting conditions.  I believe that having a set way of getting the correct exposure and focus is the key to being able to make consistently satisfying photographs.  After all, if you make a good shot, you want to know why so you can do it again, right?  

Ariel had the Canon 70-200mm f/4 L lens which we used mostly in the second half of our lesson.  I am always cautious about using a lens at its largest aperture as they can be softer than just one stop down.  As the late afternoon began to fade, being able to have a larger aperture like f/4 available was a plus, and we did a direct test to see if any sharpness was lost at f/4 compared to f/5.6.  I did not see any and was thus impressed and for any Canon shooters out there looking for a good, budget 70-200mm lens, this lens sells for about $700, which I consider a great bargain and I recommend it.

I will be meeting Ariel again on Monday to continue our photography lessons!

Photography Tip - Format memory cards to erase photos

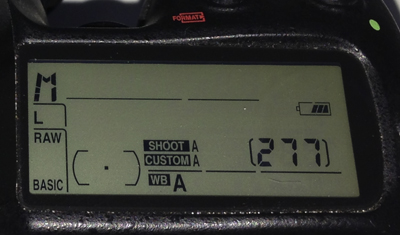
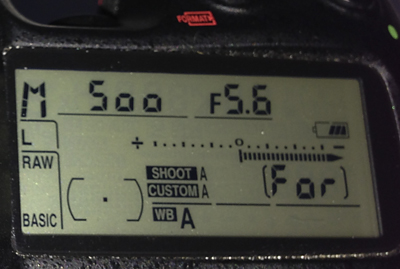
277 photos remaining on this memory card before formattingThis photography tip is about how to get photos off of your memory card once you have downloaded them, and backed them up!  The best and fastest way to do this is to format the memory card right in your camera.  This will virtually instantly delete every photo and also keep the good Nikon (or Canon, etc) formatting on your memory card reducing the chance for errors.  Many Nikon cameras make it very easy to format memory cards.  On my D300 there are two buttons you hold simultaneously (see the red format logo in the photo above).

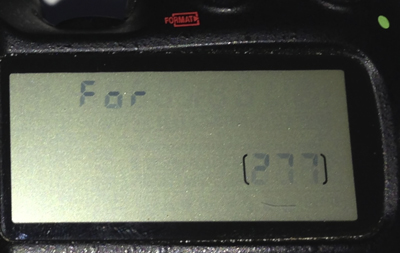
Formatting ready to be executedIf I hold the two format buttons for a few seconds, then the screen will flash "For" indicating the camera is ready to format the memory card.

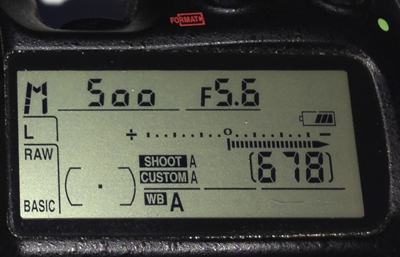
Formatting of the memory card is being done in cameraIf I press both format buttons again that will activate formatting and in the place of the remaining number of photos area of the screen, "For" will briefly be displayed.

After formatting the memory card there are now 678 shots leftIn this case formatting the memory card took my remaining photo count from 277 to a maximum available 678.  This whole process just takes a few seconds and helps keep your memory cards in good working condition.

Canon T3i 1-on-1 DSLR Photography Lesson in downtown St. Pete Florida with Jeannie

Out on The Pier with Jeannie for our second 1-on-1 photo lesson in St. Petersburg FloridaOn yet another cool Saturday morning I met Jeannie for our second of four 1-on-1 DSLR Photography Lessons in St. Petersburg Florida.  This time we went out to The Pier with her Canon T3i to photograph pelicans, and ended up finding a sailboat race and a fitness competition!  When The Pier closes in May, I will certainly loose out on one of my favorite locations for photography lessons.

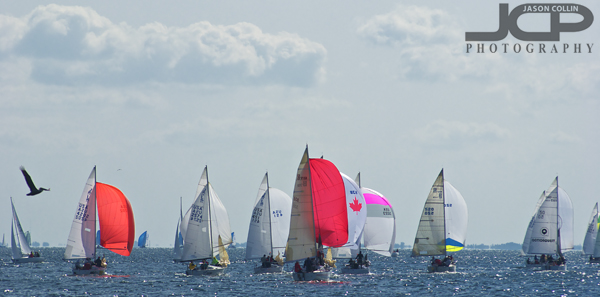
A sailboat race like this is just one of the many things that can be photographed from The Pier in downtown St. Petersburg

During this second photography lesson I helped Jeannie reinforce what she learned during our first lesson so that she can become more and more comfortable with just the physical process of getting her camera set eventually allowing for maximum concentration to be placed on composition and creativity rather than the technical aspect of getting a shot.  We made great progress!