Photography Tips

Corvette great subject bad background digital photography editing tip

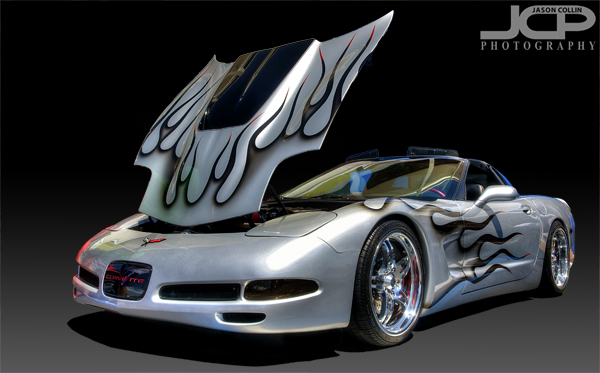
Final fully edited custom silver Corvette - Nikon D300 Tamron 17-50mm @ f/11 ISO 200 5-exposure HDR - black gradient background added digitallyWhat if you have a great subject to photograph, but a terrible background?  I tell my DSLR photography students that assuming you have a good subject, then what makes or breaks a shot, what sets it apart is the light (lighting) and the background.  For this shot the subject is a really cool custom Corvette.  However, the background was horrible and I could not use depth of field techniques to just turn the background into beautiful bokeh because the subject was too close to the background, at least if I wanted to photograph the entire car, which I did.  So, to make the shot usable I opend up my digital photographing editing toolkit.
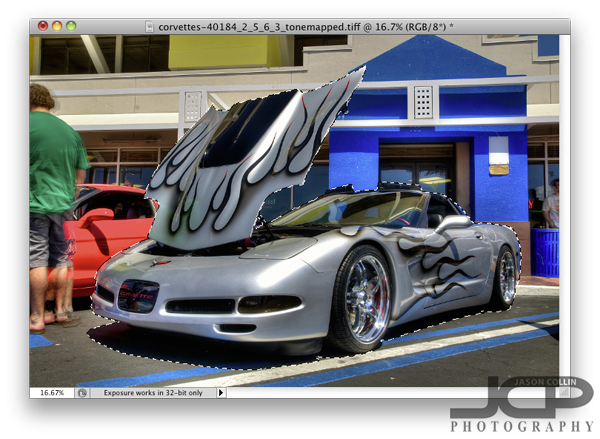
So what did I do first after processing the HDR image and do a few little minor edits?  I loaded the photo in Photoshop (I still use CS5) and chose the Quick Select (W is the keyboard shortcut) tool.  The background looks very busy and it might seem like selecting the Corvette would be difficult, but there are several factors why it was not too tedious.  One is the Corvette is a fairly distinct, blocky object, no lone thin parts or openings.  Second, none of the surrounding colors are similar to the Corvette itself.  The hood did take a little fine tuning to get selected, but other than that it was not too bad.  Notice I selected the naturally existing shadow under the car too.  Once finished I clicked on the Refine Edge option up in the Quick Select menu bar.
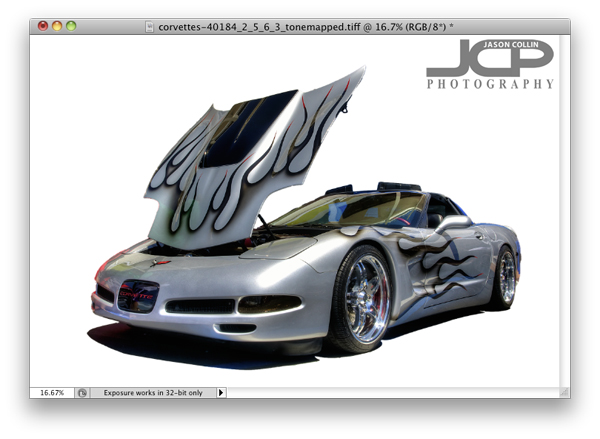
In the Refine Edge window you can clean up the extra bit of edging that you do not want as well as export just the selected subject to a new layer, which is what I always do.  Once that is done, I add a new layer to use as a background that I can paint any color.  I usually choose white first to see how it looks and also to make sure I really cleaned up all the edges.  I liked the white background, so I saved a JPG from the PSD project.
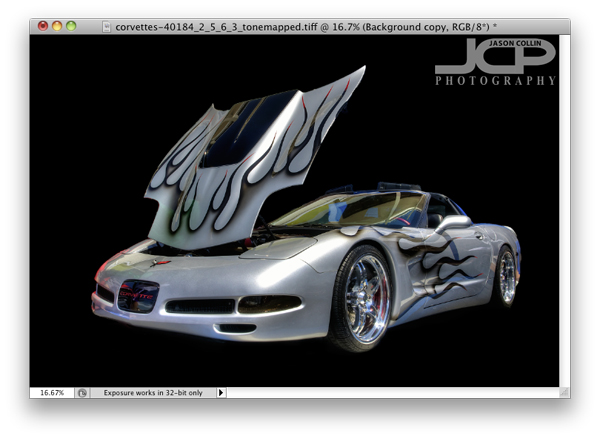
Next I just painted over the white background with the Brush Tool at 100% opacity black.  Right away I liked the black background better as I thought it made the silver Corvette pop out.  The black background caused the shadow to become invisible and kind of made the shot look a little two dimensional, so the final touch was adding a 40% opacity vertical gradient only from the mid-height point of the image.  

This process can of course be used for any subject with a variety of digital or real backgrounds.  So the next time you see a really cool subject, but are disappointed by the background, be sure to still make the shot in the field knowing you can using a few Photoshop techniques to produce a final image you will be happy with.

1/500th sec minimum shutter speed for action shots moving subjects - photography tip

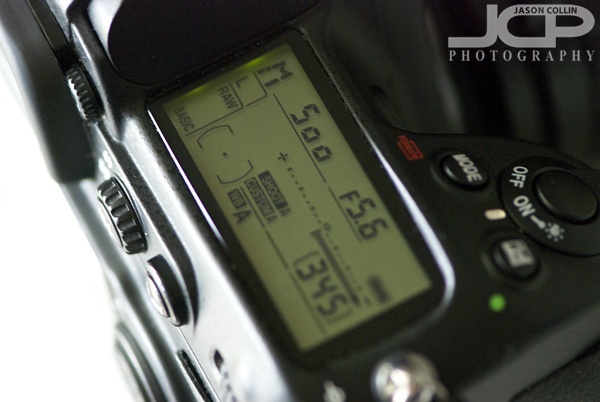
1/500th of a sec is the minimum shutter speed I feel comfortable shooting action shots with.When you shoot in manual mode or shutter priority mode, you have to set the shutter speed on your DSLR.  Of all the things you can set on your DSLR, shutter speeds have the most choices.  On my Nikon D300 I can choose from the fastest setting of 1/8000th of a second to essentially infinity (bulb mode).  So how to decide which shutter speed to use?  This week's photography tip is for choosing a minimum shutter speed for action shots or shots with moving subjects. 

  • 1/500th of a second minimum for any kind of moving subject/action shot

For me, I only feel comfortable with a minimum of 1/500th of a second when photographing anything moving.  You may be able to get away with a little slower shutter speed for not so fast moving subjects, but 1/500th of a second gives me confidence that I will freeze most action.  1/500th is the minimum though because for faster moving subjects like competive cyclists, excited dogs, etc, then even faster shutter speeds may be required.  Basically, for anything happening in your own backyard, 1/500th should be fine.  Now you have a starting point for setting your shutter speed for action shots.

Do not use in camera black & white setting - photography tip

I am following up last week's black & white photography tip with yet another this week.  Many digital cameras have the option to shoot in black & white right from the camera.  This may sound very convenient, but as usual with convenience there comes a trade-off, in this case less image data.  To illustrate this I set my Nikon D300 to shoot in monochrome mode for the shot on the left and then in standard mode for the shot on the right, which I then converted to black & white in Silver Efex Pro.  Both photos were large, fine jpg.  As you can see, the converted image contains a half megabyte more of data (12.8% more).  The difference in the amount of data will vary from shot to shot, and in this case it is a bit of a smaller difference, but you will always end up with more data by converting the image to black and white.  What that means is a better final image quality, especially for prints.

Other reasons to always shoot in color and then convert to black & white later include:

  • Silver Efex Pro allows for much more variety of black & white conversions
  • You may actually like the color image better
  • The color image can be shot in RAW

So I highly recommend always shooting in standard mode, and then later converting images into black & white using a powerful app like Silver Efex Pro to produce the best looking black & white images possible.

One factor for making a photograph a black & white final image

I chose black & white processing for these tires as the subject matter lacked colorIf someone asked me how do I decide to process a photograph as black & white, rather than leaving it as the original color image, I would say the main factor is the amount of color in the original.  If the original image itself lacked a wide color pallette, or virbrancy, then I would start to consider converting it to black & white.

The original color image on the left was not very colorful, so I decided just to remove all the colorIn the side-by-side comparision shot above, the origianl color images of the tires was nearly devoid of color, save for a little green coming through the fence.  Also, the main subject, the tires, were already themselves black, thus the photograph presented itself as a good candidate for black & white processing.  

So if you have a photograph without much color pop in it, think about converting it to black & white as a way of best presenting the image to the viewer.

Bring only one lens - photography tip

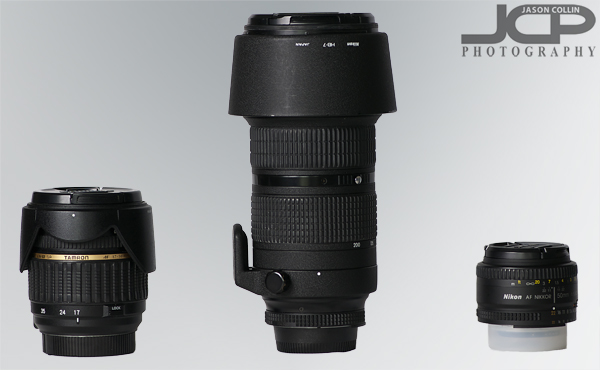
My own well used lenses, from left to right: Tamron XR Di II 17-50mm f/2.8 -- Nikkor AF ED 80-200mm f/2.8D -- Nikkor AF 50mm f/1.8DMany people start out with just one lens.  Then, if they are like me, they almost immediately start thinking about what lens to get next!  In total, I have four lenses, the ones you see pictured above and the one I made the photograph with (Nikkor AF-S 105mm VR micro f/2.8G).  When I go on a portrait job I often bring all four, though I usually only have time to use three of them.  When I go to an event job, I usually only bring two (80-200mm & 17-50mm).  

However, when I go out shooting just for myself, I almost always only bring one lens.  Why only bring one lens when I could bring four?? 

  • One lens helps me focus on making one type of photograph
  • One lens let's me travel light using my small camera bag
  • One lens means I have to be more creative

I think those are three pretty good reasons for going out sometimes with just one lens, especially to an area you frequent often and can go back and make a different kind of shot.  Of course you can bring one lens that covers the focal length of all those lenses above (18-200mm lens), but that can lead to scatter shooting and lack of focus, the first benefit aobve.  The first lens I actually ever owned was an 18-200mm lens.  I sold it within two months for the two lenses you see pictured left & center.  

Go out next time with just one lens, have a focus in mind, choose your lens based on that targeted focus, then in the comments below tell us about the experience.

Using a collapsible background to make a home photography studio St. Petersburg Florida

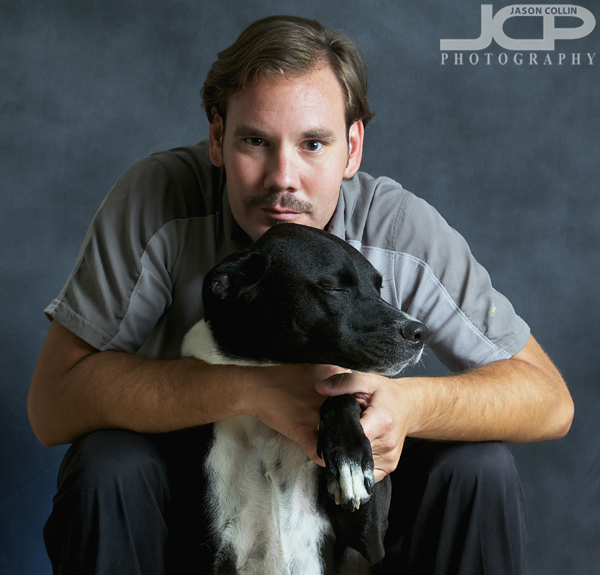
Kiki & I in a self-portrait featuring my new Botero Collapsible Background - Nikon D300 Tamron 17-50mm @ f/5.6 ISO 200 1/60th - Strobist: SB-800 in brolly to frame right & SB-600 pointed up at background with blue gel and HONL snoot (open)I am always looking to improve the range and quality of photography products I can offer to clients.  In the pursuit of this I invested in a collapsible photography background (view on bhphotovideo.com) that measures 5'x7' is neutral to dark gray and folds up like a car sunshade into a circle when not in use.  Such a background allows one to setup a small studio space virtually anywhere, including your own living room.  

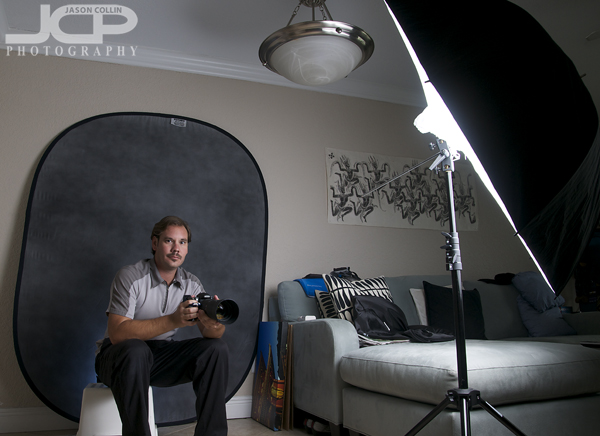
My new home studio setup featuring a 43" brolly on a light stand, 5'x7' collapsible background & gelled speedlight (behind me)The collapsible background does not require any special holder or stand.  I simply took a canvas print off the wall and rested the background up against it.  It took a little fiddling and flipping it over to get it to stay in the space I wanted it too, but all-in-all a pretty easy setup.  The background is easily big enough for two people, and maybe three or more depending on how they are posed.

This self-portrait headshot took MANY takes to make!If you like to make portraits and do not have the space to maintain a dedicated photo studio in your home, then my photography tip is to invest in a collapsible background that can be used in any room in the house and easily taken over to the homes of friends and family too.

Use DSLR self-timer on a tripod photography tip

Use the self-timer on a tripod to reduce shake after pressing the shutter on a DSLRLast week I wrote at length about the benefits of using a cable release when mounting your DSLR on a tripod.  What if you do not have a cable release?  How can you then eliminate camera shake from physically pressing the shutter button?  You can use the self-timer function on your DSLR.  By setting the self-timer to activate the shutter, the camera can come to rest again on the tripod after pressing the shutter to activate the self-timer countdown.  

I have read that some photographers do not believe that 2-seconds is long enough for a camera to completely stop shaking.  2-seconds is typically the first setting for a self-timer.  I have not done my own experiments to see if that is just some serious nitpicking or if shake does still linger.  Given that the next setting for a self-timer on a DSLR is usually 10-seconds, that is quite a long time to wait!  If your DSLR has an option for 5-seconds, that seems like the best choice.