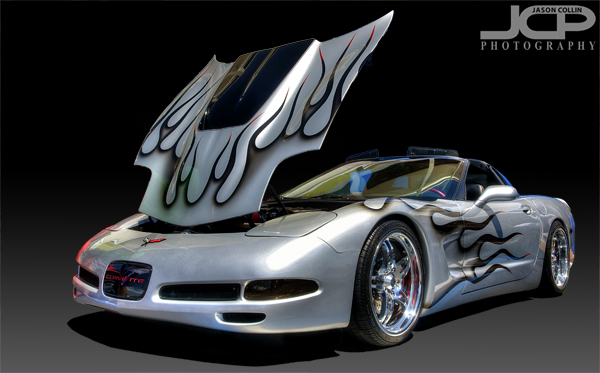
 Final fully edited custom silver Corvette - Nikon D300 Tamron 17-50mm @ f/11 ISO 200 5-exposure HDR - black gradient background added digitallyWhat if you have a great subject to photograph, but a terrible background? I tell my DSLR photography students that assuming you have a good subject, then what makes or breaks a shot, what sets it apart is the light (lighting) and the background. For this shot the subject is a really cool custom Corvette. However, the background was horrible and I could not use depth of field techniques to just turn the background into beautiful bokeh because the subject was too close to the background, at least if I wanted to photograph the entire car, which I did. So, to make the shot usable I opend up my digital photographing editing toolkit.
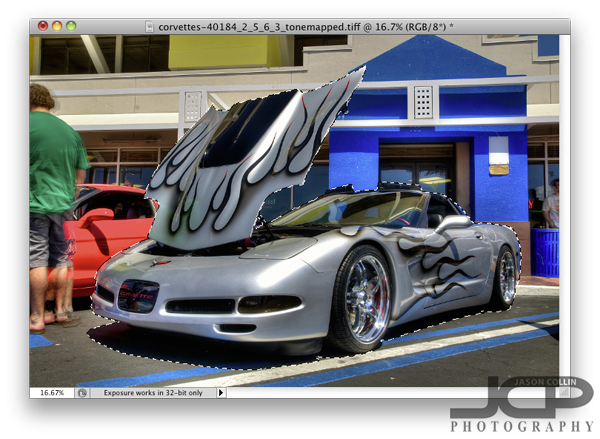
 So what did I do first after processing the HDR image and do a few little minor edits? I loaded the photo in Photoshop (I still use CS5) and chose the Quick Select (W is the keyboard shortcut) tool. The background looks very busy and it might seem like selecting the Corvette would be difficult, but there are several factors why it was not too tedious. One is the Corvette is a fairly distinct, blocky object, no lone thin parts or openings. Second, none of the surrounding colors are similar to the Corvette itself. The hood did take a little fine tuning to get selected, but other than that it was not too bad. Notice I selected the naturally existing shadow under the car too. Once finished I clicked on the Refine Edge option up in the Quick Select menu bar.
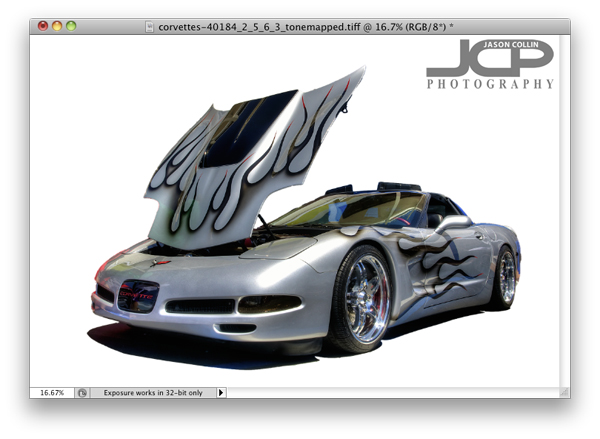
 In the Refine Edge window you can clean up the extra bit of edging that you do not want as well as export just the selected subject to a new layer, which is what I always do. Once that is done, I add a new layer to use as a background that I can paint any color. I usually choose white first to see how it looks and also to make sure I really cleaned up all the edges. I liked the white background, so I saved a JPG from the PSD project.
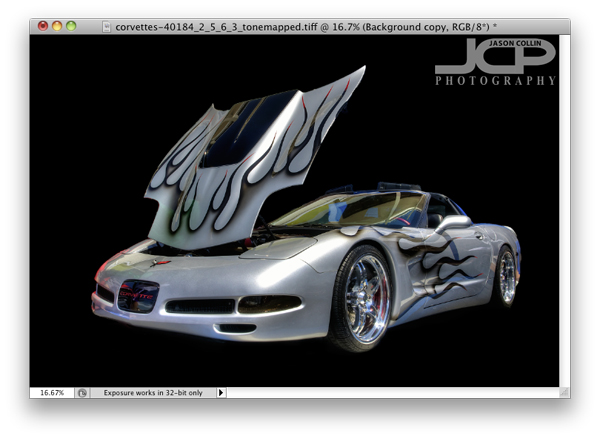
 Next I just painted over the white background with the Brush Tool at 100% opacity black. Right away I liked the black background better as I thought it made the silver Corvette pop out. The black background caused the shadow to become invisible and kind of made the shot look a little two dimensional, so the final touch was adding a 40% opacity vertical gradient only from the mid-height point of the image.

This process can of course be used for any subject with a variety of digital or real backgrounds. So the next time you see a really cool subject, but are disappointed by the background, be sure to still make the shot in the field knowing you can using a few Photoshop techniques to produce a final image you will be happy with.
 |
 |
