Photography Tips

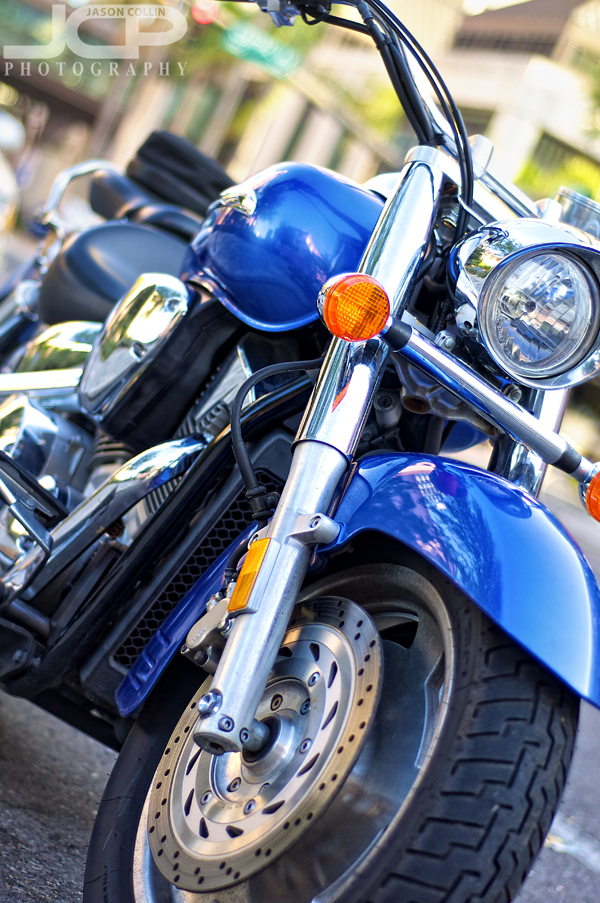
St. Petersburg Florida Motorcycle Photography - do not shoot the whole bike

Still motorcycle photographed to appear in motion - Nikon D300 Nikkor 50mm f/1.8D @ f/2 ISO 200 1/320th 

I have written before about how I like to photograph motorcycles just for fun.  It often turns out when I come across a motorcycle that I have my Nikkor 50mm f/1.8D lens on my DSLR (or is it that having the 50mm lens on makes me look for motorcycles to shoot?).  For a motorcycle parked on the street it would be pretty hard to fit the entire bike from wheel to wheel in the frame given the contraints of shooting at 50mm and of neighboring objects intruding into the edges of the frame and the background as well.

So my photography tip, that does not just apply to motorcycles but any large or unwieldy subject, is do not photograph the entire subject.  Rather fill the frame through the edges of the frame wiht the view of the subject that appeals to you the most.  It helps to use a 50mm lens and its large aperture for this kind of shot because it is easy then to create bokeh even if the background is close to the subject.  In this way you can still isolate your subject letting the viewer know absolutely what it is they are looking at.  

For this motorcycle shot I did not even worry about getting the entire front wheel in the frame, I definitely wanted the brake rotor in the shot and to compose at an off-level angle to help create a sense of motion with the motorcycle even though it is parked on the side of the road.  

Practice this kind of composition on a motorcycle the next time you see one or on another similar object and be sure and post a link to your results in the comments below.
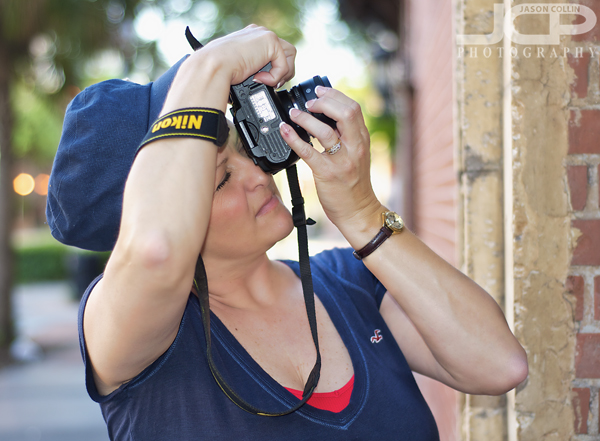

Nikon D5000 50mm lens 1-on-1 DSLR Photography Lesson in St. Petersburg Florida with Angela

Angela using her new 50mm lens to photograph architecture details in St. PetersburgSince our first 1-on-1 DSLR Photography Lesson in April, for our second of four lessons, Angela brought with her two new not insignificant pieces of gear, a 50mm lens and the Nikon SB-700 Speedlight.  These two items are actually by far the most popular pieces of photography gear that my students have purchased first over the past three years.  They are the least expensive ways to radically change the kinds of photographs one can make.  

We started out the lesson practicing with the 50mm lens where I told Angela I look for the background perhaps even more than the subject when using my 50mm lens because I want the best possible bokeh in my 50mm shots.  Lights of course easily make for cool looking bokeh, but also spectral slight coming through tree branches can create the same look.  

For the last half of our 2-hour lesson Angela put her SB-700 on her Nikon D5000 and we practiced flash portraits at sunset and twilight time as our lesson went until 8:30pm, well after sunset.  By manually setting the power on the SB-700 it was clear that TTL mode was choosing too much power making the subject (in this case, me!) look too "flashed" in the portrait.  Manually setting the power allowed Angela to make a portrait of me that looked much more natural balancing the exposure on the subject with the background exposure so that neither seemed to stand out from the other.

Perhaps by our fourth lesson we will get that flash off the camera for some strobist portraits!

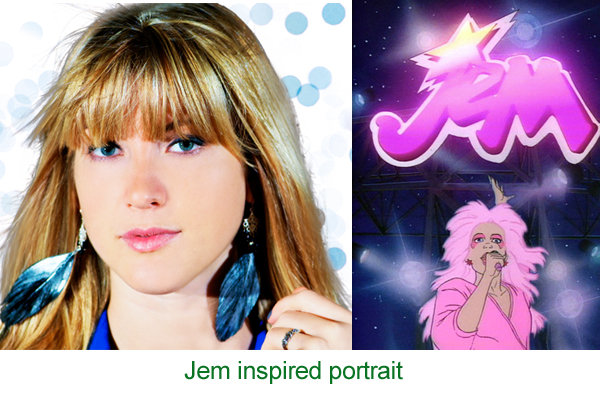
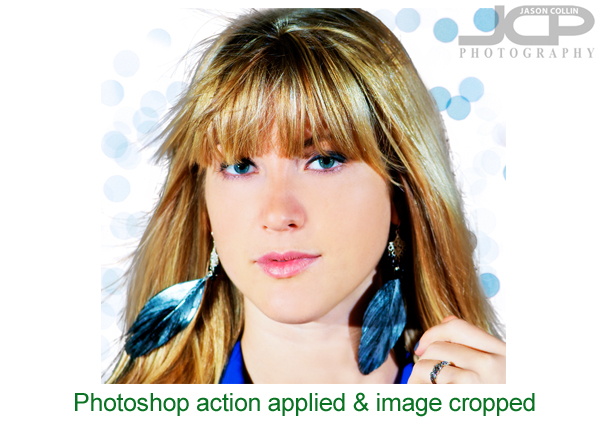
Model headshot edit inspired by Jem the cartoon series

This editing style was inspired by the Jem cartoon series! -- Model: AbbyI was going through Netflix's always woeful list of new releases when I saw that the cartoon series Jem was now available.  I remember watching this cartoon in the 80s because of the vivid pastel colors and style of the animation.  So this afternoon I went about converting one of my own photographs into a Jem-style image.

The above is my final image next to a photo of Jem (source Wikipedia).  Maybe long before I saw Jem in Netflix I had a subconscious thought to convert the shot of model Abby into a Jem-style one as I did not really like how I originally shot the photo, but I kept it lying around for some reason.  

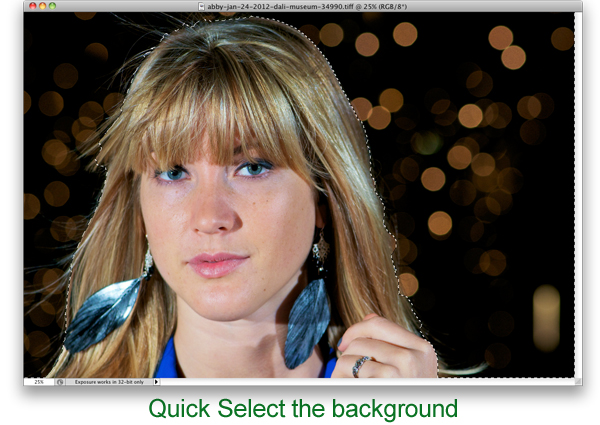
The first thing I did was to load the original image (see above) into Photoshop CS5.  Well, actually before that I did some slight warming to the image in Aperture 3 via Nik Color Efex Pro 3.

In Photoshop using the Quick Select Tool (W) I selected only the background of the image.  I did then click on Refine Edge to make the border along the hair look more natural and less choppy.

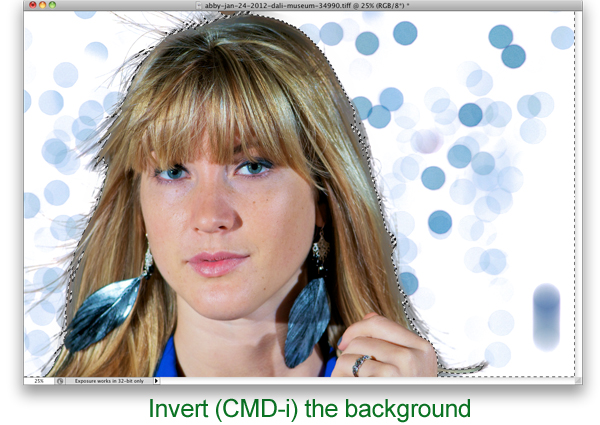
The next step was the key one and really how I thought I would go about making the photograph look more Jem-like and I knew how to do it entirely because of making mistakes in the past with my keyboard shortcut usage.  I always use CMD-SHIFT-I to resize images before I post them on this site and Facebook, etc.  Sometimes I end up hitting just CMD-I which is the Invert command in Photoshop.  Since only the background was selected, only the background became inverted going from black to white and the bokeh from yellow to purple, which to me is much more Jem-like!

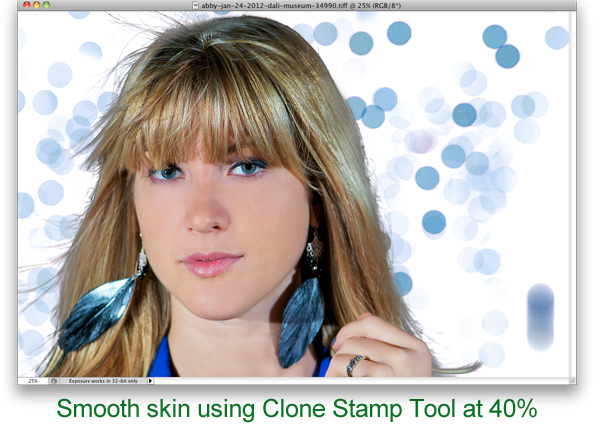
Next to clean up the image and make the model look more like Jem does, I used the Clone Stamp Tool (S) at 40% opacity and just sampled an area then brushed over that same area repeating as skin tone and texture changed for each part of the face.  This is the quickest and easiest way I know of for smoothing skin.  Note, I did not say it was the best, just the quickest and easiest.

To further the smooth and glowing look that Jem has, I used a free Photoshop action available here.  That completed the look.  I did not intend to tightly crop the image, but after all editing was done I thought a tighter crop was a better way to feature the image.  I just hit C in Photoshop to bring up the Crop Tool.  

Try this Jem-style process out on one of your photographs and post a link to the results in the comments below!

Hillsborough River State Park Relaxing with Canine & Human Friends

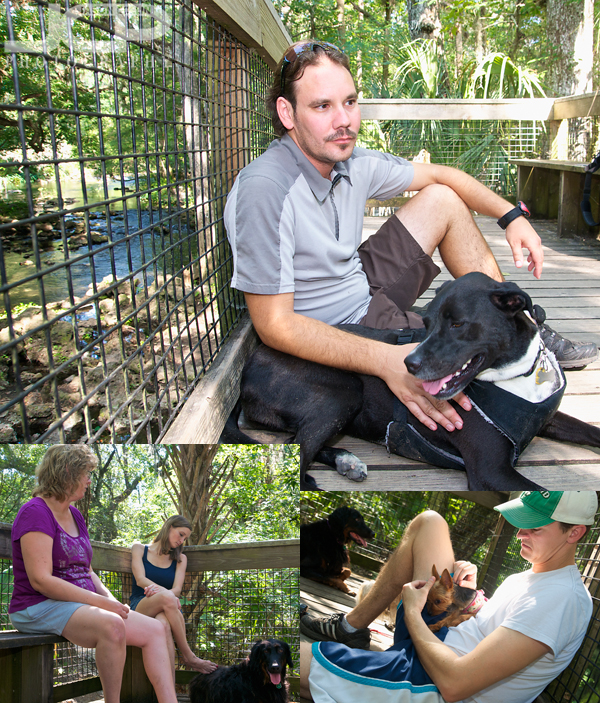
Relaxing at Hillsborough River State Park with canine & human friendsIf you make the effort with your photography, you will be rewarded.  Sometimes that effort just comes from physically lugging your gear with you when you might feel like just leaving it at home or in the parking lot.  I met some canine and human friends yesterday at Hillsborough River State Park, a very dog friendly place that is also one of the best nature experiences in the Tampa Bay area.  Many parks do not allow dogs on boardwalks, but in HRSP they have free reign.  So four people and as many dogs were able to roam the banks of the Hillsborough River, walk through the slash pine forest and later relax hig above the river and just enjoy the view.  

Certainly it was a bit of an effort to carry my Nikon D300, Tamron 17-50mm lens and Nikon SB-600 Speedlight flash on this 2-hour trek, but not that much because I only brought one lens.  I knew ahead of time that the kind of shots I would want to make would require a wide lens.  So to save weight and my back I brought the minimum amount of gear to be able to make those shots.  Why bring the flash?  For fill light in all those three shots above.  They just would not have turned out as well exposed and lit without it.  

So since I made that bit of effort to carry that minimum gear with me, I will have forever visual aids to help me remember that afternoon spent with great canine and human friends.  

My photography tip to you is:  yes, do make the effort to bring your DSLR with you, but help yourself by bringing just the one lens you know you will use for the shots you want to make.

  • Read more photography tips
  • Reserve your own 1-on-1 DSLR Photography Lesson with Jason today!
  • Get great candid portraits of you and your dog! 
  • Canon 60D 1-on-1 DSLR Photography Lesson in St. Petersburg Florida at Dali Museum with Julie

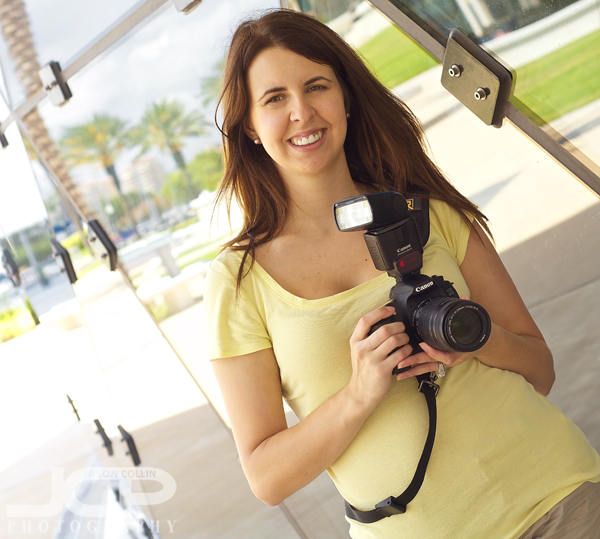
    Julie with her new Canon 430 EX II Speedlight & her Canon 60D during our photography lesson at the Dali MuseumI chose the new Dali Museum as the location for the fourth of four 1-on-1 DSLR Photography Lessons with Julie, who since our last lesson got a new external flash, the Canon 430 EX II Speedlite.  I was glad to hear that Julie has been regularly practicing her photography and even had a chance to make maternity portraits of two of her friends.  She told me that photographing people is hard!  I cannot disagree, but I also think photographing people is the most interesting and one of the best ways to really push yourself as a photographer.  

    We started this morning's lesson with more 50mm lens practice using the great tree in the rear ground of the museum.  The tree has ribbons all tied to it with messages (see third photo from the top here).  Julie really liked the tree.  It makes for a very interesting subject both from an abstract shooting standpoint and also as a prop when making a portrait.

    Then Julie attached her 430 EX II to her 60D and we went over to the Mahaffey Theater where I showed her how the angle of the light from the flash effects how portraits turn out.  Even in those outdoor conditions, although in the shade, it was very apparent that being able to bounce the light off of a side or rear wall produced the best results, as compared to pointing the flash directly at the subject.  

    Julie is interested in learning off camera flash so I look forward to seeing her for another four lessons over the summer.  I will be looking forward to it!

    Try street photography for making memorable shots of cities

    Street photography portrait of a girl on the streets of Takadanobaba, Tokyo, Japan - one of my personal favorite shots of all timeThe above photograph is one of my personal favorites that I have ever made.  It is the kind of photograph that may appeal only to the photographer who took it.  The reasons I can give for why it is a personal favorite would be, after all, personal.  I do not know the girl in the photograph.  I will never return to the city I made this photograph in.  However, they combine to make a photograph that reminds me of my time in Tokyo more than a photo of even Tokyo Tower.  Much of my time in Tokyo was spent out on the street.  In that city you walk, a lot.  You are also always surrounded by people on the streets.  In my last year there I bought my first DSLR and often had it with me.  I then realized I loved street photography.  I made this street photography portrait on one of the very first times I used my newly obtained Nikkor AF ED 80-200mm f/2.8D lens.  It was the first time to have a f/2.8 lens and immediately I was blown away by the bokeh it could make at f/2.8 and 200mm, and in particular the bokeh in this image.  I can still recall seeing this photo first pop-up on the review screen on the back of my Nikon D80.  It was the beginning of my street photography career.

    So my photography tip is this:  to help you remember the city you are traveling or living in, try street photography.  Those images may come to have more meaning to you in the years that follow than the best landmark photograph you took. 

  • Read more photography tips
  • Reserve your own 1-on-1 DSLR Photography Lesson with Jason today!
  • Learn more about the lessons
  • Motion blur for creating background interest - Japanese temple statue

    Using a slow shutter speed to create motion blur in the background - Nikon D80 Tamron 17-50mm @ f/2.8 ISO 400 1/40thI made the photgraph above three and a half years ago, still early in my DSLR photography career while I was living in Tokyo, Japan.  I noticed the wind catching and spinning this fan around like crazy.  I knew I wanted to juxtapose the stillness of the statue with the manic motion of the fan.  To accomplish this I needed to set a shutter speed slow enough to blur the fan blades, but not too slow that I could not handhold the camera steady enough to keep the statue looking sharp.  

    I found that 1/40th of a second shutter speed produced enough motion blur in the fan without camera shake causing overall image bluriness.  If I had a tripod with me it would have been a simpler shot to execute.  It was actually lucky that there was a lot of shadow in this part of the temple garden which allowed me to use f/2.8 to try and produce a little bokeh, even though I was using a wide angle lens.   

    So this weekend my photography tip and homework assignment is to go out and see if you can find some background object to catch in motion blur while maintaining a sharp, in focus subject.  Put a link to your photos in the comments below! 

  • Read more photography tips
  • Reserve your own 1-on-1 DSLR Photography Lesson with Jason today!
  • Learn more about the lessons