Photography Tips

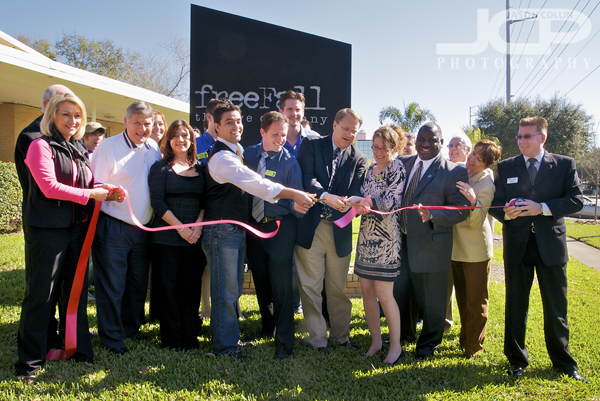
freeFall theatre company ribbon cutting St. Petersburg Florida

St. Petersburg Mayor Bill Foster helps Eric Davis of freeFall theatre company do the ribbon cutting in St. PetersburgOn a bright and sunny Tuesday morning the new freeFall theatre company of St. Petersburg, Florida had its ribbon cutting on the front lawn with assistance from St. Petersburg Mayor Bill Foster.  As you can see by the direction of the shadows, I had to shoot almost directly into the sun, which of course meant having to definitely use manual settings to insure the exposure was long enough to be able to see some details amongst the group and try not to just totally blow out the sky.  Using my Nikon SB-800 Speedlight as fill flash, I was able to produces a satisfactory exposure.  
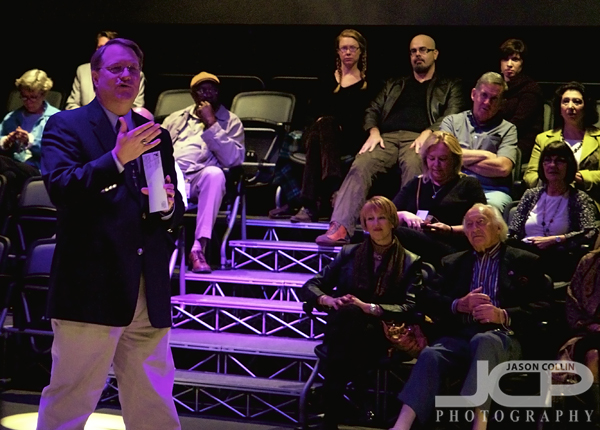
St. Petersburg Mayor Bill Foster addresses a packed freeFall theatre before the ribbon cutting.Before having to deal with too much light, I had to deal with far too little light inside the darkened theatre itself.  The purple hues are due to the colored lights being used to light Mayor Bill Foster and the packed stands of attendees.  This was not a situation where flash was allowed so that meant cranking the ISO up to 1600, setting the aperture to f/2.8 and using a steady a shooting stance as I could in the crowded conditions as I let shutter speeds dip to as low as 1/40th of a second making sure to shoot when the mayor froze his stance, otherwise even just a slow walk would lead to a blurred image at 1/40th of a second.
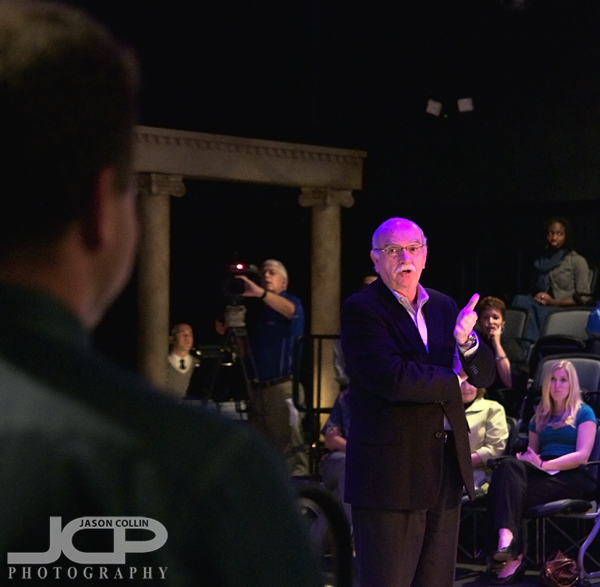
freeFall theatre company interior "Frogs" set - f/2.8 ISO 1600 1/40th handheld no flashSeveral people spoke and had the crowd quite energized.  I was ready to see a full performance!  We were treated to a small performance showcasing the current, impressive cast of The Frogs.  Long ago when I was a USF student there was a brief period where I frequented a number of Tampa playhouses.  I would like to again, but it seems ticket prices have gone up significantly since the 90s!

freeFall theatre company Eric Davis shakes hands after the ribbon cutting ceremonyIt is certainly not often one shoots in such extremely different light conditions in a span of five minutes.  That is just part of being a professional photographer, being able to adapt to wildly varying shooting environments in minimal time with the ability to produce consistent results regardless.  Lots of shooting experience in lots of situations gives one the confidence necessary to do this.

DSLR Photography Lesson with Damian & his Pentax K-7

DSLR Photography Lesson in St. Petersburg Florida - Damian & his Pentax K-7On a chilly but brilliantly sunny Saturday morning I met Damian for our first DSLR Photography Lesson.  His wife bought him a lesson gift certificate for Christmas.  This was a chance for me to get a closer look at the new Pentax K-7 DSLR, my first time to see it in person.  I was impressed.  I had never before seen a DSLR that had a proper AF-S/AF-C/M switch on it besides my Nikon D300 (and other Nikons).  It also had two finger dials and a top-of-body LCD, which to me is mandatory for a DSLR to have.  

Damian and his wife will be going shortly on a trip to Saint Lucia so we spent a good amount of time on how to make, frame and manually expose landscape shots.  I had Damian start out shooting in aperture priority mode, forever leaving auto-mode behind, as I have all students do.  However, in the bright late morning light the shots from his Pentax were coming out a bit underexposed so I had him switch to manual mode and set the shutter speed to 1/160th (rather than the 1/320th aperture priority mode was choosing).  Since it is really hard to see a 3-inch LCD screen in the aforementioned bright Florida sunshine, I taught Damian how to read the histogram, which is kind of like flying an airplane by instruments alone.  The LCD screen can certainly lie, but the histogram cannot.  

Damian is now ready to produce some great beach landscapes down in Saint Lucia.  I look forward to seeing them and to our next lesson when he gets back. 

  • Reserve your own 1-on-1 DSLR Photography Lesson with Jason today!
  • Learn more about the lessons
  • Browse past lessons with all of my students 
  • Photography Tip - shutter speed should be double your focal length

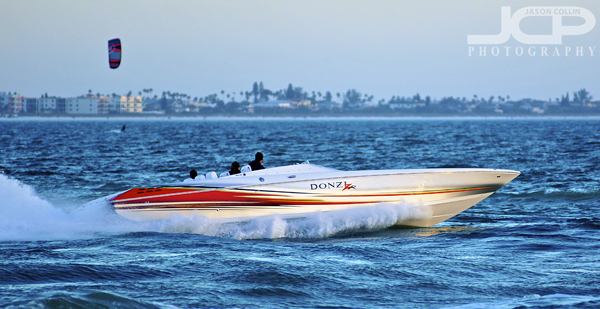
    Donzi speedboat Treasure Island, Florida - Nikon D300 Nikkor 80-200mm f/2.8D @ f/2.8 ISO 400 1/1250th 200mmOne of the most common difficulties when first entering the DSLR world is to produce sharp action photographs.  This Donzi speedboat was cruising into the Gulf of Mexico near Treasure Island, St. Petersburg, Florida just after 6pm in February 2009.  The sun was already getting close to the horizon.  The Donzi was going fast.  This added up to a photography scene with very little room for margin of error.  It required pretty exact settings to produce an acceptable image.  

    I always keep in mind one basic axiom about shutter speed: 

    • the shutter speed should be at least double the focal length 

    Since I was shooting at 200mm with my trusty Nikkor AF ED 80-200mm f/2.8D lens, according to that axiom I needed a shutter speed of at least 1/400th of a second.  However, that shutter speed is really just a theoretical minimum.  One then has to take into consideration the speed of the subject and the available light.  If I had set my shutter speed to 1/400th you would be looking at a white blur.  In general I never shoot any moving subject at less than 1/500th no matter the focal length used.  

    For something moving really fast I keep in mind that it will probably take 1/1000th to freeze its motion.  So since I made the Donzi shot with a shutter speed of 1/1250th, I was able to produce a tack sharp image.  

    So the first thing to check if you are having a hard time photographing moving subjects is to check your shutter speed.  Is it at least double your focal length?  For anything moving as fast or faster than a child running around, is your shutter speed over 1/500th or greater?  If the answer to these questions is no, then you know at least the first step you then need to take to start producing sharp action shots.

    DSLR Photography Lesson with Carie & her Canon 50D at University of Tampa

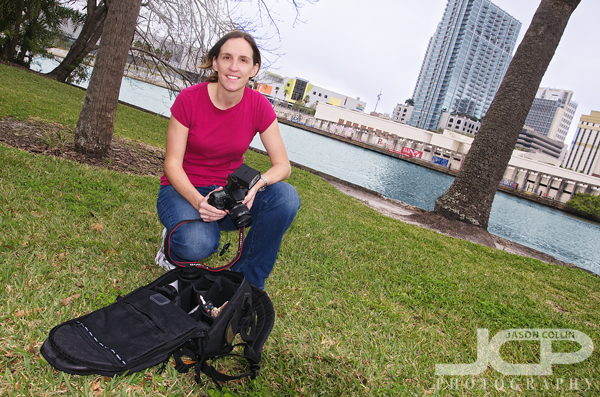
    Carie already has a full gear bag with her Canon 50D as the centerpiece - University of Tampa CampusI ventured out of St. Petersburg this morning for a DSLR Photography Lesson with new student Carie and her Canon 50D on the University of Tampa campus.  I had not had a lesson there in almost a year.  The campus was much busier than I expected for an early Saturday morning, but I was lucky and got the last parking space in front of the Plant Building.  

    Carie has had her 50D for some time and has done some studying of photography terms and techniques on her own.  What my 1-on-1 in the field lessons offer is instruction on how to actually make photos in common situations with situation specific settings.  One thing Carie wanted to be able to photograph better are her very active children who plays sports.  The variable cloudiness allowed us to use sunny actions settings, and higher ISO settings for when the sky clouded over and available light dropped significantly.  One important thing I told Carie to keep an eye on was shutter speed.  For action the shutter speed should (usually) be at least 1/500th of a second and faster.  When the clouds came and the shutter speed dipped below 1/500th, increasing to ISO 400 got shutter speeds up to an adequate 1/640th.  Of course, the faster the subject is moving, the faster the shutter speed needed to freeze that action is.

    For the final part of the lesson we went down by the Hillsborough River to practice using fill flash for portraits.  I had Carie first take a shot (of yours truly) with no flash then the exact same shot with her external flash on.  It was easy to see the better results having the flash on produced.

    Carie was also the only student (out of dozens) that naturally both held the camera correctly and more often used portrait orientation than landscape.  I was impressed! 

  • Reserve your own 1-on-1 DSLR Photography Lesson with Jason today!
  • Learn more about the lessons
  • Browse past lessons with all of my students 
  • DSLR Photography Lesson with sisters Shanna & Heather & their Nikon D3100's

    Heather & Shanna, sisters, both have the new Nikon D3100 seen here in Vinoy ParkIt is very rare that I teach anything but 1-on-1 DSLR Photography Lessons, but thanks to a Christmas present gift certificate given to both, sisters Heather & Shanna took their lesson together.  Since the both had the same DSLR, the new Nikon D3100, things were greatly simplified and they were also pretty fast on the uptake for learning how to change the basic settings for aperture, ISO, white balance and focus mode.  If yesterday morning's weather was nice, then todays's was fabulous.  It was very nice to be outside and along the St. Petersburg waterfront talking about photography.

    Each sister had the same photography knowledge level (eager beginner), but had done some good prep reading of Rick Sammon's great book, "Digital Photography Secrets."  I highly recommend that book to anyone starting out in digital photography.  I own it myself.  

    After showing the sisters how to use aperture and focal length settings to create bokeh using their 55-200mm lenses, we made our way over to Vinoy Park stopping to photograph a grey heron along the way.  In the park we finished the lesson with a little landscape photography practice making use of the rule of thirds to best place the horizon.

    I look forward to future lessons with both Shanna and Heather. 

  • Reserve your own 1-on-1 DSLR Photography Lesson with Jason today!
  • Learn more about the lessons
  • Browse past lessons with all of my students
  • DSLR Photography Lesson with Alice & her Canon 60D

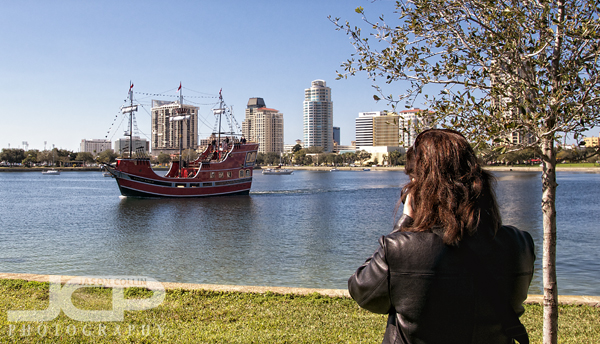
    St. Petersburg's own pirate ship sailed past Alice (with Canon 60D) and I during her DSLR photography lessonMaybe one day I will not be so surprised that one can meet people who surprisingly have many of the same rare-ish things you do in common.  For example, new DSLR Photography Lesson student, Alice, who recently got a Canon 60D, has a master's degree in ESL (English as a second language), but only briefly ever taught ESL.  I taught ESL for nine years (without a master's in it).  She also knows the same person in a local tutoring company that I do.  So while I helped Alice get acquainted with how to change the settings on her Canon 60D we discovered all these unexpected things in common.

    We were both expecting a cold morning, but I left my car without need for my jacket and unlike the blustery, semi-freezing January morning lessons last year, this was nearly as pleasant of weather as one can expect for winter in Florida.  The pirate ship even returned from its time abroad to St. Petersburg harbor and conveniently floated by just as we were entering Vinoy Park.

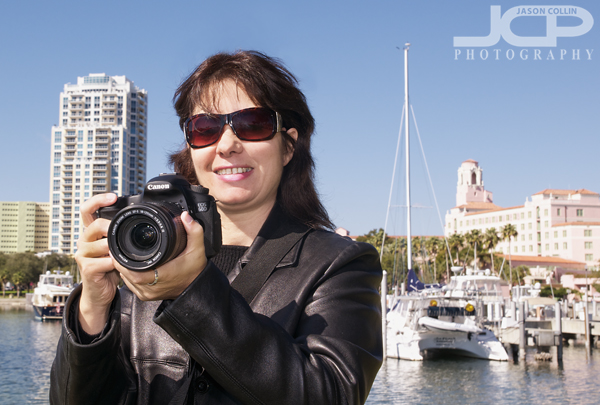
    Alice and her Canon 60D showing how to properly hold one's DSLR with left palm under the lensAlice is also interested in learning how to use the video function of her Canon 60D which may be a subject we tackle in a future lesson.  Until then she has her poodle at home to practice on all the things we learned about this fine Florida winter day.  It was fun to be able to get Alice started on her DSLR photography path and to learn of her ESL past. 

  • Reserve your own 1-on-1 DSLR Photography Lesson with Jason today!
  • Learn more about the lessons
  • Browse past lessons with all of my students 
  • Photography Tip - use filters when editing for great quick results

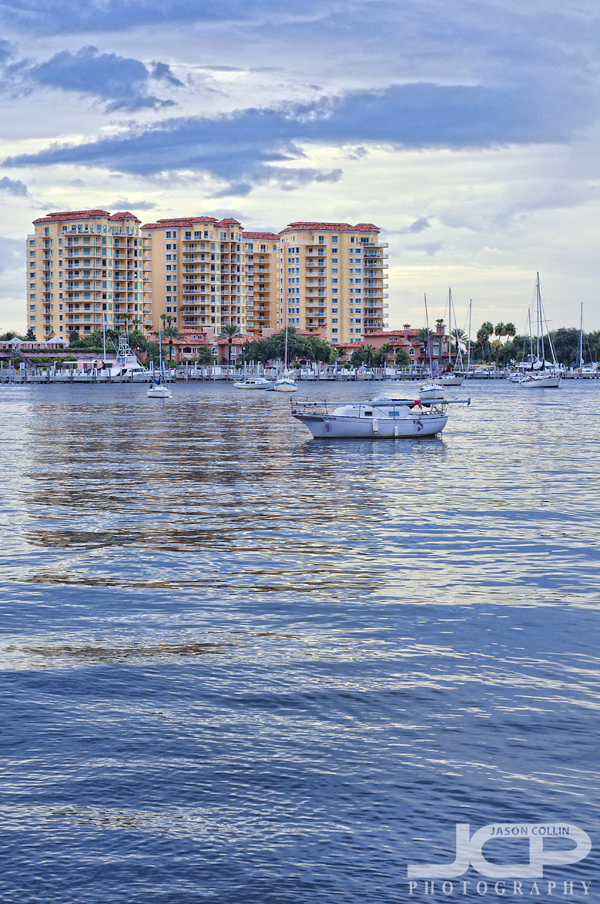
    Nikon D300 Nikkor AF 50mm f/1.8D ISO 400 1/60th - sailboats of St. Petersburg HarborFor this digital photography editing tip I am using a photograph that was made in an unusual way and breaks a few rules.  Typically for a landscape, fine art type photograph I would of course mount my DSLR on a tripod and probably use a cable release and wide angle lens too.  For this photograph I was shooting handheld with a 50mm prime lens, and in portrait orientation to boot.  At the time I was teaching a DSLR photography lesson to a student preparing for a trip to Costa Rica and he would not be bringing a tripod.

    This photograph had been lying around unedited for five months, which means I did not love it, but something about it made me want to not just delete it right away.  Maybe it is the completely empty foreground and the use of portrait orientation, or because of the sailboat with a lowered mast in the middle.  Either way, I will in the following describe my simple and fast editing method of using filters.

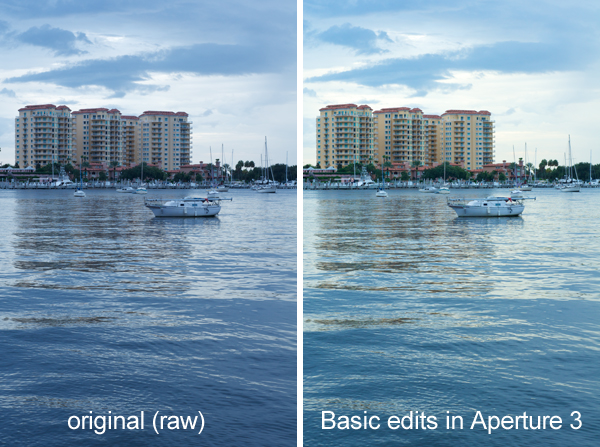
    The first step was importing the RAW file into Aperture 3.  If you use an app like Aperture 3, then shooting in RAW requires no extra work over just shooting in jpg.  So you get all the benefits of shooting in RAW, with no big work required on your part because Aperture 3 upon file import applies a RAW processing profile based on your specific DSLR right to the file.  No mess no fuss.  So there is absolutely no excuse not to shoot in RAW.  The myth of RAW being extra work is gone!  

    Here are the next steps I took in Aperture 3: 

    • straighten the horizon (right side was low)
    • adjust exposure and vibrance sliders
    • use the temperature slider to add warmth (image was too blue) 

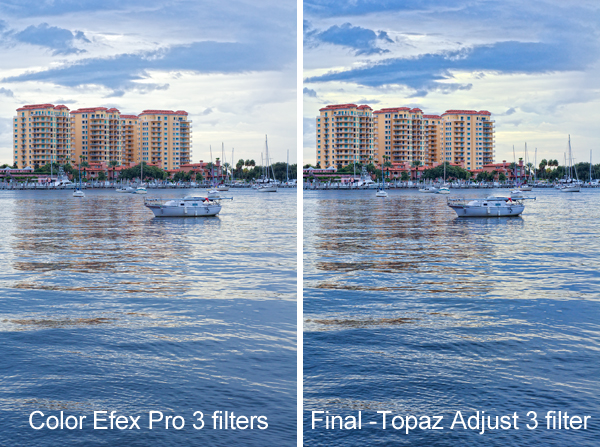
    After doing super easy and basic slider adjustments in Aperture 3, I then launch Color Efex Pro 3 which is a plugin I have right inside Aperture 3.


    The filters I used in order in Color Efex Pro 3: 

    • Polarization
    • Remove Color Cast
    • Tonal Contrast 

    After finishing things up in Color Efex Pro 3, I export the image as a TIFF right into Photoshop CS5 where I applied a 60% unsharp mask filter.  Then from right within Photoshop CS5 I launched Topaz Adjust 3 and applied the "Photo Pop" filter.  The last little thing I did to the image was use the dodge brush in CS5 set for midtones at 20% to brighten up the condos a little more, and the shoreline too.

    This is basically the editing process I do on every single photograph I edit, save for using Topaz Adjust which is only used once in a great while.  One or two of the filters may change in Color Efex Pro, and I may adjust different sliders in Aperture 3, but I think this is a streamlined, easy and effective editing process.  

    Please try this editing process out on one of your own images and post a link to the results in the comments below.