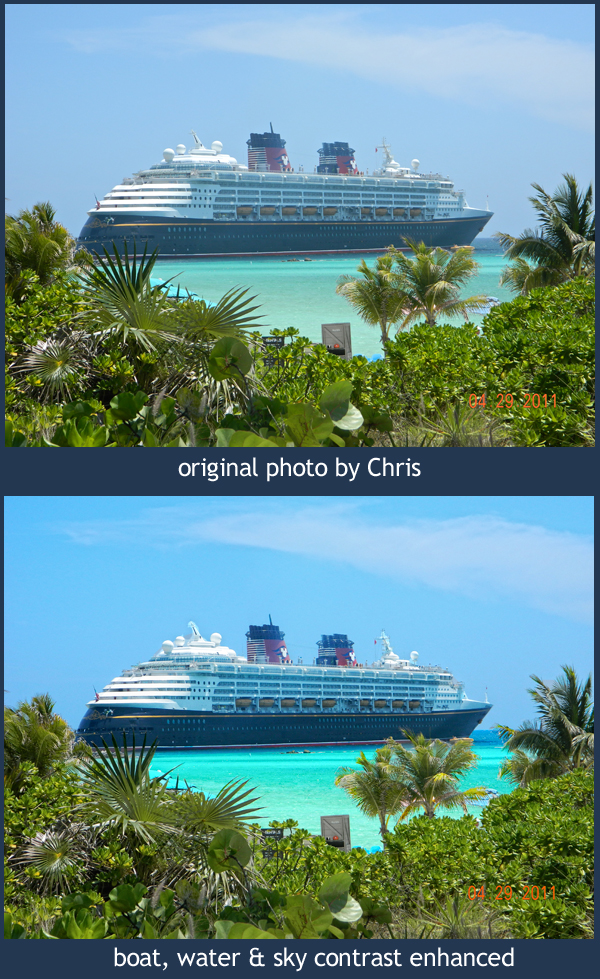
 Selective contrast edits in Photoshop can make a big impact on your photos - image used by permission
Chris took his first DSLR Photography Lesson on Tuesday where we went out into the field to practice shooting. For our second of four lessons Chris wanted to learn digital photograph editing, which I believe is a very wise thing to do (read more here about my feelings on learning shooting & editing at the same time).
The cruise ship is Chris' own photograph. The original is well composed with good contrast in the foreground plants. However, the cruise ship itself appears to be covered in a haze. I taught Chris the following techniques using Photoshop CS5 to selectively enhance the cruise ship first, then the water, then finally the sky.
For the Cruise Ship:
- Use the Quick Select Tool (W) to select the entire cruise ship
- Go to Images --> Adjustments --> Brightness/Contrast
- Increase contrast to your preference
For the Water:
- Use the Quick Select Tool (W) to select the entire water area
- Go to Images --> Adjustments --> Brightness/Contrast
- Increase contrast to your preference
- Go to Images --> Adjustments --> Color Balance (Command-B)
- Enhance the color sliders to your preference
For the Sky:
- Use the Quick Select Tool (W) to select the entire sky
- Go to Images --> Adjustments --> Color Balance
- Enhance the color sliders to your preference
The real key to this type of digital photo editing is the use of selected adjustments. If we had not selected just the cruise ship, and instead universally adjusted the contrast on the entire photograph, then the plants would have suffered from too much contrast in getting the cruise ship right. Of course making the sky look a deeper blue if done universally would make even the green plants start to look blue. Therefore, the key is starting with the Quick Select Tool (W) and selecting only the area you want to adjust.
--Professional Model DSLR Photography Lessons now available!
