St. Petersburg Florida waterfront scenes fine art photography

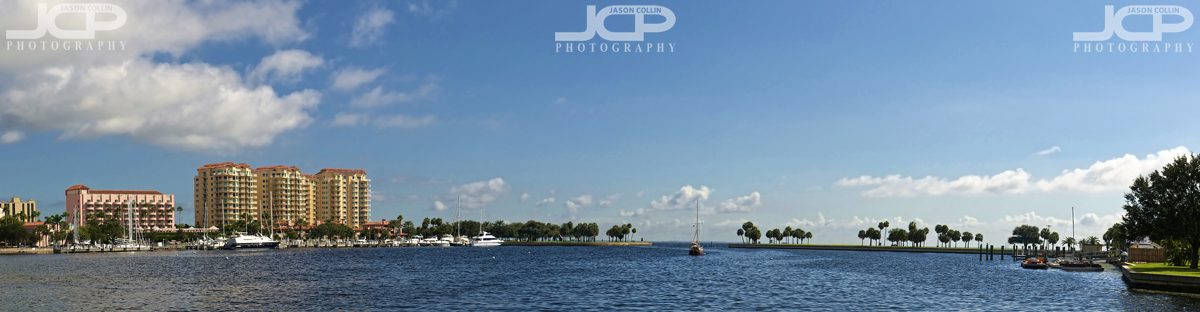
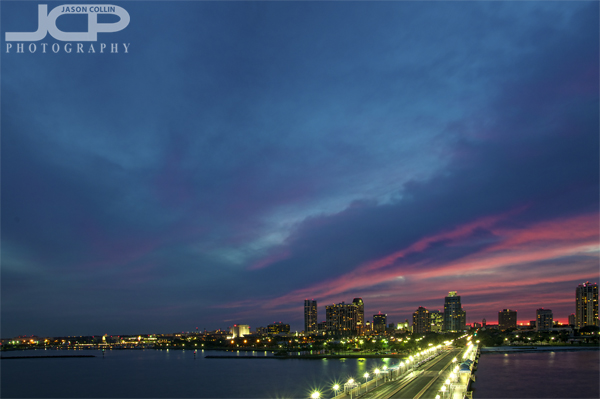
Waterfront view from North Straub Park in downtown St. Petersburg - Nikon D300 Tamron 17-50mm @ f/8 ISO 200 3-exposure HDR

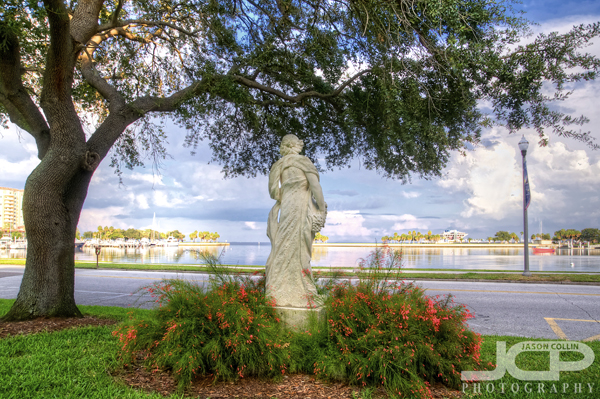
According to the Tampa Bay Times, St. Petersburg, Florida has the third largest continuous waterfront park system in all of North America (behind Chicago & Vancouver).  I believe it is the best thing about St. Petersburg, by far.  It is totally unique to the Tampa Bay area, and really anywhere else on the west coast of Florida.  

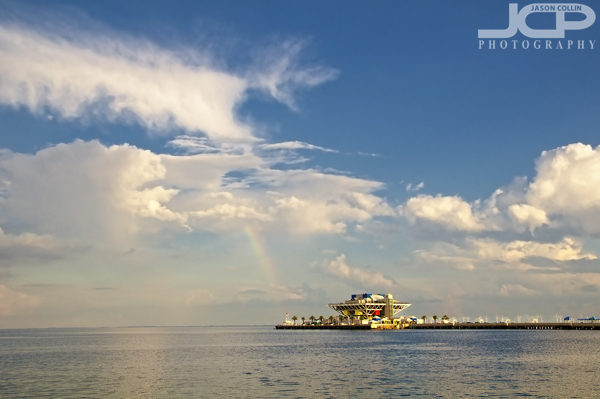
A small rainbow over the St. Petersburg Pier - Nikon D300 Tamron 17-50mm @ f/11 ISO 200 1/200th tripod mounted

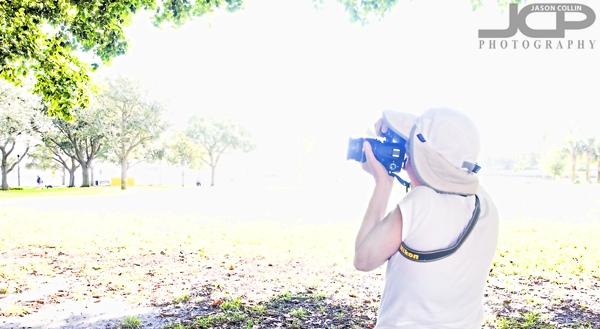
You can walk along water for pretty much as far as your legs will want to carry you starting on Coffee Pot Blvd following going all the way down North Shore Blvd.  I have walked its entirety, but only in pieces.  Of course the most notable landmark one will see along the way is The St. Petersburg Pier (above).

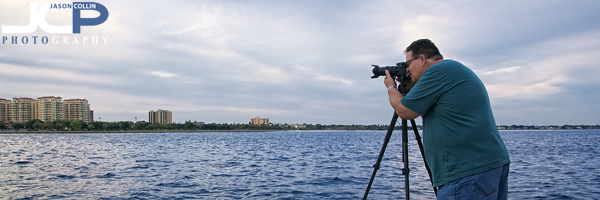
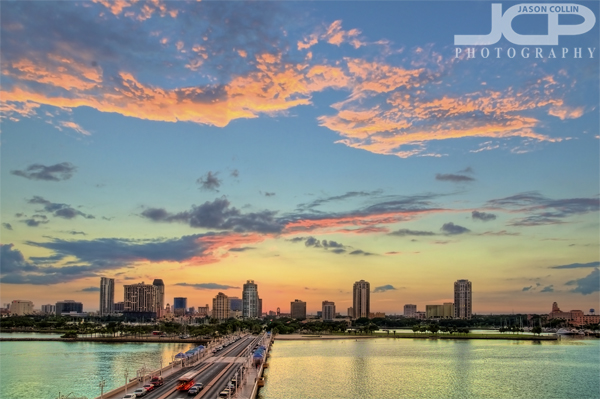
Downtown St. Petersburg bathed in a pastel sunset - Nikon D300 Tamron 17-50mm @ f/11 ISO 200 7-exposure HDRIf you can time your waterfront walk so that it ends at dusk at the top of The Pier itself, well then you may just be treated to a spectacular sunset view like the one above.  In the right weather, there is no more pleasant way to spend a few hours in Florida than walking through St. Petersburg's downtown waterfront parks.

Commercial Duvet Bedding Blanket Pillow Photography St. Petersburg Florida

Commercial bedding photography done in client's Clearwater home - Nikon D300 Tamron 17-50mm @ f/8 ISO 200 1 sec tripod mounted - Strobist: Nikon SB-800 @ 1/4 power in 43" brolly in foreground SB-600 @ 1/16th power in 43" shoot through umbrella background (window light in left background)Shooting on location (this time a residential Clearwater home) always presents unique challenges, as of course no two locations are exactly alike.  Shooting large objects on location can be especially challenging, especially so when they are in a small space.  My challenge with this commercial duvet, pillow & bedding shoot was to make the final images not look like they were merely taken within the client's own bedroom per se.  Using some set decoration (statue, clock, plant) and turning the negative of having a bright window behind the bed into a feature of the shot, was how I attempted to be as creative as possible within the bedroom location.

Commercial bedding photography done in client's Clearwater home - Nikon D300 Tamron 17-50mm @ f/8 ISO 200 1 sec tripod mounted - Strobist: Nikon SB-800 in 43" brolly in foreground SB-600 in 43" shoot through umbrella background (window light in left background)In the digital editing process I smoothed out the transition of full sunlight to orange wall removing all texture.  Contrast was selectively enhanced to compensate for the harsh light falling on the bed and lastly a softening filter was applied to the overall image as small details are a detriment to this type of shot.

St. Petersburg Florida downtown harbor panorama fine art photograph

Click for 1200px version - St. Petersburg downtown harbor panorama fine art photograph - Nikon D300 Tamron 17-50mm @ f/11 ISO 200 1/400th 4-shot panorama 

If you have Photoshop CS5 or CS6 it is amazingly easy to make a panorama image.  The above panorama of the downtown St. Petersburg, Florida harbor is composed of four shots that I made handheld using only the gridlines in my viewfinder to line up.  Then I loaded those four shots into Photoshop's Photomerge action, led the CPU do a lot of processing, and voila, out came a panorama that I then proceeded to do my usual editing workflow on.  

I am often with my camera near this small harbor as I use this location when teaching my 1-on-1 DSLR Photography Lessons.  It is a very good spot to practice making panorama images, composing with leading lines, S-curves and sometimes even wildlife.

Nikon D7000 1-on-1 DSLR Photography Lesson in St. Petersburg Florida with Mari

Mari photographing the famous banyan trees in downtown St. Petersburg during our photography lesson.Since our first 1-on-1 DSLR Photography Lesson from just a week ago, Mari has done some significant investing in her photography gear.  Gone is her Canon G10 replaced with a brand new Nikon D7000 and lens I use myself, a Tamron 17-50mm f/2.8.  Right away it was apparent to Mari how much easier using a true DSLR is.  I contend myself that point and shoot cameras are by far more complicated to use than an advanced DSLR (i.e. top LCD screen, two finger dials, all major settings have dedicated button).  Now instead of hunting through menus and having to "game" her old camera just to change aperture, on her Nikon D7000 it requires a mere flick of the forefinger.  It is likewise for all the other four major settings.

So with this new gear I began showing Mari how to manually adjust all settings for shooting in shade, bright sunlight, backlit subject and some tips on how to creatively compose common scenes and landmarks.  As always, I advised her to not put the horizon in the center, as that is how we see it with our own eyes.  Putting the horizon in the upper or lower third of the frame is almost always more appealing looking to a viewer and makes for a much more interesting photograph.  

Mari invested in a 4-pack of lessons (thanks Mari!) to help her get started in the DSLR world so I will be seeing her again soon to continue introducing her to new shooting techniques.  

Focus Mode AF-S or AF-C photography tip

One of the five things you need to know how to set correctly to make a well exposed and sharp shot in any given shooting conditions is focus mode.  Fortunately, focus mode is by far the easiest of those five settings to set as there are only two choices (disregarding manual focus mode):

  • AF-S (One Shot - Canon) for still subjects
  • AF-C (Ai Servo - Canon) for moving subjects

That is all there is to choosing which focus mode to use.  Is the subject moving or not?  In the above example the chainlocked bike certainly is not moving so I used AF-S to shoot it.  In the other example the triathlon cyclist was definitely moving, and fast, so I used AF-C.  

Most DSLRs offer a third, and useless, kind of auto auto-focus setting that you should just pretend does not even exist!

So there is no reason to ever make a focus mode mistake if you can just remember AF-S (think "S" for still subjects") and AF-C (think "C" for continuous, moving subjects).  No matter what you make a photograph of, moving or still, now you know which focus mode to use!

Tripod Nikon D7000 DSLR Photography Lesson with Tim in St. Petersburg Florida

Tim using his Manfrotto tripod to make a shot of downtown St. Petersburg during our third photography lesson.For our third of four 1-on-1 DSLR Photography Lessons Tim brought his Manfrotto tripod along for a lesson based on slowing down one's photography and not taking so many shots that make the thought of going through them all rather daunting in the editing process.  Using a tripod naturally slows you down as a photographer, thereby reducing the number of shots you take, while simultaneously improving the shots you take as each shot on a tripod needs to be carefully framed and crafted.  Free of the weight of holding the camera, using a tripod allows you to really feel at ease when shooting.  I know it is how I feel.

Long exposure shots are only possible with a tripod, and one of the best spots to make such shots are from The Pier, which is where Tim and I headed out to.  Along the way we noted how completely gray and blah the sky was and that we would not be able to make any keepers tonight from an artistic standpoint, but learning the skill of making long exposure dusk & night shots would not be affected.  I commented that is such conditions I just get in the mindset of knowing I will probably convert the images to black & white later.

Then all of a sudden a touch or orange reflected off the low clouds and soon thereafter the sky exploded with color and Tim was able to make some fantastic long exposure shots of the downtown St. Petersburg waterfront (see my shots here).  We were very lucky in the end!  For our next lesson, we will move on to flash portraits.

Stunning Vivid Dusk Sky over St. Petersburg Florida from The Pier

Downtown St. Petersburg vivid dusk south view from The Pier - Nikon D300 Tamron 17-50mm @ f/11 ISO 200 11 sec tripod mounted with cable release

And to think, making this photograph will not even be possible in a year's time because the location I shot this from, the roof of The Pier, will be demolished.  I certainly hope the structure that replaces it will offer similar or better views of the downtown St. Petersburg, Florida waterfront, otherwise there will be no more photos showing its beauty at dusk, twilight and sunset.

Cotton candy coated downtown St. Petersburg vivid pink dusk - Nikon D300 Tamron 17-50mm @ f/11 ISO 200 6 sec tripod mounted with cable releaseI had the opportunity to make these photos only because I was teaching a DSLR Photography Lesson focusing on tripod usage.  Otherwise, I would have been home and never witnessed this amazing view.  In fact, both my student and I had just earlier remarked how gray the sky was and how we would not be able to get any keepers this lesson, but at least I was able to teach him the technical aspects of using a tripod for long exposure photography.  I told him since there is so little color that I would shoot thinking to convert the images to black & white!

Orange dusk breaks over downtown St. Petersburg Florida - Nikon D300 Tamron 17-50mm @ f/11 ISO 200 1/2 sec tripod mounted with cable releaseThen all of a sudden a hint of orange light appeared reflected off the low clouds, as the sun had already actually set.  We took immediate notice and thought, at least we got to see a touch of color.  Then as the sun slipped further to the other side of the Earth, the dusk sky started to explode in color and as we adjusted the length of the shutter speed on our DSLRs, we were able to pull more and more color back over the horizon and into our lenses.  The photographs above are actually posted in reverse chronological order, with the above orange image the first I took.  Each was made almost exactly five minutes after the other.  That is the power of putting your DSLR on a tripod and using shutter speed to create an amazing long exposure image finding light and color the naked eye cannot see.