Kiki yawning studio like white background pet photography done in home

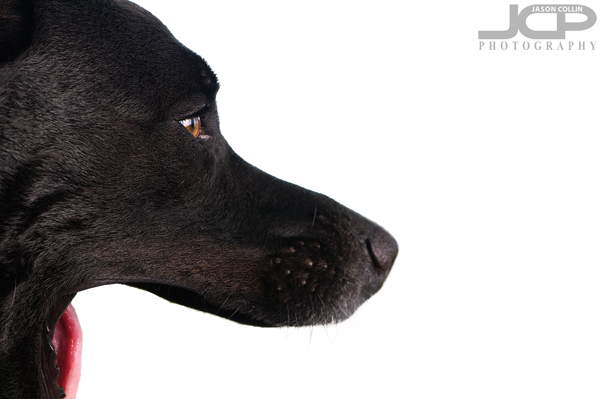
Kiki's mouth opens too wide when yawning to even fit in the frame! - Nikon D300 Nikkor 105mm VR micro @ f/8 ISO 200 1/60th Strobist: SB-800 @ 1/4 power in brolly to frame rightI have been doing quite a few in-apartment photo shoots featuring white backgrounds added digitally lately of various subjects and inevitably when I finish them before I put my photography and strobist gear away I make a few photographs of beloved puppy, Kiki.  I cannot say she is always thrilled about this.  Her expression is usually pretty neutral.  This time I interrupted her naptime resulting first in a yawn then the look she gave me (see below).  
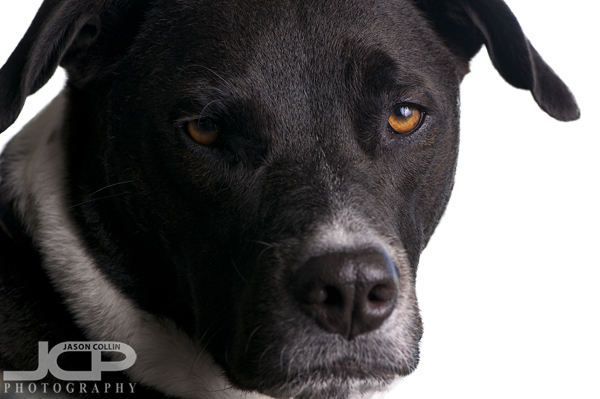
Kiki looking very nonplussed as she usually does for photos - Nikon D300 Nikkor 105mm VR micro @ f/8 ISO 200 1/60th Strobist: SB-800 @ 1/4 power in brolly to frame rightSince these photographs were made in the close confines of my living room, and even though the great Nikkor AF-S 105mm VR micro f/2.8G macro lens makes great bokeh, the backgrounds were still a distraction, which is why I chose to do a Quick Select of just Kiki in Photoshop CS5 and then refine the edges and send that image onto a new layer (done automatically if you choose the right output).  I added a layer below Kiki, painted it white, and voila, a studio looking image of Kiki done right in my own living room, no mess, no fuss.

Get images like these of your dog or cat or pet done right in your own living room . . . contact Jason today to reserve your shoot!

Nikon D5000 1-on-1 DSLR Photography Lesson in St. Petersburg Florida with Angela

Angela with her Nikon D5000 on our first of four 1-on-1 DSLR Photography Lessons in St. Petersburg FloridaOn a surprisingly cool spring late afternoon I met Angela in downtown St. Petersburg for our first of four 1-on-1 DSLR Photography Lessons.  She has been the owner of a Nikon D5000 for a couple of years, but all that time just using it on auto-mode.  Since she regularly photographs her daughter racing motorcross, taking control of her DSLR and getting off auto-mode will definitely help her capture better action shots in a wide variety of conditions.  

We said good-bye to auto-mode and hello to aperture priority mode to start out the lesson as I introduced Angela to my 4-step processing for making a well exposed and sharp photograph in any situation.  By the end of the 2-hour lesson Angela was using manual mode to make flash portraits in North Straub Park in preparation for making prom night portraits of her daughter this upcoming Friday.  She now has the practice and knowledge to be able to make well exposed and composed portraits in an outdoor setting that would also apply to indoors as well, with a few settings tweaks needed only.  

I look forward to hearing how the prom and motorcross photos came out during our second lesson coming up soon!

Sunrise Dawn Sky Over Smacks Bayou Snell Isle St Petersburg Florida Fine Art

The sunrise dawn sky over Smacks Bayou as seen from my back patio - Nikon D300 Tamron 17-50mm @ f/8 ISO 200 1/60th handheld 

 Every morning I am outside, briefly around 6:30am.  It is almost like clockwork, but it is not my clock that keeps this schedule, rather it is Kiki's.  She wants to go out to pee then quickly come back inside to eat breakfast, then we both go back to sleep until a more sane time to fully wake up.  At this time of year (April) this morning ritual coincides with late dawn just before the actual sunrise.  In the approximate 2-minutes we are outside I usually look at the horizon through not quite wet enough contacts and note what color can be found in the sky this particular morning.

Yesterday the water of Smacks Bayou was particularly calm producing a fairly clean reflection.  My senses were of course not fully functioning, but after feeding Kiki her breakfast I did go back out to make a few handheld photos of the above scene.  I should have been using a tripod of course, but I did not have the ambition or coordination at that moment to fumble with putting on the tripod plate, etc.  I think what I will do to remedy this is already have my camera mounted on my tripod before I go to bed, so should the dawn sky be particularly beautiful, all I have to do is step outside, compose and click the cable release letting the gear do most of the work for me.  

Baby's Ear Shell Macro Strobist Photographs

Baby's Ear Shell in macro top side - Nikon D300 Nikkor 105mm VR micro @ f/16 ISO 200 1/200th Strobist: Nikon SB-600 Speedlight with diffuser cap @ 1/8th power just under shellA dog park friend saw my recent macro photographs of shells I found actually at the dog park and approached me last week with a rare shell she found herself on a local beach thinking I might like to photograph it as well.  She gave me a shell she said was called a Baby's Ear Shell for how its soft curves and translucent shell looks.  It is a very delicate looking shell when held in one's hand.  However, to photograph it I wanted to bring out as much detail as possible, which meant using a strobist technique.  The other challenge was how to prop or stand the shell so it could be cleanly photographed.  My solution for that is represented in the last image below.

For the above shot I placed a speedlight just under the shell adjusting the strobe's power to illuminate without blowing out too much of the bottom of the shell.  Slight movements produced different shadows, but it did not take long until I was pleased with the results I got above.

Baby's Ear Shell in macro back side - Nikon D300 Nikkor 105mm VR micro @ f/16 ISO 200 1/200th Strobist: Nikon SB-600 Speedlight with diffuser cap @ 1/4th power just under shellTo photograph the under side of the shell I placed the speedlight behind the shell for a more traditional backlit look.  This created shadows which show the depth of the dome of the shell and the underside ring portion of it.  I was surprised to be able to pull blue out of the dome portion, which is not visible with the shell just in hand.

My shell shooting solution, putting a piece of tape on it and hanging it from a wire rack.The method I came up with to photograph the shell was simply to hang it by a piece of tape from a wire rack plant holder I have in my living room.  Then I simply painted over in black the tape and the wire in Photoshop.  The black background was created in camera by choosing a fast shutter speed of 1/200th while shooting in my living room with the blinds closed.

Thank you Mari for thinking of me and sharing your shell!

Look for repeating patterns in architecture shots

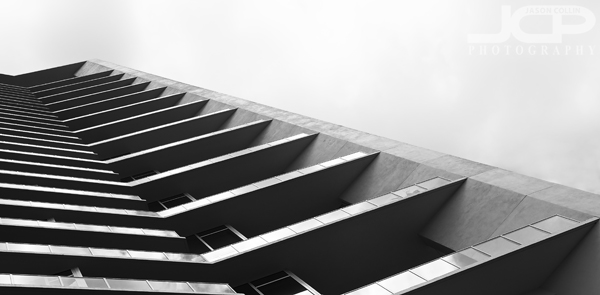
Using balconies as a repeating pattern composition - Signature St. Petersburg tower - Nikon D300 Tamron 17-50mm @ f/11 ISO 200 1/500th - black & white processing using Silver Efex ProFinding and using repeating patterns in your photographs is my photography tip for this week.  In the above photograph of Signature St. Petersburg I composed the shot to exaggerate row after row of balconies so that they came to form a repeating pattern.  I also held my camera off-angle to create a leading line with the far edge of the skyscraper and also the interior contour that leads the viewer's eye from lower right to upper left.  Thus, in this architecture shot I combined repeating patterns with leading lines in an attempt to produce an interesting photograph.

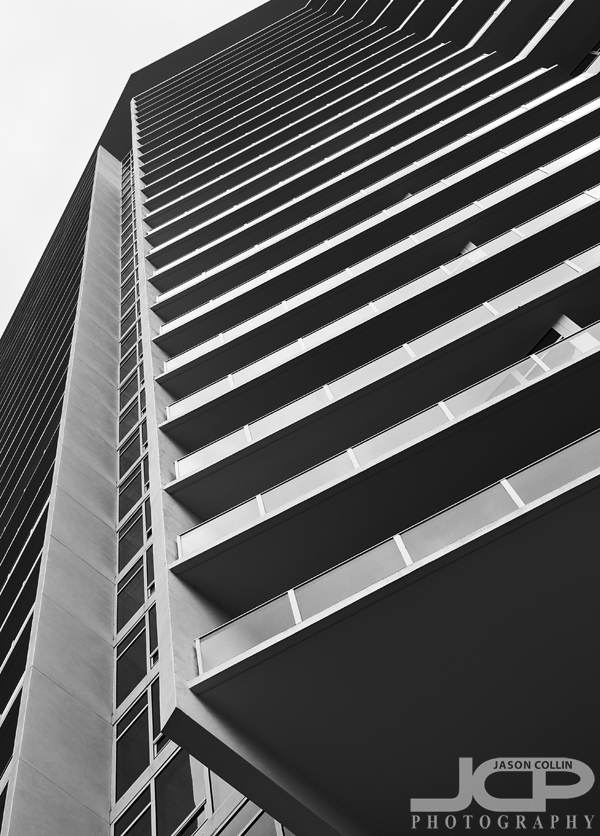
Once again using leading lines and repeating patterns to create interest - Nikon D300 Tamron 17-50mm @ f/11 ISO 200 1/200th - black & white processing in Silver Efex ProI used the exact same techniques in composing this architecture shot as well, just put into portrait orientation.  In composing and later in cropping, I paid special attention to make sure each leading line ended exactly at the edge of the frame.  Note how the lower left the line ends right into the corner, and for the small line in the upper right, just before the roof went upwards to the right, I cropped it there to keep the line straight.

Lastly, I chose black & white processing for both these images because there was cloud cover and the building itself lacks color, so no reason to leave what little color was left in the image.

  • Read more photography tips
  • View more architecture photography
  • Reserve your own 1-on-1 DSLR Photography Lesson with Jason today!
  • Canon 5D Mark II 1-on-1 DSLR Photography Lesson St. Petersburg Florida with Gina

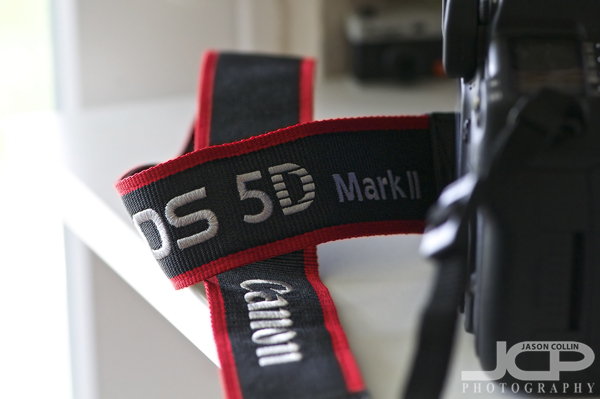
    From setting the date to setting the aperture, a wide ranging DSLR photography lesson with GinaI have been in contact with Gina for the past few days helping her with everything from which DSLR to purchase to which lenses to get for it as she has a very strong need to add to her photography knowledge as quickly as possible.  She has already been shooting for awhile, getting a few high profile jobs even.  The Canon 5D Mark II was new to her and brand new store bought yesterday so we began the lesson from the very beginning, set the time and date and putting the neck strap on.

    During our 1-on-1 DSLR Photography Lesson Gina wanted me to go through every menu setting and every button on the camera leaving no stone unturned.  This gave me my most indepth look yet at how a Canon DSLR works as I shoot Nikon.  I have already had hands on with every Canon model made in the past five years, but before now not setting one up totally from scratch.  I remain convinced the ergonomics of shooting with a Nikon of similar level are far, far better.

    We finished the lesson with a review of the correct terms for referring to shutter speed, how to identify and describe a lens, among other terms.  

    I hope Gina's upcoming shoot goes well and I look forward to seeing the images.

    Model Portfolio Shoot in Vinoy Park St. Petersburg at Sunset with Shane

    Featuring The Pier in the background of this model portfolio shot - Nikon D300 Nikkor 80-200mm @ f/5.6 ISO 200 1/60th Strobist: SB-800 @1/2 power with diffuser cap to frame left & SB-600 @ 1/4 power with diffuser cap to frame rightI met Shane through Model Mahem and we soon setup a model portfolio shoot deciding on Vinoy Park in downtown St. Petersburg as the location and I suggested having the main shot idea to feature The Pier in the background, since in its current form it will only be around another two years or so.  That is the photograph featured above with me shooting from flat on my stomach to get the composition I wanted.  In the fading dusk light I thought that black & white suited the image better than the minimal color left in the original.

    The setting sun blazes the sky yellow in this model portfolio shot - - Nikon D300 Nikkor 80-200mm @ f/8 ISO 200 1/250th Strobist: SB-600 @1/4 power with diffuser cap to frame left & SB-800 @ 1/4 power with diffuser cap to frame rightScheduling our model portofolio shoot just in time to catch the last bit of the sunset, I was able to make the above shot featuring a vivid yellow sky as the background from our vantage point in Vinoy Park and still include some of the local features in the background to put the photograph in a specific setting context, instead of a generic sunset that could have been anywhere.  Once again I was lying flat on my stomach to make the above shot.

    The lights of The Pier provide the bokeh in this night shot - - Nikon D300 Nikkor 80-200mm @ f/5.6 ISO 200 1/60th Strobist: SB-800 @1/2 power with diffuser cap to frame left & SB-600 @ 1/4 power with diffuser cap to frame rightThis was the final shot I took of the model portfolio session.  I always like to end on an image that I know I will actually use, whenever possible.  In my model portfolio shoots quantity is not the goal, but rather producing a select few images that neither I nor the model already have in their portfolios, unless a model approaches me to recreate one of my shots.  I knew even before scheduling the shoot I wanted to make a shot like this featuring the lights of The Pier as bokeh in the background.

    Shane was a great model and expressed the exact right emotions I was looking for in order to make these photographs.