Photography Tips

Photography Tip - Enable Highlights mode

Go to Highlight alert on Canon DSLRs to show any overexposed areas when reviewing your shots.One very useful feature that is often not on by default in DSLR cameras, is the view highlights mode.  Enabling this mode allows you to see which areas of a photograph have blown out highlights.  The areas will flash giving a clear signal that part of the photograph is overexposed and that you may want to adjust exposure to bring back detail in those highlights.
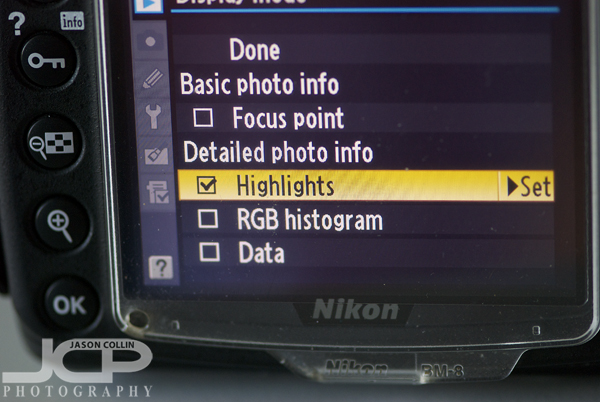
Nikon offers many types of review views including highlights.As usual, Nikon does highlights mode much better than Canon.  No matter what review mode you look at on a Canon DSLR, the highlights will always be flashing.  This gets annoying when you just want to see the composition of the shot and you may have intentionally overexposed some areas.  On Nikon highlights have their very own review view.  
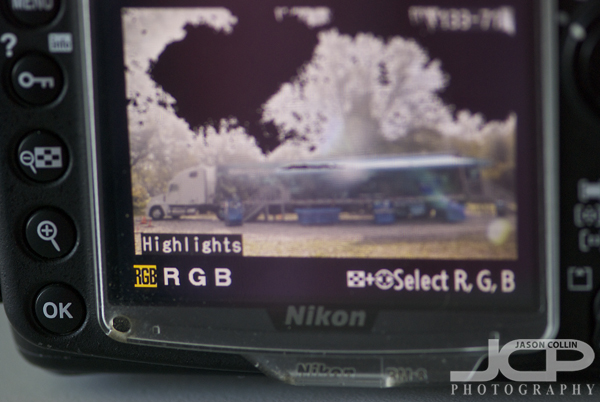
The black areas in the white sky are the flashing highlight signalIn the image above the large black areas in the sky indicate the portions of the photograph that are overexposed, or blown out.  Those black areas will flash on and off clearing letting you know, "hey, the sky is totally blown out, did you really intend to do that?"  
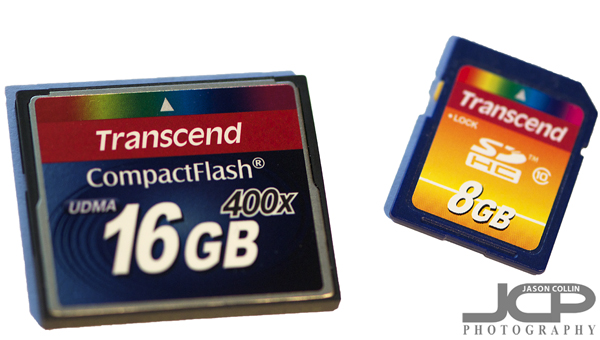
How many memory cards for photography should I have?

I recommend Transcend memory cards. I have used them exclusively in my DSLRs for over 4 years.HOW MANY MEMORY CARDS SHOULD I HAVE FOR MY DSLR CAMERA?

The answer to this question is simple, but it requires a bit of counting.  This is my formula for the minimum number of memory cards you should have: 

  • # of cameras + # of camera bags = total number of memory cards

I have two DSLRs and two camera bags.  Therefore, if I followed my own rule, I should have at least four memory cards.  I do, I have five.  Why match the number of memory cards to both the number of cameras you have and the number of bags?  This is to avoid ever being stuck without a memory card.  For example, you took the memory card out of your camera and left it on your desk.  You put your camera back in your bag and go out to shoot the next day, but the memory card is still at home on your desk!  If you had a memory card stashed in your bag, you are saved.  

Why do I recommend this?  Well, because it has happened to me!  I left a memory card on my desk, went out to shoot, boom, no memory card.  That feeling is a rather terrible one let me tell you!  So I then made sure I always had a spare memory card in each camera bag so if I ever forgot to put a memory card back in my camera, I am not out in the field stuck not being able to make photographs.  

Memory cards are extremely cheap, so there is no excuse not to follow my memory card formula!  If you think memory cards are not cheap today, then let me tell you that in 2001 when I got my first digital camera, a beloved Olympus 2040 (2 megapixel camera!), I paid over $250 for a 500mb (yes, megabyte) card.  All of my photos from the greatest trip of my life, 10 days in Cambodia, all but four of those photos are at 640x480 because I had to converve space on my memory card!  

Nikon D7000 1-on-1 DSLR Photography Lesson in St. Petersburg Florida at The Pier with Mari

Mari photographing a pelican during our 1-on-1 DSLR photography lesson in St. Petersburg FloridaI had not seen Mari (as a photography student, though I see her every week at the dog park) since Halloween so today we just got our fourth of four 1-on-1 DSLR Photography Lessons in before Christmas.  We started the lesson answering a lot of her questions she accumulated since we last met, especially about shooting around dawn.  In particular there were issues with getting a focus lock in such low light and also being able to get enough exposure given that she handholds these shots.  The focus tips I gave her should remedy those issues and I reminded her how to gradually increase the ISO as needed to be able to handhold shots even in very low light.

After this we once again headed out to The Pier to photograph somoe of our favorite subjects, pelicans!  The sun was blazing even on this afternoon just two days from winter, but we made best use of the harsh light as we could by positioning ourselves in at least side lit conditions.  We got as close to the pelicans as we dared, who were mostly obliging though one did snap at me a bit.  I cannot blame him though.

I look forward to seeing how Mari puts together all we have learned as she continues to photograph the beauty of St. Petersburg, Florida.

1-on-1 Canon 7D 50mm DSLR Photography Lesson with Julianna in St. Petersburg Florida

Showing Julianna how a 50mm lens is good for shallow DoF portraits with natural light during our 2nd photography lesson in St. Petersburg, FloridaI met Julianna this morning for our second of four 1-on-1 DSLR Photography Lessons in downtown St. Petersburg, Florida.  Our first lesson last week was a general overview of how to use her Canon 7D with 18-55mm lens in manual mode and which settings needed to be changed when.  Today we swapped lenses and used her 50mm f/1.8 lens the whole morning.

I am a big fan of 50mm lenses and how they can "create something out of nothing" because of their great ability to make very shallow DoF shots.  When you can make the entire background become bokeh with ease, you can be very selective in how you portray your subject in frame.  In the above shot Julianna modeled for a demonstration of using natural light and shallow DoF to make a fun portrait right on a plain city sidewalk.  

Julianna also learned to be careful when creating such shallow DoF shots and that framing the shot first and then moving the single focus point on to the subject is safer than the usual set the focus point in the center on your subject, then recompose.  

1-on-1 Canon 7D DSLR Photography Lesson with Julianna in St. Petersburg Florida

Julianna with her Canon 7D absorbing 2-hours of photography knowledge in St. Petersburg FloridaFinally, a cold front has passed through Florida again banishing the humidity allowing for a decent enough Florida winter morning for my first of four 1-on-1 DSLR Photography Lessons with Julianna and her Canon 7D in downtown St. Petersburg.  Thank you to Kristin for referring Julianna to my photography lessons!

Julianna had a good amount of photography instruction in the past, and wanted a refresher on how to shoot in manual mode in particular.  I began the lesson though by showing her around her Canon 7D a bit so she can quickly and easily change the five settings necessary for making a well exposed and sharp shot in any shooting conditions, as well as confirming in the field the results of a shot.  The biggest piece of advice I perhaps gave her is that she should always (basically) use the lowest ISO possible until hitting the limits of aperture and shutter speed for the subject she is trying to make a photo of.  Thus, when shooting on a bright and sunny day like it was during our lesson, there was no reason at all to use anything but ISO 100, the lowest and thus cleanest ISO available on the Canon 7D.

For our next lesson we will focus on making creative and skilled shots with a 50mm lens.

Photography Tip use Christmas lights for portrait lighting

In December (and even November) holiday and Christmas lights begin showing up hanging from trees, houses and windows.  Another use for Christmas lights is as portrait lighting.  As seen in the above example, I wrapped a string of Christmas lights around a couple from head to toe (but not over their faces) and also the mantle of the fireplace.  I used no speedlights and there was only the dimmest of ambient light coming into the living room.  In order to get enough exposure I used a shutter speed of 0.8 seconds with my camera tripod mounted.  I asked the couple to stand as perfectly still as possible as small movement would create blur with that long of an exposure.  

Portrait using Christmas lights for creative lighting - Nikon D300 tripod mounted with Tamron 17-50mm lens @ f/5.6 ISO 200 0.8 secSo for creative portrait lighting, try using Christmas lights.  Be sure and put a link to your photos in the comments below!

1-on-1 Nikon D3000 DSLR Photography Lesson #2 with Georgia in St. Petersburg Florida

Georgia showing good form with her Nikon D3000 out at The Pier during our second photography lesson in St. Petersburg, FloridaI met Georgia on a too humid for December even for Florida morning for our second of four 1-on-1 DSLR Photography Lessons.  Since our first lesson last week, she had the opportunity to photograph a friend's family and their great classic Cadillac convertible.  She learned that making photographs with just a little bit of pressure is a whole different thing than just walking around shooting for yourself.  I was pleased though that in difficult conditions for the most part she used appropriate settings, especially keeping her ISO at the minimum.  

We set off for The Pier to concentrate on shooting at 200mm and see what the pelicans were up to, which unfortunately was mostly lazing about turning their throats inside out.  Still, I gave Georgia some tips on how to turn a pretty good pelican shot into one that stands out just a bit more, but that little more makes all the difference.  We also covered some landscape photography composition tips.