Photography Tips

1-on-1 DSLR Photography Lesson in St. Petersburg Canon XTi with Veronica

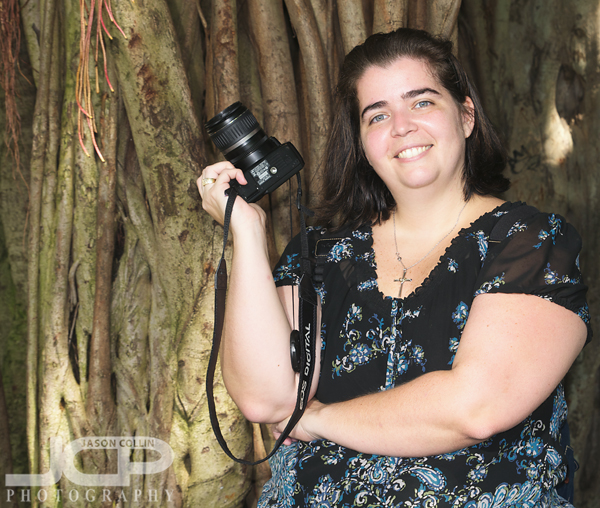
Veronica with her Canon XTi in front of downtown St. Petersburg's banyan treesFor our 1-on-1 DSLR Photography Lesson Veronica came all the way down from Spring Hill, quite a journey down the most unpleasant road in the area, U.S. 19.  Perhaps in reward for that effort we were treated to a beautiful morning in downtown St. Petersburg that was not too hot, with a nice breeze.  

Like many of my photography students, Veronica has had her DSLR for a bit of a long time, but had only ever been using it on auto-mode.  She was familiar with some photography terms from a bit of self-study, but she was hoping our lesson would help her make much better portraits of her children and improve her photography overall in general.  Well, that is exactly what I design the 1-on-1 lessons to do so it was a perfect match in that regard.  

I taught Veronica my (yet to be patented) 4-step process for setting up any given shot, and upon realizing the meter in her Canon XTi was either somehow suffering from some internal problem or just not that good, we almost immediately went into manual mode which produced much better looking exposures.  

We concluded the lesson under the famous banyan trees of downtown St. Petersburg with a little flash portrait practice.  Also, since she only has one lens (18-55mm) at this time and really wanted to be able to make better portraits and get closer to her subjects, I suggested she next invest in a 55-200mm lens or similar to be able to make the shots she needs.  We will meet again later this summer after she practices some more on her own (highly recommended) and perhaps invests in some new gear as well.

1-on-1 DSLR Photography Lesson in St. Petersburg Canon T1i at The Pier with Kristin

Purposefully overexposing practice out at The Pier with Kristin and her Canon T1iIn the two weeks since our first 1-on-1 DSLR Photography Lesson together Kristin has added greatly to the inventory of her camera bag with a very nice new Manfrotto tripod, a 50mm lens and an external flash!  However, our intended topic for our second of four lessons was bird-in-flight shots so none of her new gear applied to that, but since there bird action around The Pier was uncharacteristially quiet yesterday evening we did end up using her tripod to practice some landscape and sunset shots.  

It was a nice breezy walk out to The Pier where I got Kristin setup with her 70-300mm lens for being able to capture bird-in-flight images, which is not easy to do.  Even though, unfortunately, there were not many birds that particular evening, Kristin took a liking to this kind of photography and will practice more on her own near her hometown area of Gulfport which also has a waterfront and a pier.  

This gave us time for me to show her the basics of tripod usage, like lining up the barrel of the lens flush over one of the tripod's legs and which knob on the ballhead allowed for which adjustment.  We could not have had a great contrast going from birds-in-flight requiring very fast camera movement to long exposure shots on a tripod requiring very little physical effort on the part of the photographer.

We covered a good amount of photography topics once again during our 2-hour lesson which I enjoyed a lot and next up will be putting some more of Kristin's new gear to use!

Use a 50mm lens as a macro lens photography tip

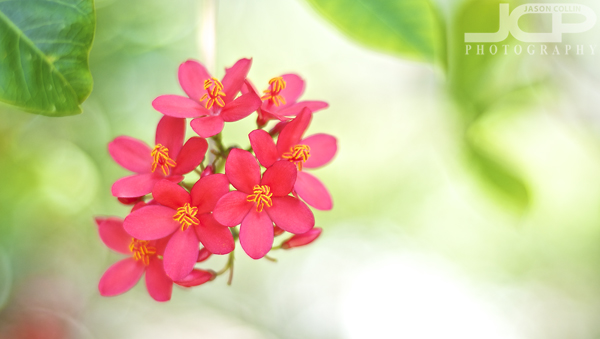
Bokeh created by using a 50mm lens - Nikon D300 Nikkor 50mm @ f/2 ISO 200 1/400th natural lightMacro lenses are expensive.  They are great, but if macro photography is one of many types of photography you like the cost may not be justified, even though macro lenses often can be great for portraits and other things too.  Before you spend $500 or $1,000 or more on a dedicated macro lens, I suggest getting a 50mm lens first (if you do not already have one, which you should!) for about $120 which can be used as a kind of macro lens and see just how much you like macro photography.  If you cannot get enough of it, then investing in a dedicated macro lens would be worth it.  If you are pleased with the results you are getting with the 50mm lens, well then you saved hundreds of dollars and you also get all the other benefits of a 50mm lens.

The flower image above was made with a 50mm f/1.8 lens @ f/2 with no special lighting, just ambient.  Post a link in the comments below to macro images you made with a 50mm lens.

Macro Jewelry Product 1-on-1 DSLR Photography Lesson in St. Petersburg Canon T3 with James

James making a macro shot of a ring in a lightbox during our 1-on-1 photography lessonThis morning I headed over to the BB&T Building in downtown St. Petersburg to meet James in his office for an atypical 1-on-1 DSLR Photography Lesson.  He sells rings and other jewelry and wanted help making the best product shots he could using his Canon T3, lightbox and Canon 60mm macro lens.  He also wanted workflow instruction on how to cleanly remove the ring from the background and place it on a pure white one.

We started off with shooting instruction and the best settings to use and also where to place the lights to give the best look on the ring itself.  Since the lighting and subjects were constants, it did not take long to dial in the best settings.  We took those sample shots we made and opened them in Photoshop where I showed James my Quick Select & Refine Edge technique for putting a subject on a clean white background.  In order to produce the best looking edges, I had to use one extra setting I had not used before in the Refine Edge process, teaching myself something new on the fly as well as James!  In the end we were both very pleased with the results we were able to produce.  One other top tip for Photoshop, if you are having trouble selecting an image, do not crop the image at all, leave as much space between the frame and the object as possible, as this was how we were able to get a more accurate quick select.  I told James many times that Photoshop is alive and has feelings and needs to be coerced sometimes into doing things!

James only had a very short and flimsy tripod to put his Canon T3 on so right during the lesson I helped him pick out a very nice Induro tripod and also a cable release!  It was a fun and different lesson than my usual ones and I enjoyed learning about James' various businesses.

Nikon D40 1-on-1 DSLR Photography Lesson with Kelly in St. Petersburg Florida

Kelly contacted me with a time sensitive need for a 1-on-1 DSLR Photography Lesson so she could use the knowledge for an upcoming shoot.  She has been doing portrait sessions and weddings and wanted help to organize the knowledge she had and get know-how for making consistently sharper images in particular.  Most photographers have no system for setting up a shot, which I think is critically important.  I change my settings in the same progression for each and every shot, every time.  This way I do not miss anything and if a photographer does not have that much experience, it limits the "panic feeling" of hurriedly trying to get a shot that was very different from the one you just took (i.e. indoors to outdoors).  

Just going through the deeper settings on Kelly's Nikon D40 I was able to improve her final image results by 20% even if she instantly forget everything I would soon teach her during our 2-hour lesson.  However, I am not worried about her remembering what we practiced because she took extensive and detailed notes throughout the entire lesson, which I highly recommend.

I am looking forward to seeing Kelly's future portrait and wedding work!

Canon 60D & Canon T3i DSLR Photography Lesson St. Petersburg Florida with Danny & Doug

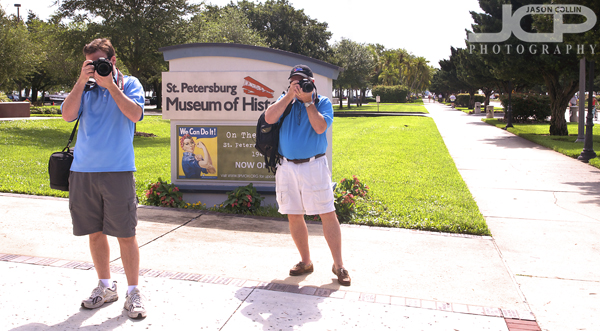
Left to Right: Doug with Canon 60D & Danny with Canon T3i during our DSLR photography lesson in St. PetersburgFirst off, I did not pose Doug & Danny like that in the above photo!  I did show them proper DSLR camera holding technique earlier which is why their stances look so similar.  Their lesson was the companion lesson to the one their wives took at the end of May with the same cameras, a Canon 60D and a Canon T3i.  Both lessons started out the same, though most of my lessons do, but as seen in the photo above we spent more practice on photographing moving subjects which they both seemed to like doing very much.  

Our lesson started at 9am to avoid the now near full-on Florida summer heat with us meeting in downtown St. Petersburg and over the course of the lesson we passed by many local points of interest like the Museum of History.  We ended our lesson by the two large banyan trees on Beach Drive for a little flash portrait practice, concluding a jam packed 2-hour photography lesson that was a lot of fun and I hope keeps Doug and Danny using manual mode for the most part!

Removing the photograph background but preserving foreground details for depth

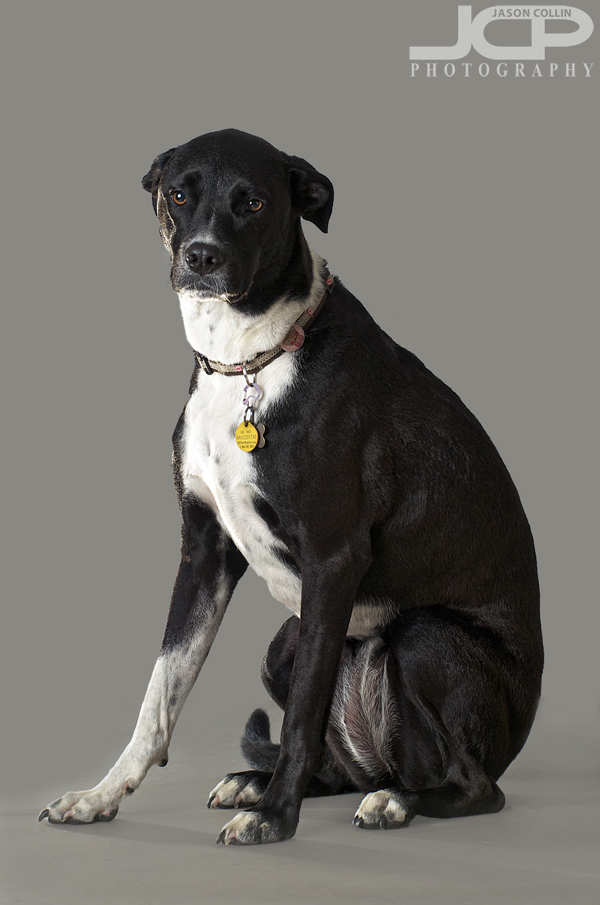
In an attempt to further refine my own skills with using the "Refine Edge" function in Photoshop's Quick Select tool I made the above photograph of Kiki right here in the living room.  I knew beforehand I would be removing the background and painting in a new one.  I have really started to like using this technique lately, especially when adding a pure white background.  However, when including a full view of the subject, replacing the entire background be it with all white or any other color a lack of depth can result as the foreground and background are exactly the same.  As you can see in the finished version on the right some shadow and light remain on the floor around Kiki's paws.  After doing my usual edits to the image, the process I followed for making the digital backround was thus: 

  • Quick Select the floor area only & increase its contrast
  • Using the Eye Dropper tool select a color from the increased contrast floor (gray-ish in this case)
  • Increase the area Quick Selected to included everything except Kiki herself
  • Using the Brush tool at 100% paint the background up until the edge of the floor
  • Change the opacity to 40% and paint the floor area until a uniform gradient appears 

In am happy with the process I used to make the digital background in this case, but I would like to improve the smoothness of the gradient/transition of the background to foreground even more by using every smaller opacities to brush it in.

The finished final image of Kiki with gray background added in Photoshop leaving floor light and shadow for depthAlas there is no editing I can do to make Kiki not look like a sad puppy.  This was right before our usual dog park time and I think she was wondering why do I have to sit through this when we could already be on our way to the park!  Next time I will attempt her portrait in the morning.

Get images like these of your dog or cat or pet done right in your own living room . . . contact Jason today to reserve your shoot!