Photography Tips

Architecture Photography Tip put building edge parallel to edge of the frame

This photography tip is about how to frame architecture shots with regards to the sides of the frame.  When photographing a skyscraper like the one above, I like to get the opposite edge (in this case the left) of where the building starts from to end with a part of the building parallel to that edge.  

In the shot on the right, the top of the building is at an angle to the left of the frame.  To me this looks awkward and makes the viewer's eye uncomfortable when following the lines of the skyscraper.  In the shot on the left, I composed so that the top of the building ended up parallel to the left (opposite edge) of the frame.  The viewer's eye starts from right to left and continues up through the top of the frame.  

What do you think about this small, but important composition detail? 

  • Read more photography tips
  • Reserve your own 1-on-1 DSLR Photography Lesson with Jason today!
  • Learn more about the lessons
  • Nikon D5100 DSLR Photography Lesson with Debbie in St. Petersburg Florida

    Debbie with her new Nikon D5100 during our photography lesson in St. Petersburg FloridaIt was on a crisp and sunny President's Day I met Debbie with her new Nikon D5100 for our first DSLR Photography Lesson together in downtown St. Petersburg.  Debbie had a Fuji bridge camera before that she had extensive experience with photographing people.  However, she was mostly using it on auto-mode, and likewise, when she got the D5100 she was staying in auto-mode.  DSLRs do not work well at all in auto-mode, they like to be told what to do.  The very first goal during my 1-on-1 photography lessons is to get people off auto-mode and to start taking more control over their photographs.  

    Even though Debbie already had photography knowledge, I added some organization to that with my 4-step method of getting the settings right for any given shot and also helping her just get familiar with changing those four things on her D5100.  We started out using aperture priority mode, but it did not take long to find the limits of using it in the harsh mid-day Florida sunlight.  Aperture priority mode was a good starting point for making a landscape shot of The Pier and Tampa Bay, but it was choosing too slow of a shutter speed.  By switching to manual mode and doubling the speed from 1/100th to 1/200th the results were much deeper blues in the sky, more details in the clouds and just an overall more dynamic image.  That is the power of taking control of your DSLR.

    Debbie gets to travel often for her work, giving her lots of different photography opportunities.  I look forward to seeing her images taken in aperture and manual modes!

    Panasonic Lumix DMC-GF3 Photography Lesson St. Petersburg Florida

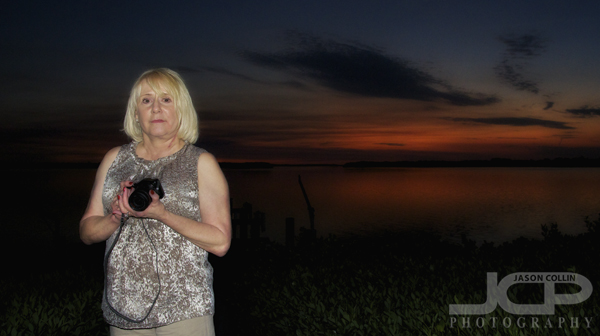
    Donna with her new Lumix DMC-GF3 Micro Four Thirds camera at twilight during our first photography lessonI received a phone call from Donna inquiring about my DSLR Photography Lessons and if I had time for a lesson before she soon left for a trip to South America.  Fortunately, both our schedules worked out and we were able to have our first of four lessons before her trip.  Donna just got a Panasonic Lumix DMC-GF3 Micro Four Thirds style camera.  This was my first time to get hands on with one of these compact cameras that has interchangeable lenses.  To be honest, my first impression is I would never own one of these types of cameras.  If I was not going to bring my DSLR around with me, I would probably then opt for something like the Nikon Coolpix P7100 or the Canon Powershot G12.  Still, I found the mostly menu driven DMC-GF3 to be pretty intuitive as I could figure out everything without having to delve into the manual.  

    The Lumix DMC-GF3 does have all the exposure modes of a DSLR, including aperture and shutter priority modes, as well as full manual.  Therefore, I could teach Donna my (someday) patented 4-step process for getting the correct exposure and sharpness for any given shooting conditions.  We started in aperture priority mode and once we hit the limits of her lens (f/5.6) and then also the shutter speed limit of 1/50th (what I feel is safely possible to handhold with a wide angle lens on) I had her switch to manual mode and force the shutter speed to stay at 1/50th of a second, but increase the ISO acccordingly to still get the desired exposure.  

    We tested the built-in pop-up flash of the Lumix DMC-GF3 for casual indoor portraits.  It worked as well as most pop-up flashes, which means it was passable.  When Donna returns from her trip we will work on more composition focused lessons.  I look forward to seeing her South America images!

    Photography Tip - How to make a black background out of nothing but camera & strobe settings

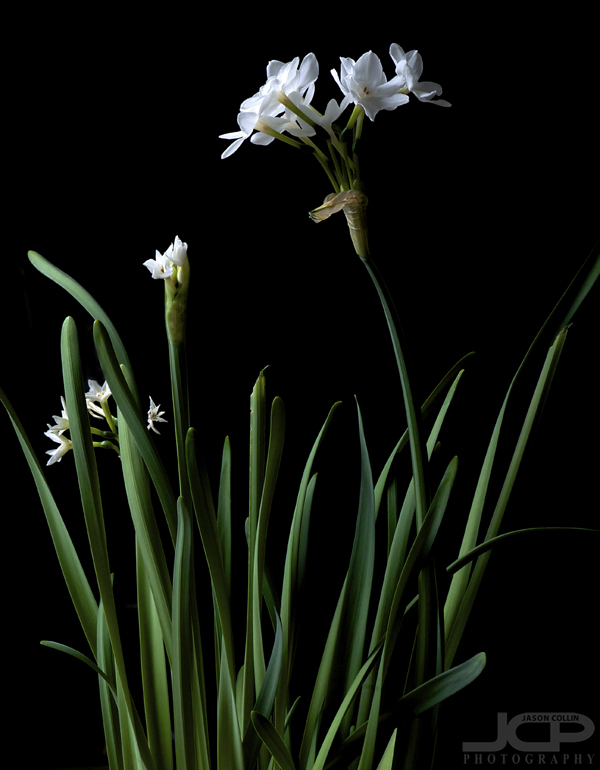
    This flower was photographed in my living room in the afternoon, black background achieved by: Nikon D300 Nikkor 105mm VR micro lens @ f/22 ISO 200 1/250th - Strobist: SB-800 in reflective umbrella to frame leftIf you would like to photograph a subject on a black background, you do not need to have an actual black background to achieve this.  Using strobist skills and manual settings on your DSLR you can create a black background almost magically.  I set these flowers on a small table in the middle of my living room.  It was 1:21pm on a sunny afternoon with the blinds closed on both windows, but a lot of light was still filtering through.  I setup a reflective umbrella (a softbox would work even better) to the left of the flowers with a Nikon SB-800 Speedlight.  It took some fiddling to make sure none of the light from the umbrella splashed onto any of the walls, which made them visible in the shot.  The same goes for getting the settings on my DSLR to produce the results I wanted.  In the end I was able to achieve what I wanted, just the light from the speedlight exposing my subject with the ambient light in the room eliminated due to the small aperture and fast shutter speed settings.  

    How to create a black background: 

    1. setup the subject in a room with as much distance from the walls as possible
    2. setup a speedlight to left or right of subject with umbrella/softbox/other light modifier
    3. start with f/16 and 1/200th & adjust from there as necessary (ISO should be at lowest setting) 

    Thank you to Bill Gracey and his great flickr photostream for the inspiration for this shot.  Be sure and visit his extensive gallery of strobe lit plants.

    Try this at home and be sure and post a link to your results in the comments below.  If you would like to learn how to make photographs like this first hand, I offer 1-on-1 DSLR Photography Lessons in and around the St. Petersburg area.  Reserve your lesson today! 

  • Read more photography tips
  • Reserve your own 1-on-1 DSLR Photography Lesson with Jason today!
  • Learn more about the lessons 
  • Meeting Rick Sammon - what I learned in Oldsmar Florida

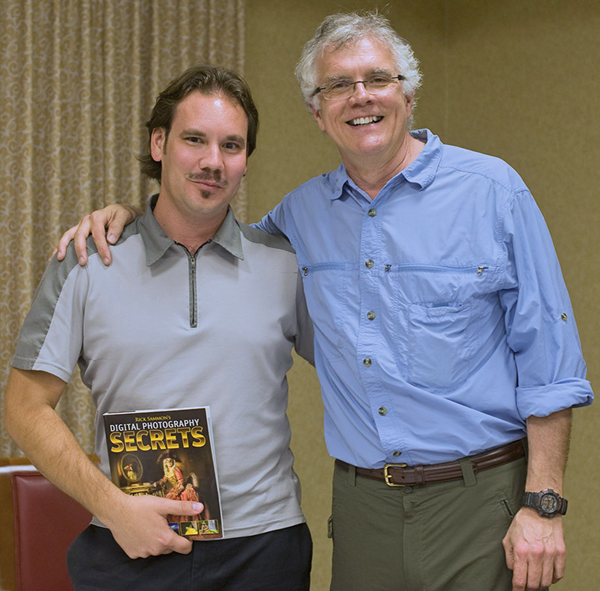
    Jason & Rick Sammon - I got to meet one of my biggest photography influences - thank you Kathy for the photoI was walking down the hallway in the Hilton Garden Inn looking to make a quick restroom stop before attending a photography seminar.  I see a tall man at the end of the hallway who asks me, if I am looking for the photography seminar, that it is this way.  I do not recognize him at first from a few feet away, but the voice was very familiar.  As I get closer I realize it is the speaker for the seminar himself, Rick Sammon.  In my mind I thought wow, shook his hand and asked if he would sign my copy of his book, DIGITAL PHOTOGRAPHY SECRETS.  He did so gladly.  This is how I got to meet Rick Sammon for the first time after listening to him for years on photography podcasts, which made his voice very familiar to me.

    Rick (website) is a very famous photography traveling to dozens and dozens of countries making all kinds of photographs.  His photography talent is evident in his images.  What is perhaps even more amazing about him is his passion and enthusiasm for sharing what he knows and loves about photography with people, often for free.  This particular evening he gave two hours of his time to talk to about a hundred local photographers of all levels.  His photography podcasts I used to listen to were all for free.  I really respect how much he gives to help others love photography as much as he does.  

    About thirty minutes into Rick's photography seminar I began to realize just exactly how much my own photography knowledge came from him.  Things I now tell my own photography students are nearly verbatim tips Rick espouses as key things for making great photographs.  This surprised me and made me smile.  I guess, however, this should hardly be surprising given I have listend to dozens of hours of his podcasts and read his SECRETS book containing all those tips.  

    Depsite all that expsoure already to Rick's knowledge, here are things I learned during his 2-hour seminar: 

    • speedlights keep pupils wide (bedroom eyes)
    • use layer masks for combining to very different DoF's
    • horse photographs ideally show all legs off the ground (I thought just curled under before, which is probably the same actually)
    • a photographer should practice (a lot)
    • cut a slotted hole in a piece of cardboard for movie lighting (like when peeping through window blinds)
    • include shadows on a wall to add depth
    • conversely put the flash high to hide shadows on walls 

    It was inspiring to meet Rick and feel his enthusiasm.  This is my photography tip for your, go and hear (famous) professional photographers speak!  I am sure you will always learn something.  This will help your photography a lot.  Each tip you can pick up adds to your skill set.  Picking up a few key skills from other photographers and lots of practice was how I taught myself DSLR photography.  I cannot emphasize enough how important it was to me randomly picking up a key piece of photography knowledge here and there because of being around other photographers via seminars like this one and even more through photography meetups.  

    Thank you very much to Kathy for organizing this seminar and for making the photo of me with Rick above and for giving so much of her own time to run The Tampa Bay Strobist & Photoshop Collective on Meetup.com.  You should join her group!

    So now I have had direct contact with my two favorite photographers and biggest influences, this meeting with Rick Sammon and a few years ago Scott Bourne personally critiqued one of my photos on his website.  Try and seek out and meet your own favorite photographers!  It may be easier than you think.

    Light Painting & Night Photography DSLR Photography Lesson with Julie

    Light painting during Julie's DSLR Photography Lesson out at The Pier in St. Petersburg FloridaFor our third of four DSLR Photography Lessons I met Julie on a chilly St. Petersburg evening to practice long exposure and night photography.  This type of shooting most definitely requires a tripod, and we pushed the legacy tripod Julie borrowed from her husband to its limits.  We took the trolley out to The Pier, but first had a quick practice of on how to shoot abstract bokeh with her new 50mm lens.  

    Being a Monday night we basically had the entire Pier to ourselves, and especially so at my favorite water level spot upon a decaying concrete platform.  Besides showing Julie how to make the usual long exposure shots of the St. Petersburg downtown skyline, we entered a kind of special effects world with light painting.  For the above shot, I set my DSLR on my tripod with a 10 second shutter time.  Using the LED light on the back of my iPhone 4 I "painted" from the tip of Julie's finger down onto the concrete.  I did not astral project myself, I just moved quickly enough not to be fully exposed in the image.  

    We went on to practice light trail shots and a number of other things too.  It was an action packed lesson for sure and Julie was great managing with an unfamiliar tripod and getting adept at changing the settings on her Canon 60D in the dark.

    Architecture & Exposure DSLR Photography Lesson St. Petersburg Florida with Rebecca

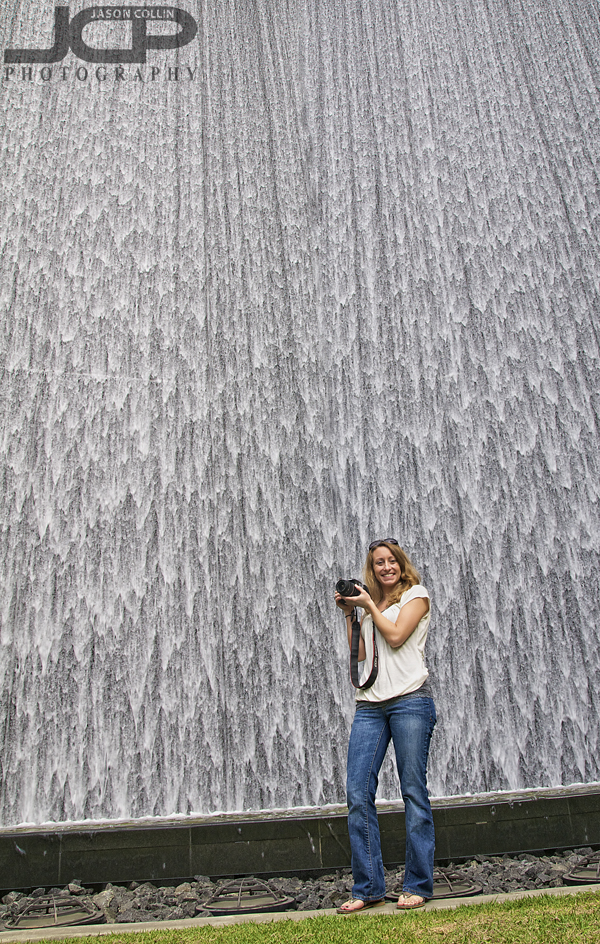
    The Waterfall at Signature Place Tower in downtown St. Petersburg - Rebecca with her Canon XSiFor our second of four 1-on-1 DSLR Photography Lessons I met Rebecca at the same spot in downtown St. Petersburg where we began by looking at some photographs she had taken since our first lesson with her Canon XSi.  Rebecca is following my most recommended path for anyone taking my 4-pack of lessons (or even a single lesson) by first taking a lot of notes during the content heavy first lesson, then shooting a lot between the first and second lessons.  This allowed me to see her progress and give very specific help to improve her shots.  In fact, we spent the entire second lesson practicing how to get a correct exposure given differing lighting (backlight, side light, etc) with a focus on architecture subject matter.

    For this practice I had Rebecca start in Aperture priority mode (A, Nikon; Av, Canon) at f/11 which is recommended for our typical sunny Florida days.  Then depending on where the sun is relevant to the subject, we were able to find the limits of A-priority mode.  This is how I taught Rebecca to find the limit:  1.)  once the shutter speed goes below 1/60th, increase aperture  2.)  Once the aperture limit of f/5.6 is hit along with the 1/60th shutter speed limit, then increase ISO

    When A-priority mode was choosing a shutter speed too fast even at f/11, then I had her switch to manual mode, staying at f/11 while manually setting a slower shutter speed and tweaking the latter to produce the desired balalnce between for example enough blueness in the sky, but also enough detail in the shadows of buildings.  

    Using these real world skills for setting up a properly exposed shot, plus the architecture composition tips I passed on to her, I am sure Rebecca will be able to make some great shots when she visits New York City next week.