Photography Tips

Off Camera Flash DSLR Photography Lesson with Nikon D700 & SB-900 Speedlight

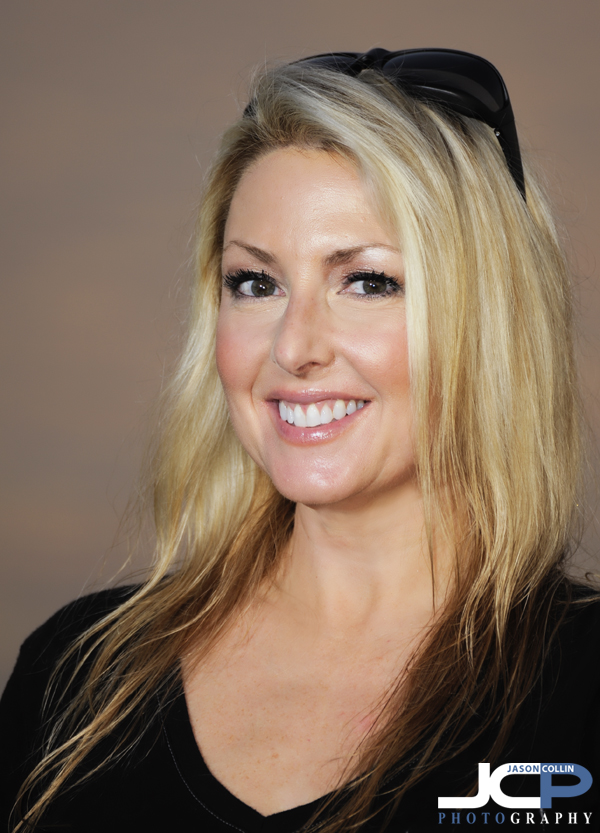
Not done in a studio, but outside amongst fire ants and mosquitoes! - Nikon D700 with Nikkor 70-300mm f/3.5-5.6 lens @ f/5.6 ISO 200 1/200th Strobist: Nikon SB-900 Speedlight @ 1/128th power on light stand to frame left triggered by Commander modeBarbie has started a new four DSLR Photography Lesson set with me.  We picked up right where we left off on Monday with some flash portrait practice.  However tonight, we got the flash off the camera for some strobist style shots.  Can you guess where the above shot was taken?  Looks like a studio right?  Actually, it was right in Vinoy Park around sunset time.  Such is the power of off camera flash combined with the right lens and exposure settings.  Almost anywhere can be made to look like you are working in a studio.   

For the above shot I used Barbie's kit (Nikon D700, Nikon SB-900 Speedlight bare, Nikkor 70-300mm f/3.5-5.6 lens) combined with my light stand.  The background, if it were in focus, is Tampa Bay at dusk.  This was my second time getting hands on with Barbie's SB-900 and all I can say is:  it is VERY powerful.  Most of the time tonight it needed to be manually set to 1/128th so as to not over expose either myself or her.  
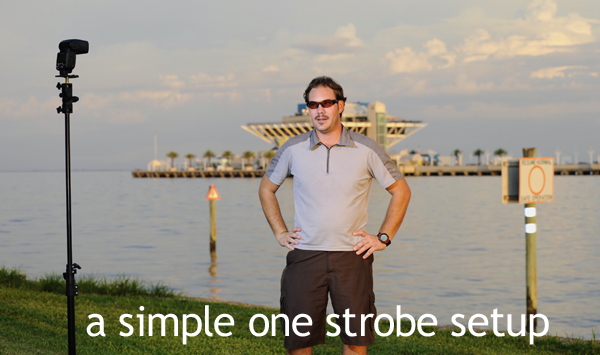
As you can see, our setup for tonight's lesson was as simple as strobist photography gets, just a single strobe on a light stand, with not even a diffuser cap on the flash.  The SB-900 was triggered by commander mode on Barbie's D700.  All Nikon's D80 and above (D90, D300, D300s, D700) have this mode that uses the DSLR's built-in flash to trigger the Nikon strobe (SB-600, SB-800, SB-700, SB-900).  Now, this is a great feature to have standard in the camera, but it is not totally reliable as a line of sight is needed, so for proper strobist photographer I do recommend getting radio triggers.  

  • Reserve your own 1-on-1 DSLR Photography Lesson with Jason today!
  • Learn more about the lessons
  • Browse past lessons with all of my students 
  •  

    --Professional Model DSLR Photography Lessons now available!

    Photography Tip - find lights for creative bokeh

    Take a photo lesson with Jason & learn how to make this same shot! - Nikon D300 with Nikkor 50mm f/1.8D @ f/2 ISO 200 1/80thI have been having DSLR Photography Lessons using only 50mm lenses often lately.  My Nikkor 50mm f/1.8D lens is one of my favorites to use as a "walking around" lens as its large aperture allows for easy creation of very shallow DoF, which itself of course results in bokeh.  However, not all bokeh is created equal.  

    Photography tip:  find small lights to use as big bokeh in the background of your shot

    The lights in the above photograph were hanging around a tree in a restaurant's back courtyard eating area.  I actually was standing in a very grimy alley (see the second shot here) to make this shot.   

    Using a large aperture of f/2 and focusing on the railing, the small lights seen on the left became the much prettier bokeh on the right.  This also shows the importance of knowing how to creatively control your DoF and what object to set the focus on in order to produce the best results.  

    Try this photography tip this weekend and post a link to your shots in the comments below.

    50mm DSLR Photography Lesson with Pam & her Canon 60D

    50mm lenses are by far the most fun for the money in the DSLR worldMy third of four lessons with Pam was a 50mm lens only DSLR Photography Lesson.  If you do not have a 50mm lens yourself, well, get on Amazon or BH Photo and order one immediately as they are the cheapest lens made, but also one of the most fun to use.  It is very, very rare in the DSLR photography world to get a great piece of gear for under $150, but that's just what you get with a 50mm f/1.8 lens.  There is no better value for money in photography, not even close.  

    50mm lenses are great at easily producing bokeh since they have such large apertures.  What I told Pam at the beginning of the lesson was that it is no skill to produce bokeh using a 50mm lens, but there is a big difference in quality of bokeh depending on what the background elements of the shot are.  What works really well?  A string of lights works great.  In the above photo trees in a park along the St. Petersburg waterfront are decorated with strings of white-blue lights.  I set the focus on Pam intending to make the lights of the trees into round glowing bokeh orbs.  No flash was used and I handheld the shot.  That is the power of the 50mm f/1.8 lens!

  • Reserve your own 1-on-1 DSLR Photography Lesson with Jason today!
  • Learn more about the lessons
  • Browse past lessons with all of my students
  •  

    --Professional Model DSLR Photography Lessons now available!

    External Flash DSLR Photography Lesson with Barbie & her Nikon D700

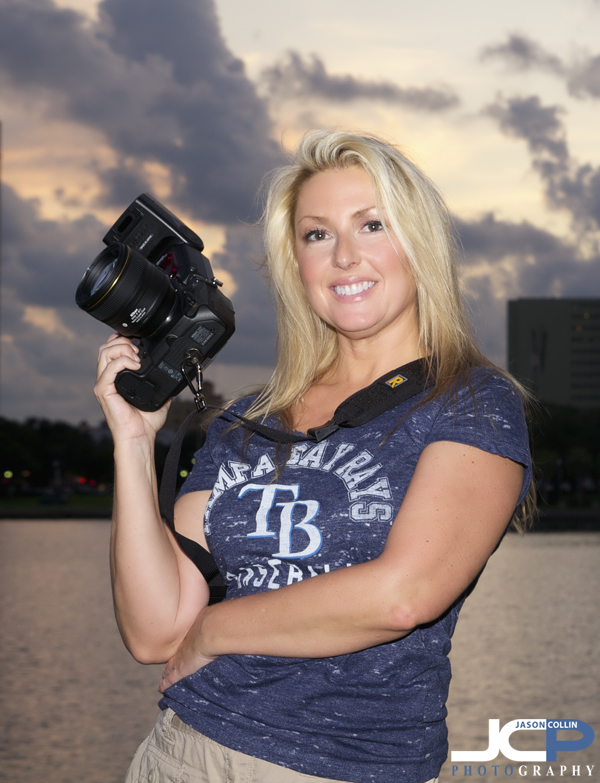
    Barbie and her Nikon D700 with new Nikon SB-900 Speedlight! Flash is necessary for sunset portraits like this.Lately everytime Barbie and I have another DSLR Photography Lesson she comes with another significant new piece of photography gear.  For our fourth of four lessons Barbie debuted her new flagship Nikon Speedlight, the large and powerful SB-900.  Also, she got a BlackRapid RS-7 strap similar to my RS-Sport model! It was my first time to get hands on with the most powerful speedlight Nikon makes and although I was impressed with its power, there were some quirks with its controls.  Like to adjust the power there is not just a plus and minus adjustment button, another button must be pressed first to select the power on the rear LCD screen.  

    To practice sunset and twilight portraits Barbie and I headed out to Vinoy Park which offers a great background of the downtown St. Petersburg waterfront to the west and to the southeast is The Pier and a panoramic view of Tampa Bay.  It is my favorite spot in the whole city.  

    To get the most natural looking flash portraits in low light we had to use our speedlights in manual mode, dialing in low levels of power like 1/64th so as to not blow out the subjects (us).  Barbie will be buying another 4-pack of DSLR Photography Lessons starting on Friday when we will continue our flash practice, and get the flash off the camera!

  • Reserve your own 1-on-1 DSLR Photography Lesson with Jason today!
  • Learn more about the lessons
  • Browse past lessons with all of my students
  •  

    --Professional Model DSLR Photography Lessons now available!

    BlackRapid RS-Sport Camera Strap Gear Review

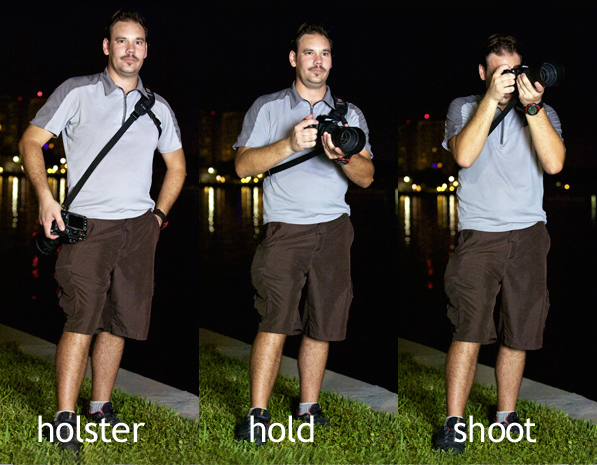
    Gunslinger hip to eye shooting style demonstration using the BlackRapid RS-Sport strap system with a Nikon D300 & Nikkor 80-200mm f/2.8D - photo by PedroLet me start by just saying that the BlackRapid RS-Sport strap has made me excited about using my DSLR again because of just how cool it feels to slide the camera up and down the strap.  Readers of my movie reviews will know I am a big western fan, and I definitely feel like an old gunslinger when using my BlackRapid RS-Sport.  So this is the emotional part of the review, which is mostly what determines buying a certain product or not.  I decided to buy one even before I knew it would make me feel like a gunslinger.  Just trying a photo student's RS-7 strap for a few seconds instantly convinced me to free my neck from its burden and get a sane camera carrying system.

    For the ergonomics and practicality part of the review, the BlackRapid RS-Sport strap still gets a very positive gear report from me.  I have only had the RS-Sport for exactly two weeks, but I have already put it through many different shooting situations and it has performed great in all of them.  On a 2-day event shoot (5pm-8pm Friday; 9am-12am [yes 15 hours] Saturday) I got home early Sunday morning with zero shoulder pain.  Normally after only a few hours using my old Nikon Professional branded Optitech neck strap, I would have lingering sourness after a job.

    The effectiveness of the BlackRapid strap system comes from taking the weight off your neck because when do you ever carry anything around your neck ever besides for some reason a heavy DSLR?  Instead, the BlackRapid strap system puts the weight on your left shoulder like any other style of bag one carries.  It has to be your left shoulder too.  If you are left-handed like me and concerned because you usually carry everything on your right shoulder so your left hand has easy access to the bag, it immediately felt normal to me to have the BlackRapid strap on my left shoulder because you grab a DSLR with your right hand first anyway.  The grip on the DSLR body is designed for the right hand so do not be concerned about having to use it on your left shoulder, even if your are left-handed.

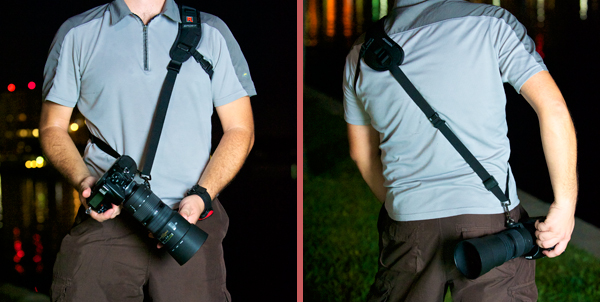
    Your camera on a BlackRapid strap can hide behind your hip in tight spots or can easily be held in front to squeeze through places.

    I chose the RS-Sport model for the extra bit of strap that goes under the armpit area for extra stability.  I have to admit I did think at first that this is not comfortable and maybe I should have just gotten the RS-7 which is similar to the RS-Sport but minus the underarm strapping.  However, in real world use and not hyper nitpicking when trying it on in one's house, I am definitely glad I got the RS-Sport because the main shoulder pad is more ergonomically tapered and the underarm strapping is not noticable to me anymore.  

    How anybody can use the first party straps that come with a DSLR is beyond me.  I immediately got a cushier Optitech neck strap, which sells for about $24.  Now I wish I had gotten a BlackRapid strap long ago.  The RS-Sport sells for $69.95 and the standard RS-7 for just $58.95.  There are several other styles, including a dual strap system for carrying two cameras!

    Take a 1-on-1 DSLR Photography Lesson with me and I will let you try out my RS-Sport strap for yourself! 

    --thanks to Pedro for taking these shots of me

    DSLR Photography Lesson at the New Salvador Dali Museum with Golda

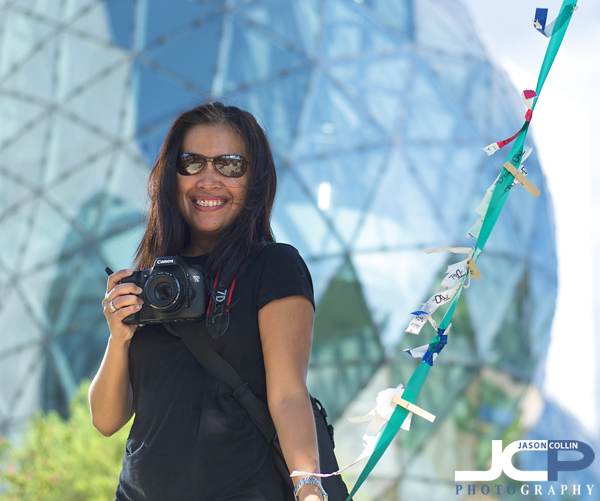
    Golda with her new Canon 7D at the New Salvador Dali Museum in downtown St. PetersburgIt was my first time to have a DSLR Photography Lesson on the grounds of the new Salvador Dali Museum on the St. Petersburg waterfront.  I will definitely be using it again as there are ample architecture photography opportunities along with a very interesting garden to photograph, plus good locations to practice portraits as well.  This was the site of my fourth of four lessons with Golda who will in September be going on a three week mediterranean cruise!!

    I actually visited the Dali Museum to photograph it for promo shots for a hotel recently, but did not get up close like I did today.  The strange design of the "waterfall" of glass looks much better close up I think than it does from afar.  I used it for the background of the above portrait of Golda.  She is standing under a tree that has long green streamers tied to it, upon which people tie their Dali ticket wristbands as well as handwritten messages and notes.  I thought it was a nice interactive touch to have as part of the greater museum exterior.  

    As for what we practiced during the lesson, we started with architecture shots of the building itself, then moved on to making shots with bokeh (using the streamers), transitioned to use an external flash to add fill light for portraits in the shade before ending with composing portraits to take advantage of repeating patterns.  It was a photography packed 2-hours!

    I look forward to seeing Golda's mediterranean photos and especially the promised postcard she said she would send!

  • Reserve your own 1-on-1 DSLR Photography Lesson with Jason today!
  • Learn more about the lessons
  • Browse past lessons with all of my students
  •  

    --Professional Model DSLR Photography Lessons now available!
    Tripod DSLR Photography Lesson with Pam in St. Petersburg Florida

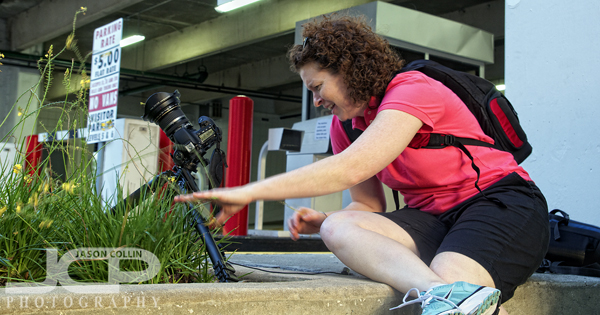
    Pam using her Canon 60D with Canon 10-22mm ultrawide angle lens on her tripod in downtown St. PetersburgAs you can see, for our second of four DSLR Photography Lessons, Pam was not afraid of getting into the thick of the concrete jungle to get a shot.  This evening's lesson focused on using a tripod to compose architecture shots.  We mostly photographed the skyscraper condos of downtown St. Petersburg before ending along the waterfront.  

    I showed Pam a few tripod basics, like making sure the front of your lens points over one of the three legs of the tripod (for extra stability) and that if you do not need your tripod's full height, you should use only the upper portions of the legs, leaving the thin (and less stable) legs unextended.  When using a tripod I also recommend using a cable release, which Pam has, so as to avoid any shake from your finger pressing (and shaking) the shutter release button.  

    It was a bit of a learning experience for me as well helping Pam compose shots with her ultra-wide Canon 10-22mm lens, as I do not own a similar lens and no past student has either.  One really has to think, "I am going to shoot wide, and only wide," as even at 22mm everything still looks wide in the frame.  My next gear purchase though, besides a Spider Belt, will be an ultra-wide angle lens, probably the Tokina 11-16mm f/2.8 as several friends have it and love it and I have not heard anything but praise for that lens.

    For our third lesson next week Pam and I will be using 50mm f/1.8 lenses exclusively.

  • Reserve your own 1-on-1 DSLR Photography Lesson with Jason today!
  • Learn more about the lessons
  • Browse past lessons with all of my students
  •  

    --Professional Model DSLR Photography Lessons now available!