Photography Tips

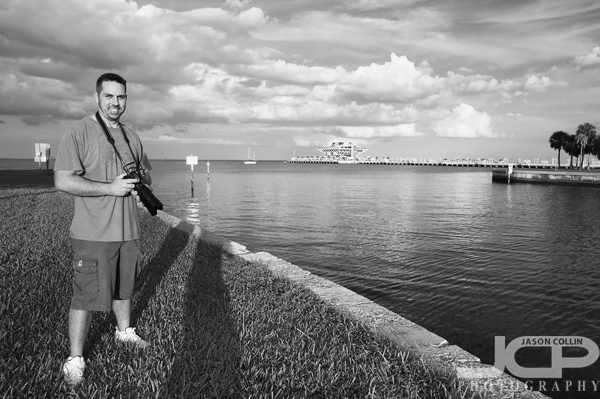
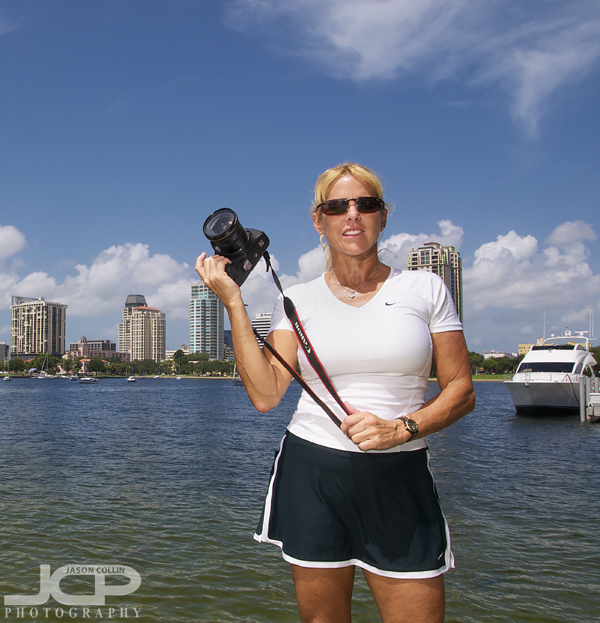
DSLR Photography Lesson with Deb & her Canon 7D

Deb learned which lenses to use on her Canon 7D depending on the subject she is photographingDeb mentioned before our DSLR Photography Lesson in downtown St. Petersburg that she had a 70-200mm lens, she did not mention though it was the Canon 70-200mm f/2.8 IS L lens!  She also mentioned that she did not really use it that much, not realizing the power of that lens.  I immediately began to sing its praises and how it was the best piece of photography kit in her bag.  
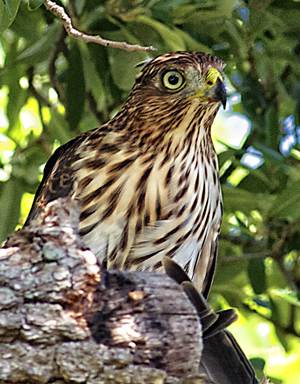
red shouldered hawk with preyFirst though I showed her how to navigate all the controls on her Canon 7D, which Canon does not necessarily make that easy to do since it pairs often changed settings to a single button.  Soon though I had Deb constantly checking and confirming her aperture, ISO, WB and focal mode/points (the order I set & check things in) as we walked around making different kinds of shots (shallow DoF, moving subject, etc).  We even had the chance to photograph a red-shouldered hawk eating prey in a tree.  Deb lives on 3-acres of land and said many birds can be found on her property so I hope she takes out her 70-200mm and 7D each day to practice shooting and start documenting all the wildlife she gets to call neighbors.

Deb works for Ambassador Limo whose clientele overlaps with mine so we talked some about combining our professional services to provide an even stronger product for clients.  I look forward to this very much and also to our next DSLR photography lesson once her external flash arrives! 
  • Reserve your own 1-on-1 DSLR Photography Lesson with Jason today!
  • Learn more about the lessons
  • Browse past lessons with all of my students 
  • Photography business tip - give your client a little extra

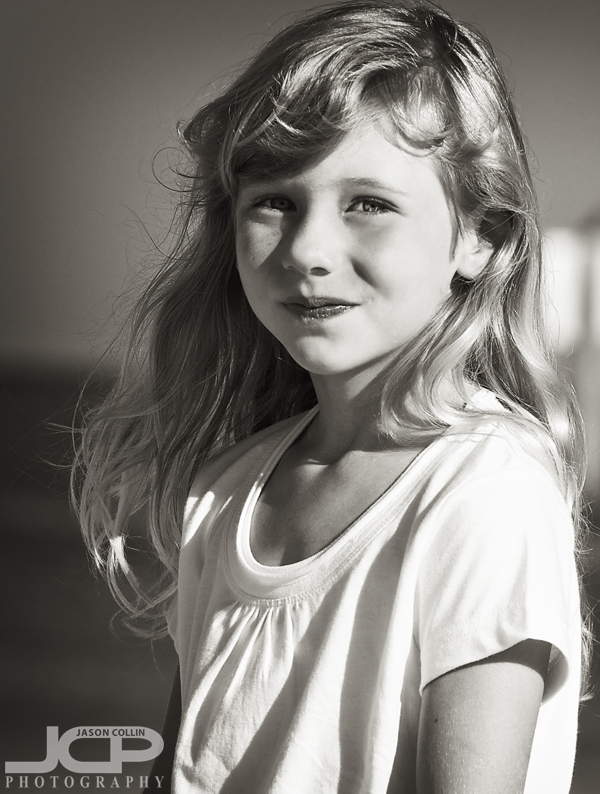
    Nikon D300 Nikkor 80-200mm f/2.8D lens @ f/8 ISO 200 1/800th processing Silver Efex ProIt is commonly heard in the business world to under-promise and over-deliver.  In this way a business can impress a customer or client.  How can this apply to the professional photography business?  One simple way is to just give the client extra photos than stated in the package they bought.  Which photos to give as bonuses?  Well, they will of course not be any of the best of the best because those will have already been included in the initial product to the client.  

    One way to know is to listen to your client's feedback once you delivered the promised number of photos.  If they say they like shots of one particular person a lot (often a child) or like one certain style of shot or if they say they really like the black and white versions, then any of those can be your clue on which photos to include as bonuses.  

    A recent client said she especially liked the photos of her daughter.  So I went through my remaining unedited 3-star and even 2-star photos from our portrait session to see if there was anything I thought still good enough to put into the hands of a client.  I found the above shot and made it work to my satisfaction by applying a sepia landscape filter to it in Nik Silver Efex Pro.  

    The result?  The above image was included in the prints she later ordered, the direct business benefit to the photographer.  Even more important, I was able to provide the client with another image of her daughter that will brighten a desk or shelf in her home.  Thus, satisfaction for the client and satisfaction for the photographer knowing his/her work provided some real world benefit.

    Sidney & Berne Davis Art Center Night Wedding Portrait

    Textual illumination at Davis Art Center Ft. Myers, Florida - Nikon D300 Tamron 17-50mm f/2.8 lens @ f/2.8 ISO 800 1/60th Strobist - Nikon SB-600 Speedlight in TTL mode on tripod to frame right triggered by commander mode

    If you are looking for a cool place to make portraits at night in the Ft. Myers, Florida area, the Sidney & Berne Davis Art Center in the downtown area of Ft. Myers is a great place to shoot when it is all lit up.  Cylindrical structures with old names carved into them are lit up from the inside projected said names on all surrounding surfaces.  

    While the reception party raged on inside after, Debbie and Matthew and I slipped out to make a few night wedding portraits.  I used off camera flash to light the couple and let my shutter speed stay open long enough to bring out some of the details in the building behind them.

    If you have photographed at the art center (day or night), please include a link to your photographs in the comments below. 

  • Reserve your free wedding photography consultation with Jason today!
  • Learn more about candid wedding photography packages
  • Why choose Jason to be your wedding photographer?  Read the Wedding FAQ 
  • Florida DSLR Photography Lesson with Pete & his Nikon D5000

    Pete likes to use his Nikkor 70-30mm VR lens with his Nikon D5000 the most because he likes to see detials

    During our DSLR Photography Lesson, new student Pete asked the most questions of any student before.  However, this only made my job easier as I like to be asked questions and this process also tells me exactly what the student needs to know.  It was a very rare rain-free evening in St. Petersburg, virtually windless, and thus pretty steamy, but we had many shaded Q&A sessions over the two hours.  Pete was very anxious to learn how to use his new Nikon D5000 better.  He had photography experience, but modern DSLRs have quite a few more controls on them than cameras of yesteryear.  The first thing we did was get him off of P mode and onto aperture priority mode.  Then I taught him about aperture, and about how he really only needs to worry about using f/5.6, f/8 and f/11 for the type of photography he likes to do.  

    Two leading lines go right to the subject in this quick portrait of PeteBasically I showed Pete a good default settings base that will suit him well for shooting still objects in many situations: 

    • f/11
    • ISO 200 (lowest on Nikons)
    • aperture priority mode
    • white balance = sunny
    • focus mode = AF-S (one shot for Canon)
    • one (centered) focus point
    • use a tripod as much as possible 

    For sunny outdoor Florida weather, morning to evening, those settings will work well for most still subject matter.  

    Pete is traveling to beautiful Martha's Vineyard soon so I look forward to seeing his shots from there! 

  • Reserve your own 1-on-1 DSLR Photography Lesson with Jason today!
  • Learn more about the lessons
  • Browse past lessons with all of my students 
  • I photograph motorcycles for fun

    Nikon D300 Nikkor 50mm f/1.8D @ f/2 ISO 100 - St Petersburg, FloridaWhy did I photograph this motorcycle?  Simply because I like to photograph motorcycles.  I do not know how to ride a motorcycle.  I have only ever ridden on one once as a boy.  Yet I am drawn to photographing them.  Mostly parked.  These are photographs just for me.  For my own enjoyment.  I photograph them because it excites me too.  

    I am just trying to say I believe it is important for a photographer to sometimes (always?) make photographs for themselves, first and foremost.  To not care at all what people on flickr will think, not what people in your local photography club will say, not what your more experienced photographer friend will say.  Just make a photograph that you yourself like to look at.  I know I really like looking at all that chrome and green paint above.  If someone else digs it, that's cool.  If not, it will not lesson my own liking of it in the least.  

    I used to live in Tokyo where there are many more motorcycles.  I even made a flickr set just for them.

    What do you like to photograph just for yourself?

    On camera external flash DSLR Photography Lesson with Mohammad

    Nikon D300 with Tamron 17-50mm f/2.8 lens @ f/6.3 ISO 200 1/60th manual exposure Since our first DSLR photography lesson Mohammad bought an external flash (Canon 430EX II speedlite) to pair with his Canon T2i, which is something I highly recommend to all my students as the best next piece of photography gear to buy, after the initial DSLR and lens purchase.  The popup flash on DSLR bodies (or any camera) produces very poor results and has a very limited reach.  If you like to photograph people, then an external flash (strobe) is basically a must.  

    We once again met in downtown St. Petersburg finding various overhangs and walls to practice bouncing the strobe off of.  Even with an external flash, you do not want to just blast the light directly onto the subject, which will produce blown out skin tones and harsh shadows.  So what you can do is have the light from the strobe bounce off something so that it hits your subject indirectly.  This indirect light is scattered and soft.  That kind of light is good for producing professional looking portraits.

    While I was being the model for Mohammad's practice shots, he remembered to use the rule of thirds while photographing me.  So since the lens was not pointed directly at me, the head of the flash would need to be redirected more toward me (the subject) or a bouncable wall.  External strobes like the 430EX II have a multidirectional head.  So the lens can be pointed one way, and the strobe another.  This is another advantage an external strobe has over the built in pop-up flash.  

    New in the lesson was also shooting mostly in manual mode.  Mohammad quickly realized that being able to get away with f/8 and f/11 for almost all shots taken in direct sunlight is not the case when using external flash as we often had to very finely tune our apertures and shutter speeds to produce the best exposures.  As you can see, I used f/6.3 for the above shot.  

    Now, as better an external flash mounted on a hotshoe is over the built in pop-up flash, getting that external flash off the camera is that much better than having it on the hotshoe.  I look forward to a future lesson with Mohammad where we practice off camera flash.  I recommend reading the STROBIST blog if you want to get a daily dose of lighting information. 

  • Reserve your own 1-on-1 DSLR Photography Lesson with Jason today!
  • Learn more about the lessons
  • Browse past lessons with all of my students 
  • Digital Photograph Editing Lesson with Danielle

    Danielle's original jpg digital photo on the left, our edited version on the right using Photoshop Elements 8/CS5

    Some of my DSLR photography students have gotten to a point where their shooting is definitely improving, and it is time to now work on how to post process, or edit digital photographs.  Danielle is one such student.  I even wrote recently myself that one should develop shooting and editing skills simultaneously.  

    Danielle brought her laptop to the lesson loaded with Adobe Photoshop Elements 8.  I worked on my own laptop using Adobe Photoshop CS5 showing her step-by-step how I go about editing a portrait.  I typically use a workflow in this order: 

    1. crop the image
    2. correct the exposure
    3. color correct the image
    4. edit the subject's eyes
    5. remove blemishes
    6. clone out unwanted elements in the image
    7. sharpen
    8. save! 

    As you can see above, Danielle captured a very nice expression on the baby's face.  Since the right side of the baby's head was already over the edge of the frame, I decided to crop down the top as well.  The baby had a small cut on the inside corner of her left eye, we used the healing brush mostly to make that disappear.  

    The baby also had dark shadows under her eyes.  We chose a soft clone stamp brush, set it to lighten, set it to 40%, sampled an area just under the dark spot, then made a gentle brush stroke horizontally over the dark spot.  Then we used the dodge tool set to highlights and 30% and clicked once or twice on each white area of the eye to quickly and super easily brighten the eyes without making it look too fake.

    The last thing we did was remove some drool on her lips.  

    Danielle did a good job in camera of getting the image.  We then used editing to make the photograph more polished and professional looking.  With practice those editing steps only take about 10 minutes to do, or less.  Danielle learned and practiced those steps side-by-side with me and more as well in just a 2-hour lesson.  I am looking forward to seeing how she does on her own, and if she discovered any new editing tricks herself!

    Thank you Danielle for letting me publish your photograph. 

  • Reserve your own 1-on-1 DSLR Photography Lesson with Jason today!
  • Learn more about the lessons
  • Browse past lessons with all of my students