Photography Tips

DSLR Photography Lesson with Libby at Florida Botanical Gardens

Macro photography especially requires you to check and change your settings constantly

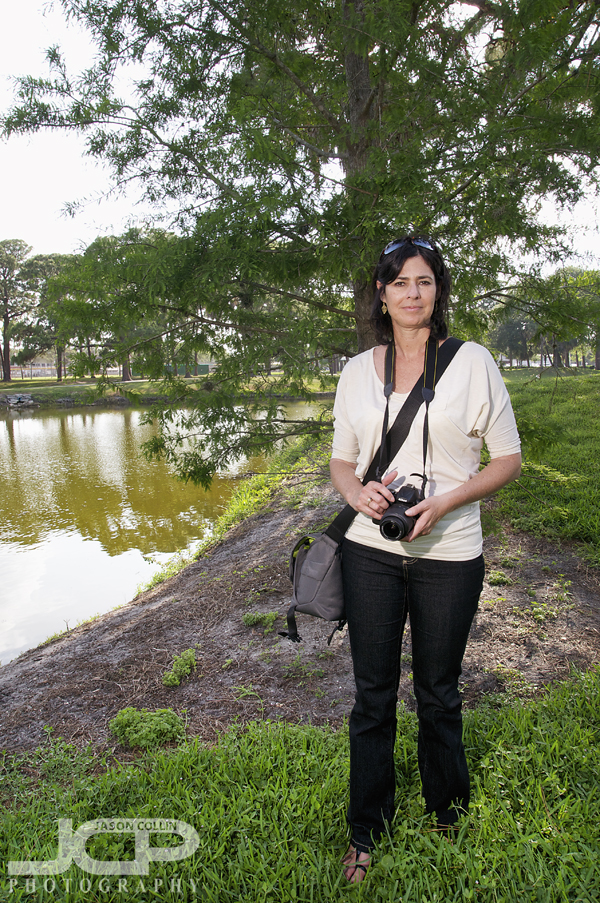
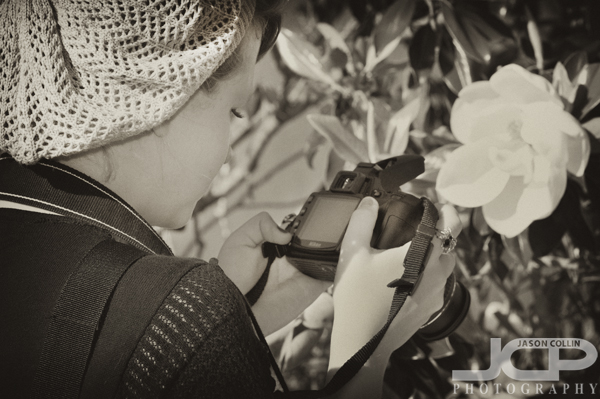
My second DSLR Photography lesson with my youngest student, Libby (1st lesson), was my first time to have a lesson at the Florida Botanical Gardens, which turned out to be an excellent location.  We focused exclusively on macro photography this time, in particular, flowers.  We must have photographed ten different kinds of flowers in two hours, as well as different colors of some types.  We ran out of time before we ran out of subject material.  

Now with a DSLR you really need to have a dedicated macro lens to get the best macro photography results.  Unlike point-and-shoot digital cameras that are jack-of-all-trades, if you simply turn the settings dial on your DSLR to its macro mode (if it has one), this will not magically transform it into a camera capable of making a macro shot.  Therefore, I have no idea why camera makers have these "presets" on lower-end DSLR cameras.  

Libby did not have a dedicated macro lens, but we made due with what she had (17-50mm kit lens).  Besides having a macro lens, to be able to make a macro shot like you see in magazines you need a sturdy tripod and excellent lighting, like a ring flash of some kind.  Macro photography is hard.

However, it is great for getting a photographer to become obsessed with checking and changing settings, which I always tell my students to do.  You might be photographing a white flower in shade and next trying to photograph a purple flower in direct sunlight.  Significant settings changes are required to shoot in such varied conditions.  I bet Libby's thumbs were getting sore from changing aperture, ISO and exposure compensation so much!

I had a very good time exploring the gardens with Libby during our lesson and look forward to bring more students to this exciting new DSLR photography lesson location.   
  • Reserve your own 1-on-1 DSLR Photography Lesson with Jason today!
  • Learn more about the lessons
  • Browse past lessons with all of my students 
  • DSLR Photography Lesson with Mohammad at Vinoy Park

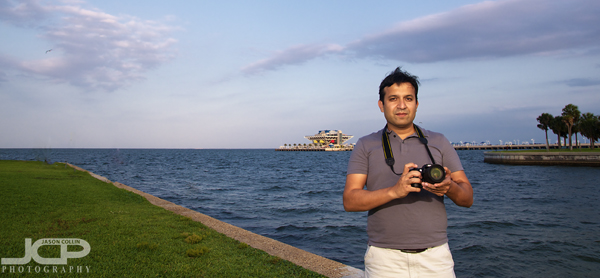
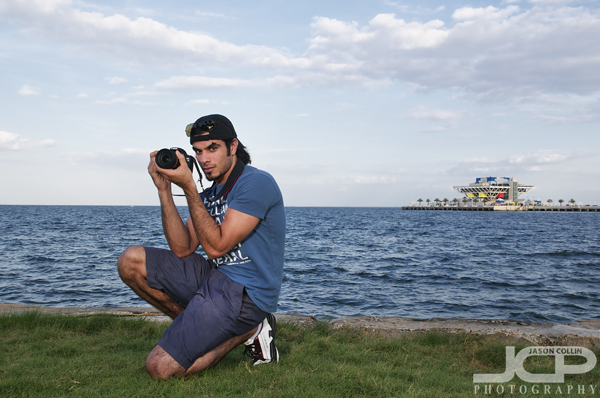
    Mohammad and his new Canon T2i with Tamron 17-50mm f/2.8 lens at Vinoy Park

    Mohammad is the first DSLR Photography Lesson student of mine to have the Canon T2i camera.  Before the lesson we talked several times on the phone discussing which one he should buy.  He was also considering the Canon 7D, but as the body alone would have eaten up most of his budget, I recommended he get the T2i and invest the rest in a good lens, which he did, the Tamron XR Di II 17-50m f/2.8, the same lens I use for a majority of my paid work.  

    As we walked around downtown St. Petersburg ending up at Vinoy Park, we discussed the usual DSLR photography basics, like how to make a shot with bokeh, how to photograph a moving object, and how to compose a landscape shot, but we also talked a lot about traveling.  I found out that Mohammad is also a world traveler and we have been to several of the same places, least of which was the island of Koh Chang in Thailand.  It seemed a heck of a coincidence to talk about such a not so popular Thai island all the way here in St. Petersburg (my experience at Koh Lanta).  

    We were treated to another great evening of spring weather Florida-style for the lesson.  

    Once Mohammad returns from a trip to Mexico I look forward to hearing all about it in our second lesson. 

  • Reserve your own 1-on-1 DSLR Photography Lesson with Jason today!
  • Learn more about the lessons
  • Browse past lessons with all of my students  
  • DSLR Photography Lesson #3 with Carmen at Fossil Park

    Fossil Park provided a surprisingly nice backdrop for our 3rd DSLR Photography LessonIt was three months since our last DSLR Photography Lesson together, so for this our 3rd lesson Carmen (1st, 2nd) had quite a few questions and photos to show me at the start of the 2-hour lesson.  I am always pleased when students are at least out practicing and getting good use out of their DSLRs.  That then gives us something to build on during subsequent lessons.  For example, Carmen photographed some of her family in the evening time wanting to get a water backdrop.  I was able to look at the settings she used for those shots and specifically tell her what she could have adjusted to improve the shots.  Then we actually practiced the same type of landscape portrait shots together to try and build "photography muscle memory" so she could remember on her own for the next time she photographed her family.

    Another focus of this lesson was on exposure compensation, the +/- button on your DSLR.  I was the model and first stood in direct sunlight, facing the sun, Carmen with her back to the sun as the photographer should be.  The portrait came out with me looking very light and harsh shadows under my eyes, basically making my eyes invisible.  How to correct this?  Move me (the subject/model) into shade.  We kept all settings the same.  The photograph was greatly improved, although a little underexposed.  The final step was adjusting her Nikon D5000's exposure compensation to +0.7 which produced a very pleasing natural light portrait that was night and day different from the two before.  If you do not have an external flash, adjusting your exposure compensation and placing the subject in shade can still produce some good looking outdoor portraits.

    I look forward to seeing Carmen's improved portraits! 

  • Reserve your own 1-on-1 DSLR Photography Lesson with Jason today!
  • Learn more about the lessons
  • Browse past lessons with all of my students
  • DSLR Photography Lesson in St. Petersburg with Irfan

    Irfan with his Nikon D90 during our first DSLR Photography Lesson in St Petersburg

    Choosing the Nikon D90 as your first DSLR is a great choice as it is a camera that allows for lots of growth with its ability to out of the box trigger a remote flash, allow settings changes by viewing its low power using top LCD as well as its dual control dials, all things no other DSLR under $1,000 has.  Irfan brought his D90 and two lenses for our first DSLR Photography Lesson on a very pleasant St. Petersburg evening, not too hot, not too windy.  

    He also brought some knowledge of photography terminology (aperture, ISO).  We took what he knew and expanded on it during the lesson, plus of course adding a good bit more information too.  He seemed to absorb it all well.  

    As always I showed proper and safe lens changing techniques and how to best hold a DSLR camera for maximum stability, which right off the bat makes you at least look like a pro shooter.  

    I look forward to showing Irfan more off camera flash shooting techniques in future lessons, and perhaps even HDR photography! 

  • Reserve your own 1-on-1 DSLR Photography Lesson with Jason today!
  • Learn more about the lessons
  • Browse past lessons with all of my students  
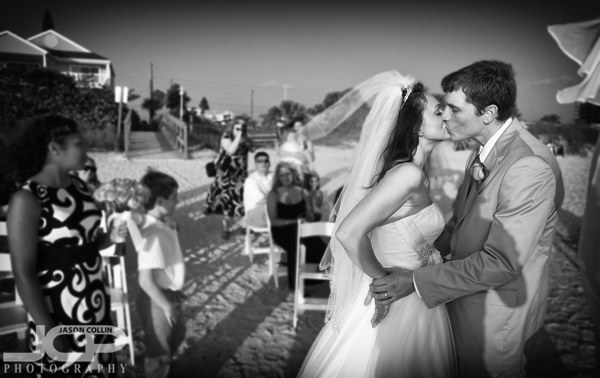
  • Selective Focus Wedding Kiss Black & White

    Nikon D300 Tamron 17-50mm f/2.8 @ f/8 ISO 200 1/500th strobist: SB-600 hotshoe mounted TTL

    What I wanted to make the focus of this image, was the kiss.  Yet I did not want to do this simply by cropping way in on the bride and groom.  My original idea was to just use a holga filter on the image, but I did not like the grain for this shot.  I wanted more of an ethereal look to the shot, rather than historic.  I also wanted to isolate the couple from the distracting background.  The way to achieve this look did not come to me all at once.  I tried one thing, which led to another, which ultimately lead to the final image you see above.

    Here is the step-by-step editing workflow I followed: 

    • import RAW file into Aperture 3
    • increase the vibrancy slider
    • send image into Color Efex Pro 3, apply polarization, pro contrast, & remove color cast filters
    • send 16-bit TIFF version into Photoshop CS5 to remove blemishes & sharpen with unsharp mask (save & close)
    • via Aperture try holga filter in Silver Efex Pro 3 (do not like result)
    • send 16-bit TIFF back into PS CS5 and magic wand select the couple, reverse selection, apply gaussian blur to the selection (save & close)
    • via Aperture use Silver Efex Pro 3 to apply high structure filter, add vignette, burn bottom edge (finished!) 

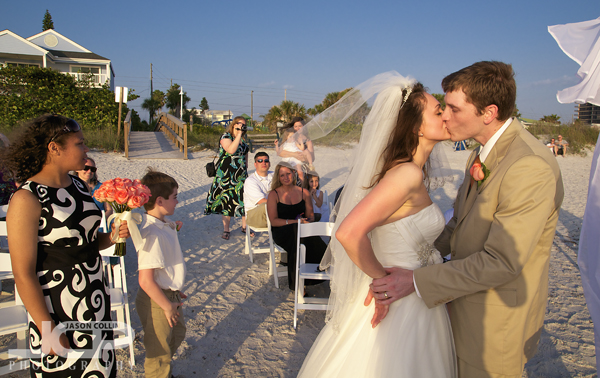
    It took me a good bit of time, like over 15 minutes, but I really like working on experimental processing projects like this, when I have the time.  The original (well, only did first three bullets to it) is below.  What do you think?  Which do you prefer, original or selective focus black & white, both or neither?  Why?

    the "original" image

    DSLR Photography Lesson with Nicole & her Nikon D5000

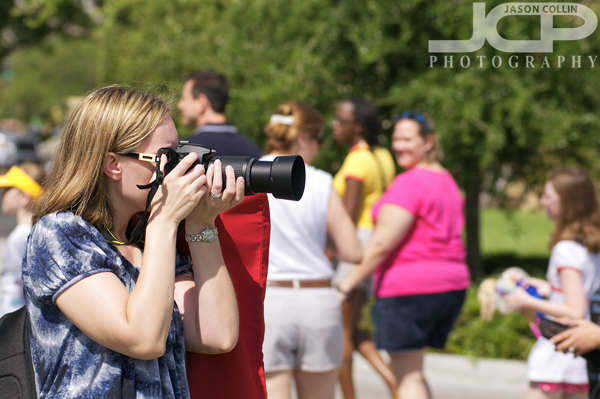
    Nicole photographs the Walk For Autism with her new Nikon D5000

    The heat is on in Florida once again, so maybe my starting time for DSLR Photography lessons will soon need to be moved from 10am to 8am!  By the time I met Nicole for our first lesson we already found ourselves sticking to the shade anytime we were not shooting.  She recently purchased a Nikon D5000 with the two kit lenses, a good starting point for anyone interested in DSLR photography.  Unknown to us the Walk For Autism event was happening right where we were meeting.  This was a nice surprise as we had good subject matter for practicing street photography.  In the above photo you can see Nicole practicing using her medium telephoto 55-200mm lens and AF-C focus mode.  AF-C stands for auto-focus continuous which sets her D5000 to continually set a focus on whatever her focus point is on while she holds the shutter down half-way.  

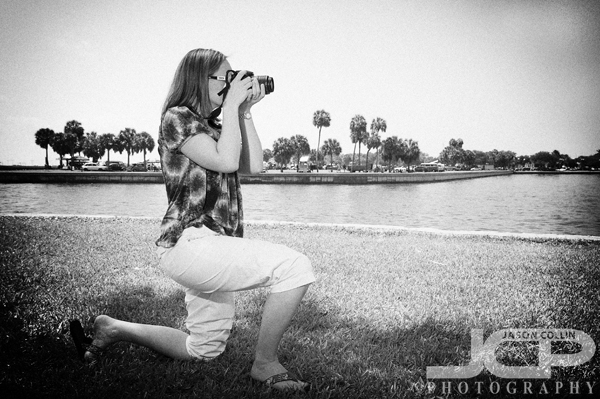
    Nicole demonstrating good one knee shooting technique - holga effect in Silver Efex Pro 3 appliedOne of the first things I teach every DSLR Photography student is simple, solid, good camera holding technique, as soon in the above photo.  The left palm goes under the lens with the left thumb on the outside.  This way your elbows can be locked into your body.  For extra stability you can use the one knee technique.  I often rest one of my elbows on my knee as well.  

    Nicole was a fast learner to everything I showed her during the lesson, seemingly retaining most of it the first time!   

  • Reserve your own 1-on-1 DSLR Photography Lesson with Jason today!
  • Learn more about the lessons
  • Browse past lessons with all of my students 
  • DSLR Photography Lesson with Nicole & her Nikon D70s

    Many of my DSLR Photography Lessons end in Vinoy Park with a portrait of the studentA very pleasant morning in St. Petersburg (i.e. minimal wind) greeted Nicole and I for our first DSLR Photography Lesson together.  She has had her Nikon D70s for awhile, even taking some online photography courses.  However, there is nothing like an photography lesson out in the field where you can get direct, real-time feedback.  

    Nicole has the Nikkor 50mm f/1.8D lens, a very high quality for value lens.  I have the same lens myself so we began the lesson using that lens, which is great in low light, in the super bright late morning Florida sunshine.  The 50mm f/1.8D lens actually makes a pretty decent landscape lens when stopped down.  Of course it is great too at producing a very shallow DoF (depth of focus).  

    Nicole had not photographed any moving targets yet, so she switched to her Sigma 18-125mm lens and tried to get me in focus as I zig zagged across the history museum's front lawn.  Centering the subject when photographing a moving subject is ok to do composition-wise because you should be trying to fill the frame and keep up with the movement of the subject.  

    We had a lot of fun conversations during the lesson, not all of them restricted to photography.  I was interested to hear about the 10 acres of land Nicole lives on!  

    The end of the lesson covered, briefly, flash portrait photography.  Nicole has the same Nikon SB-600 Speedlight that I do, but unfortunately the D70s cannot remotely trigger an external flash so we just practiced with it on the hotshoe.  As always, it is fun to show students just how much of a difference flash makes in portraits even with lots of natural, front light on the subject. 

    I look forward to our next lesson when we will cover a few photography topics in more depth. 

  • Reserve your own 1-on-1 DSLR Photography Lesson with Jason today!
  • Learn more about the lessons
  • Browse past lessons with all of my students