Reviews

Photography Tip - always wear appropriate footwear

Waterproof trail running shoes make great go anywhere do anything photography gear

All of my adolescent and adult life I have worn very high quality footwear.  I believe in this strongly.  When I see the flip-flop wearing trend of recent years I just cannot fathom it.  Never in my life have I ever exposed my toes to trauma, or filth, in public.  Footwear is also a key piece of photography gear.  Yesterday I was out trekking in Brooker Creek Preserve.  A sign said that some of the 2-mile trail may be flooded as they want to keep the natural trail grade.  For the first half mile I did not even see any mud, but the middle mile was walking down a track of 2-5inches of water over a bed of what looked like green angel hair pasta.  The trail was not such that one could just skirt around the water the whole time.  Mostly the water was unavoidable.  

If I had not been wearing my dominant Salomon XA Pro 3D Ultra GTX trail running shoes (they have a waterproof Goretex XCR membrane) I would have had to of either turn back and not get any shots that day, or walk a mile with soggy socks.  I had no idea that the trail would be flooded, but I knew that hiking anytime in Florida's forests in summertime means that flooded paths are possible.  

Not only do my Salomon's protect me from water, but their cushioning and support help me get through all day wedding jobs as well.  They are one more piece of gear that I have absolute confidence in, which in turns contributes to my overall confidence in my ability to do photography.  When I am doing photography work, I want to have no weak links in either my camera bag or on my person.  Thus, to me, wearing the right footwear for a job is as important as using the right lens.

What is your footwear of choice for what kind of photography?  I have worn Salomon's for the past seven years and they keep getting better with each new model.

Trial-ing out Topaz Adjust

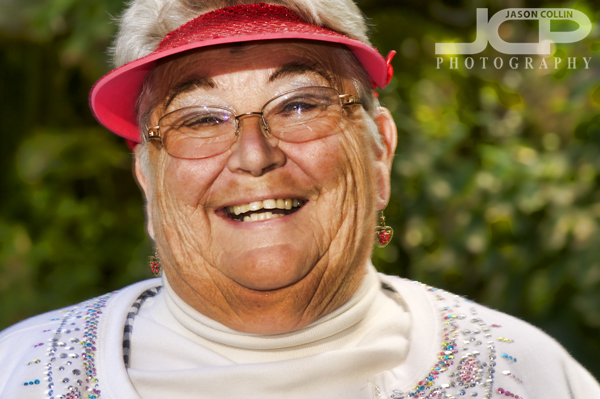
A sample candid portrait I processed in Topaz Adjust which took some fiddling about to produce (original below)

I am a strong supporter of Nik's suite of apps, especially Color Efex Pro 3 and Silver Efex Pro.  However, I have been coming across more and more mentions of Topaz Labs' Topaz Adjust app, which is actually a plug-in for Photoshop.  The before and after photos on the Topaz Adjust product page are impressive.  Several totally blah photographs are miraculously transformed into strikingly colorful portfolio shots.  

The above photograph is my first attempt at adding some of that Topaz style pop to one of my images.  I was teaching a DSLR photography lesson to student Danielle in Sunken Gardens, actually practicing flash outdoor portraits, when this woman (visiting Florida from Michigan) and her friends passed by and said hello.  I already had my Nikon D300 in hand and my SB-600 Speedlight raised as this woman let out a big smile.  I quickly asked her, "may I take your photo," she did not protest so I pushed the shutter.  Personally, this is my favorite kind of photo to make and I do not often get a chance in public to make one of these in Saint Petersburg, as it is sparsely populated.

So using one of the softer presets in Topaz Adjust I added a little bit of skin smoothing and then adjusted the color sliders to make the image more vivid.  There are quite a few presets and they did not immediately produce an image I liked, so it took quite a bit of playing with several of the presets and adjusting them to produce results that I liked for the photo.  Some may find any results with Topaz Adjust look too unreal or too HDR-ish.  However, for adding color pop and pulling details out of shadows, I found Topaz Adjust to be a very useful tool.

I will continue to experiment with Topaz Adjust as there is a learning curve involved.  Topaz Labs offers a free trial of Topaz Adjust.

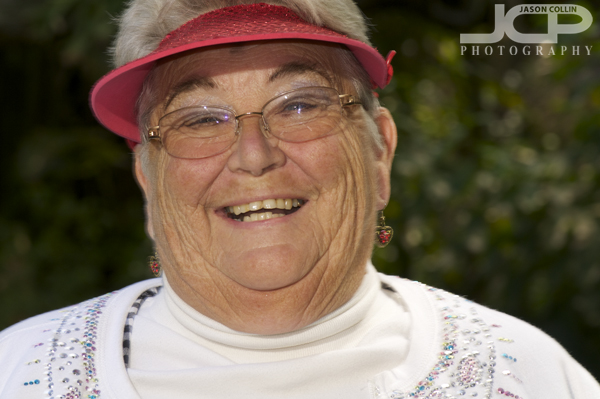
The original image with only Aperture's basic RAW file processing.

LensRentals.com Review

Fast and painless lens and camera body rental with LensRentals.comI needed a second body for the big Treasure Island Yacht and Tennis Club New Year's Eve party job.  This gave me a chance to finally try out LensRentals.com, a service I had heard about on photography podcasts, like TWiP, for awhile.  Though the name has lens in it, you can not only rent camera bodies but also tripods, strobes and other photography accessories.  

Once at the LensRentals.com website you check the availability for the piece of gear you need on the date you need it by.  The minimum rental period is seven days.  I chose to have the Nikon D90 body I wanted to rent arrive two days before New Year's Eve just in case something went wrong.  Nothing did, except . . . .

Reserving and renting the D90 was very painless.  The D90 arrived on the date I reserved it for, however, the UPS delivery person left the box in front of my neighbor's door!  I was tracking the package and saw that someone signed for it.  Well, I was at home all morning and did no such thing.  None of this was LensRentals.com's fault, but it certainly made me think that UPS needs to hire more competent and honest drivers, as I know for a fact no one was home at my neighbor's house either to sign for the package.

The D90 came with all accessories you would get as if you bought one yourself, plus an included carrying bag.  The only thing I had to add was my own memory card (SDHC).  

Returning the D90 was also painless as LensRentals.com provided a prepaid UPS shipping label.  All I had to do was reseal the box and drop it off at the UPS counter at Staples.

I can highly recommend LensRentals.com.  I look forward to renting something more exciting next time, like a 400mm lens!

How photographers can use the iPad

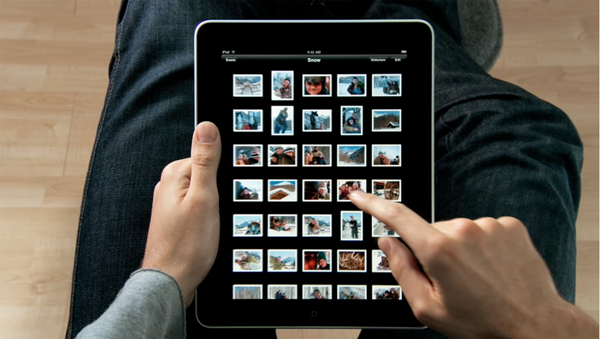
An iPad would go into a photography client's hands much less clumsily than a laptop.

As soon as I saw Steve Jobs start to demo the new iPad I began seeing how it could help me as a photographer.  When Steve spoke about how much more intimate and personal holding and using a tablet device was as compared to a laptop, and even a netbook, these were the words that made me imagine a potential client better connecting with my photography portfolio during a consultation meeting.  I think the iPad would be even better than actual prints.  Prints are floppy and a bit hard to handle if shown in any significant size to a client, and framed prints are not very portable, but multiple portfolio shots on an iPad could be viewed by the client very elegantly.  

I often use my iPhone to show random people I meet some of my portfolio shots to pretty good effect.  Since I could basically fit an iPad right into my regular business-sized organizer, and I take the organizer with me everywhere, I could just as easily show random people (i.e. potential clients) my portfolio, no doubt to even greater effect as an image on a 9.7" screen will be much more impressive than on a 3.5" one.  Also consider the new slideshow features Jobs demoed and the iPad will help to enhance your portfolio shots' inherent wow factor.

For large budget photography jobs, the iPad could make a great impression as the means for delivering the client their photographs.  Could the iPad put a serious dent into wedding album demand by digitally savvy newlyweds?  I think so.  The same iPad could start as your client's wedding album, then serve to include an album of pregnancy portraits, then newborn portraits, and so on and so on.  Your wedding clients will now always carry the photographs you provided for them by their side, no doubt showing them to many more people increasing your chances of referrals.  

How much online and print advertising can $499 buy?  Quite a bit, but I think if you really are focused on referrals as your source of new clients, an iPad in the hands of a very satisfied client would be able to pay for itself very quickly.  

How will you use the iPad for your photography business?  Share your ideas in the comments below.

UPDATE:  This blog post talks about how the iPad could help sales of photography books in e-book form. 

Why I love Silver Efex Pro 3 by Nik Software

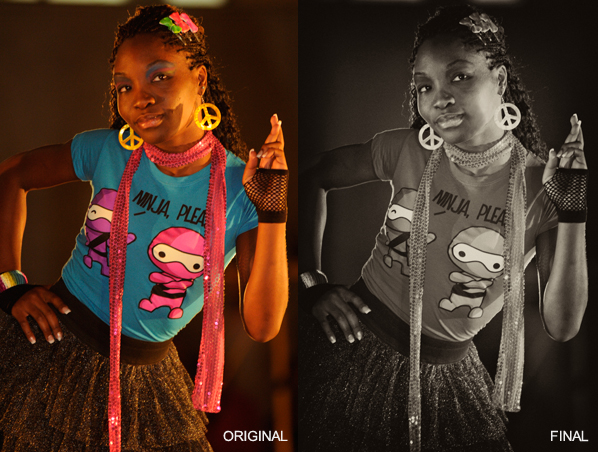
On the left is the original JPG. On the right is the fully processed RAW image after using Silver Efex Pro 3.

I love Nik Software's Silver Efex Pro.  It is nearly completely responsible for me being excited about making black and white images.  I have Scott Bourne to thank for introducing me to this wonderful piece of software.  Silver Efex Pro is an amazing tool for crafting black and white, sepia and in between photographs.  It is absolutely simple to make a black and white version of photos for clients who request both color and black and white images.  

In the above ORIGINAL and FINAL comparison, I used a photo I made at a recent fashion show.  I shot in RAW + Fine mode on my Nikon D300.  The ORIGINAL is the Fine JPG version straight out of the camera.  When I first reviewed this image, I liked the pose by the fashion model.  I did not like the strange lighting that came from the various awkwardly placed floodlights illuminating the runway.  I was thinking of just leaving the photo on the cutting room floor....until I popped it into Silver Efex Pro 3:

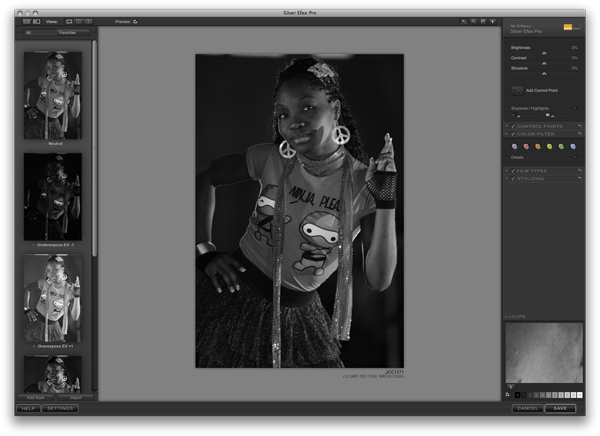
What you first see when you load an image into Silver Efex Pro 3 via the Aperture plugin.

 I use the Silver Efex Pro 3 plugin for Aperture 2.0 (also available for Lightroom & Photoshop).  In the left column are all the different filters one can apply to an image.  My favorite filter is "high structure," but it is not good for close-up portrait shots.  My second favorite filter is "Antique Plate I," which is the filter I used in the FINAL image above.  

In the right column in the Silver Efex Pro 3 window are controls for adjusting brightness, contrast and structure.  Below those are further fine tuning controls for filtering a specific color, and then if you go into the Toning control area you can tweak to your heart's content if you really want to.  I find that many filters are pretty good as-is for my tastes for 80% of my shots.

So if you are tired of fiddling in Photoshop to produce a black and white image, or are using the black and white mode of your digital camera, I can highly recommend using Silver Efex Pro 3 as an alternative that will not only streamline your workflow but produce great results with only a few clicks.

Review: Melannco Six opening Brushed Silver Aluminum Collage Frame & Adorama printing

Melannco Six Opening Collage Frame

At a yard sale a few weeks back, Aya and I bought a cool looking aluminum photo frame. I cannot remember what we paid for it, maybe $10, but I thought it was a heck of a deal as it looked like it must have costa at least $30 to $40. Then I happened across the exact frame on Amazon and it sells for $14.99! So not a super deal, but at either price the frame is worth the cost.

The full name of the frame is the Melannco Six opening Brushed Silver Aluminum Collage Frame. The sample photos in the frame were all black & whites. We tried a few color prints in the frame at first, but no doubt black & white is the way to go.  I ordered the required 4x6 print sizes from Adorama on Kodak Professional Endura Metallic Paper.  A client had ordered prints from our portrait session on metallic paper for a few of the black & white shots and really liked the results, so I wanted to see how they looked as too.  I am very pleased with how black & white images look on Kodak's metallic paper.  There is definitely a metallic tone to the prints, so believe the name!  

Adorama's website interface is a bit awkward to navigate, but they turn around your order very quickly.  I put the order in late in the evening on Monday, and they were delivered to my door on Wednesday afternoon, with the cheapest shipping option chosen.  Such a quick turnaround time will definitely make me use Adorama again.  

The photo frame comes with a built in stand to be placed on a table top and built in hooks so it can easily be hung on a wall.  The aluminum frame, frames the metallic prints nicely.  Both are recommended.