Photography Tips

One factor for making a photograph a black & white final image

I chose black & white processing for these tires as the subject matter lacked colorIf someone asked me how do I decide to process a photograph as black & white, rather than leaving it as the original color image, I would say the main factor is the amount of color in the original.  If the original image itself lacked a wide color pallette, or virbrancy, then I would start to consider converting it to black & white.

The original color image on the left was not very colorful, so I decided just to remove all the colorIn the side-by-side comparision shot above, the origianl color images of the tires was nearly devoid of color, save for a little green coming through the fence.  Also, the main subject, the tires, were already themselves black, thus the photograph presented itself as a good candidate for black & white processing.  

So if you have a photograph without much color pop in it, think about converting it to black & white as a way of best presenting the image to the viewer.
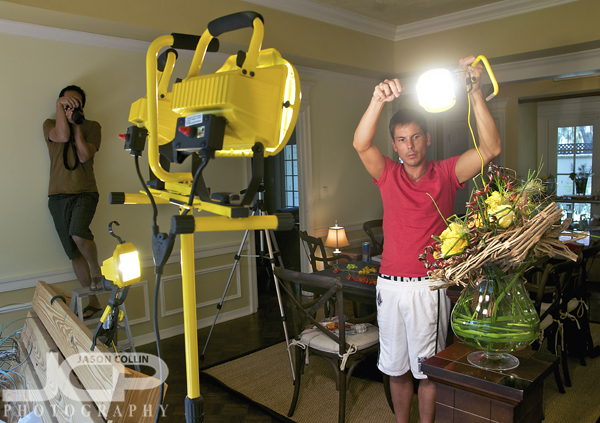
Flower Arrangement Photography Lesson in Tampa with Gopal

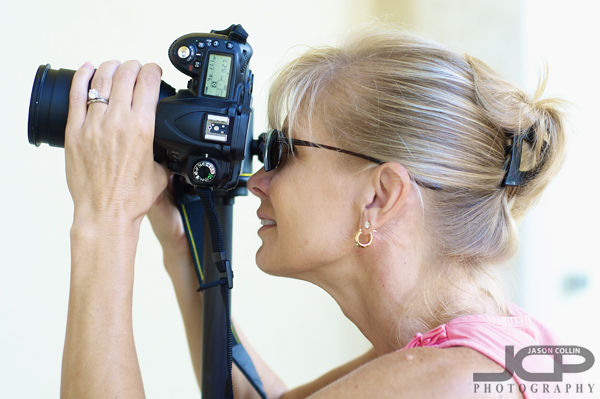
Getting things setup to photograph flowers using an industrial light system in TampaI have taught over 200 1-on-1 DSLR Photography Lessons to people who were mostly hobbyists wanting to get better at making photographs for themselves.  However, I am increasingly teaching people who want to get better at photography for improving their own business.  These are what I call Commercial DSLR Photography Lessons.  Such was the case when I went over to Tampa to teach Gopal (holding camera above) how to photograph flower arrangements using the lighting and gear he currently had.  

I still began the lesson like I do any other, by teaching Gopal my step-by-step processing for setting the camera in order to procduce a well exposed and sharp image in any given shooting condition.  From there we went to using his very specific setup in the same room he would be photographing the floral arrangements.  I gave advice on where to better position the lights and how to manipulate the exposure to produce the darker overall tone to the images that he wanted.  

In addition to this shooting process we also covered a little bit of digital editing workflow.  I look forward to seeing his final images using all we covered that afternoon.

Bring only one lens - photography tip

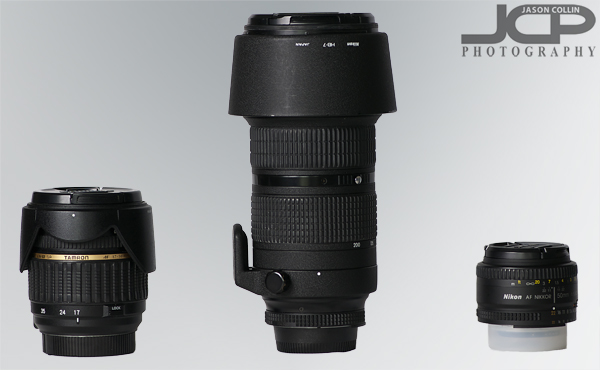
My own well used lenses, from left to right: Tamron XR Di II 17-50mm f/2.8 -- Nikkor AF ED 80-200mm f/2.8D -- Nikkor AF 50mm f/1.8DMany people start out with just one lens.  Then, if they are like me, they almost immediately start thinking about what lens to get next!  In total, I have four lenses, the ones you see pictured above and the one I made the photograph with (Nikkor AF-S 105mm VR micro f/2.8G).  When I go on a portrait job I often bring all four, though I usually only have time to use three of them.  When I go to an event job, I usually only bring two (80-200mm & 17-50mm).  

However, when I go out shooting just for myself, I almost always only bring one lens.  Why only bring one lens when I could bring four?? 

  • One lens helps me focus on making one type of photograph
  • One lens let's me travel light using my small camera bag
  • One lens means I have to be more creative

I think those are three pretty good reasons for going out sometimes with just one lens, especially to an area you frequent often and can go back and make a different kind of shot.  Of course you can bring one lens that covers the focal length of all those lenses above (18-200mm lens), but that can lead to scatter shooting and lack of focus, the first benefit aobve.  The first lens I actually ever owned was an 18-200mm lens.  I sold it within two months for the two lenses you see pictured left & center.  

Go out next time with just one lens, have a focus in mind, choose your lens based on that targeted focus, then in the comments below tell us about the experience.

Real Estate Photography Lesson in Largo with Kelly & her Canon XS

Real estate photography often involves working in small spaces!This year I have started to teach more commercial photography lessons, that is teaching photography to those who will use those photography skills to directly help their own businesses.  To that end I met Kelly this morning in Largo for a 1-on-1 DSLR Photography Lesson on how to photograph real estate, as she is an agent and wants to improve her listings with better images.  She was a referral from Angela, another photography student and also family portrait client.  Thank you Angela!

The photography lesson with Kelly this morning was a combination of the usual 5-step methodology (in manual mode) I teach everyone for creating a well exposed and sharp image in any given situation.  However, I limited the scenarios this time of course to shooting indoor interiors.  In this way I showed Kelly everything from how to properly change lenses, how to get the most stability out of a tripod, why you would want to purposefully overexpose certain images and also how to compose and frame shots to best showcase each room of a house.

It was a nice change of pace for me to teach this kind of commercial lesson and I look forward to seeing the no doubt improved real estate photographs Kelly uses for her upcoming listings!  Visit her official business website if you are looking for a home in northern Pinellas.

Architecture Photography Lesson in St. Petersburg Florida with Chris

Chris composes an architecture shot with her Nikon D90 on her Induro CT214 tripod in St. PetersburgThis was my fourth of four 1-on-1 DSLR Photography Lessons with Chris in downtown St. Petersburg.  This time we focused on architecture shots and made use again of her awesome new Induro CT214 tripod.  A tripod can be an unwieldy thing, and just like any other piece of photography gear, the mechanics of how to use it need to be learned and honed so that excess time setting up the tripod does not start to cause one to miss shots, or even worse make one want to just leave the dang tripod at home!  Thankfully, the leglocks on the Induro CT214 are as smooth as butter and can be loosened and tightened with just about only a 3/4th twist.

Chris used her Nikon D90 in manual mode the entire time naturally as the meter did not often suggest the exposure we actually wanted when shooting in the late morning sunlight.  Through a process of getting the tripod in place, composing the shot and locking in the best exposure settings Chris learned that photographing an entire building is not often the most ideal architecture shot, where shooting only a portion of the structure can lead to a more creative final image.  

Chris has two trips coming up over the next few months and will soon be able to put all she learned in our eight hours of 1-on-1 instruction to great use and I really look forward to seeing her photographs!

Canon T3i 1-on-1 DSLR Photography Lesson in downtown St. Petersburg Florida with Erin

Erin with her Canon T3i during our 1-on-1 DSLR Photography Lesson in St. PetersburgThis was actually my second 1-on-1 DSLR Photography Lesson with Erin, but the first one out in the field with her Canon T3i as previously we worked on editing, content management and website related photography topics.  The weather cleared up to make for a very pleasant Friday evening in downtown St. Petersburg to learn about my 4 (or 5 in manual) step process for producing a well exposed and sharp photograph in any given shooting situation.  

Besides teaching how this process works, I perhaps even more importantly to start out with, teach the person how to get around their DSLR in an efficient manner and be able to change these camera settings eventually without even having to think about it.  To know photography, one must first and foremost know their gear.  Then they can apply photography knowledge using their gear in a skilled manner that will in the end result in satisfying photographs.  

I look forward to seeing Erin's photographs taken in manual mode!

CanonT3i Off Camera Flash Strobist Photography Lesson in St. Petersburg with Elizabeth

Elizabeth learning off camera flash for portraits in downtown St. PetersburgFor our third of four 1-on-1 DSLR Photography Lessons in downtown St. Petersburg I met Elizabeth for an off camera flash portrait photography lesson who brought her very generously willing boyfriend, Angel, to model once again.  Since our last lesson on natural light portraits, Elizabeth invested in a pair of Yongnuo remote flash triggers and a light stand.  This allows her to put her Canon 430 EX II Speedlite right next to her subject, but be able to shoot from any distance up to 30+ feet away.  

You may think why would I want to ever shoot a single portrait subject from so far away, but using a long focal length has many benefits in portrait photography, the least of which is limiting distortion which helps the subject to not look wider than they actually are.  

I am sure with numerous people to help her practice, along with her own enthusiasm for portrait photography, Elizabeth will be regularly wowing her friends and family with her new photography skills!