Photography Tips

Photography Tip - always be ready to shoot

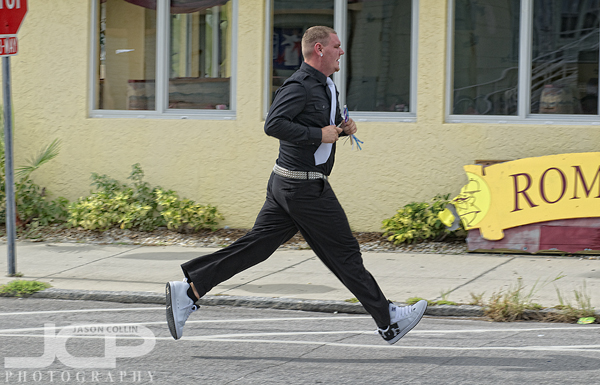
My camera was at the ready, so I could photograph this streaking ska dude

When you are out walking around with your camera in hand, both you and your camera should always be ready to shoot.  I like to have a distinct mindset of either I am out to make photographs or I am not.  If I am not, that usually means I am really not and have left my camera at home, like I did last Sunday when it was just Kiki and I quietly walking the paths of Sawgrass Lake Park.  However, when I do have my camera with me, the lens cap comes off as soon as I step out of my car and only goes back on once I am back in the car.  I never turn my Nikon D300 off while it is out of its bag.  DSLR cameras use virtually no battery while in standby mode, so there is no reason to turn a DSLR off until it is back in its bag.  

I teach DSLR photography lessons.  Often when out on a first lesson with a student as we are walking to a different spot to practice something new, the student will not only have their camera off, but the lens cap on!  I will point out something interesting passing by and say I would shoot that.  However, the student will have no chance because her/his camera is not ready.  I use such a situation to show students that one should never miss chances for photographs while one's camera is out.  So I recommend that you always keep the camera on, the lens cap off, and your finger on the shutter.  

You never know what might happen or who will pass by.  Someone told me that Cameron Diaz was wondering around St. Petersburg recently.  Imagine seeing her pass by but your camera is not ready!  Or, you, yourself are not ready to take a shot because even though you have kept your camera on, you have switched your mindset away from photography.  

I was photographing something entirely different when I noticed the ska dude above streaking across the street.  He is not exactly Cameron Diaz, but if it had been her, I would have gotten the shot!

Natural Light Portrait in the Golden Hour

Nikon D300 with Nikkor AF ED 80-200mm f/2.8 lens @ f/4 ISO 200 1/1600th natural lightI am a huge believer and practitioner of off camera flash.  However, it is very freeing to be able to photograph without worry of a strobe firing, using the right power, diffusing the flash properly, etc.  Florida has mostly very, very harsh and strong sunlight, but it has golden hours just like every where else too.  

I made this portrait using the nice soft light of about 30 minutes before sunset on this Treasure Island beach.  Note though that I still had the subject mostly face the setting sun as well as my back to the sun.  I chose an aperture that allowed me to both use the lowest ISO on my camera and also produce a shallow DoF in order to separate my subject from the background.  

Depending on location and sky conditions, the golden hour for shooting can start from about 90-minutes before sunset and continue on a few minutes after it sets.  Of course there is another golden hour each day for early risers, about 30 minutes before sunrise.

Photography business tip - give your client a little extra

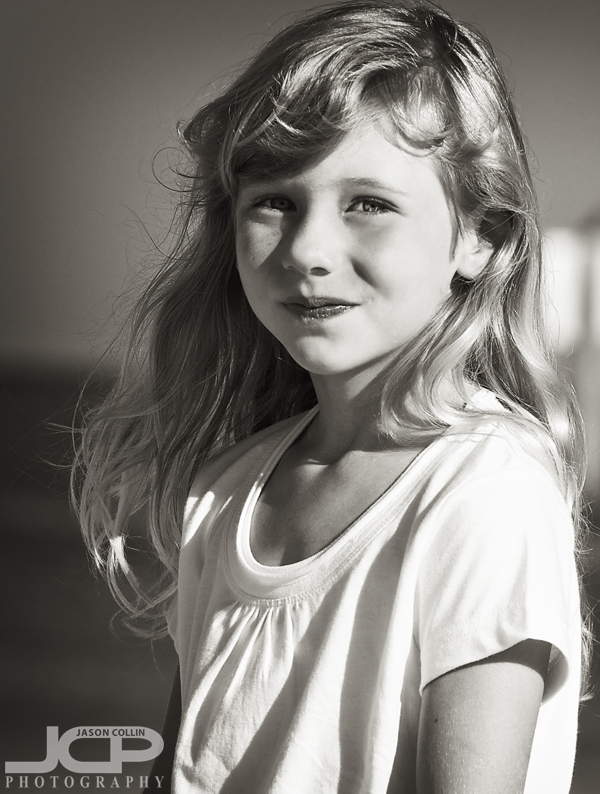
Nikon D300 Nikkor 80-200mm f/2.8D lens @ f/8 ISO 200 1/800th processing Silver Efex ProIt is commonly heard in the business world to under-promise and over-deliver.  In this way a business can impress a customer or client.  How can this apply to the professional photography business?  One simple way is to just give the client extra photos than stated in the package they bought.  Which photos to give as bonuses?  Well, they will of course not be any of the best of the best because those will have already been included in the initial product to the client.  

One way to know is to listen to your client's feedback once you delivered the promised number of photos.  If they say they like shots of one particular person a lot (often a child) or like one certain style of shot or if they say they really like the black and white versions, then any of those can be your clue on which photos to include as bonuses.  

A recent client said she especially liked the photos of her daughter.  So I went through my remaining unedited 3-star and even 2-star photos from our portrait session to see if there was anything I thought still good enough to put into the hands of a client.  I found the above shot and made it work to my satisfaction by applying a sepia landscape filter to it in Nik Silver Efex Pro.  

The result?  The above image was included in the prints she later ordered, the direct business benefit to the photographer.  Even more important, I was able to provide the client with another image of her daughter that will brighten a desk or shelf in her home.  Thus, satisfaction for the client and satisfaction for the photographer knowing his/her work provided some real world benefit.

Sidney & Berne Davis Art Center Night Wedding Portrait

Textual illumination at Davis Art Center Ft. Myers, Florida - Nikon D300 Tamron 17-50mm f/2.8 lens @ f/2.8 ISO 800 1/60th Strobist - Nikon SB-600 Speedlight in TTL mode on tripod to frame right triggered by commander mode

If you are looking for a cool place to make portraits at night in the Ft. Myers, Florida area, the Sidney & Berne Davis Art Center in the downtown area of Ft. Myers is a great place to shoot when it is all lit up.  Cylindrical structures with old names carved into them are lit up from the inside projected said names on all surrounding surfaces.  

While the reception party raged on inside after, Debbie and Matthew and I slipped out to make a few night wedding portraits.  I used off camera flash to light the couple and let my shutter speed stay open long enough to bring out some of the details in the building behind them.

If you have photographed at the art center (day or night), please include a link to your photographs in the comments below. 

  • Reserve your free wedding photography consultation with Jason today!
  • Learn more about candid wedding photography packages
  • Why choose Jason to be your wedding photographer?  Read the Wedding FAQ 
  • I photograph motorcycles for fun

    Nikon D300 Nikkor 50mm f/1.8D @ f/2 ISO 100 - St Petersburg, FloridaWhy did I photograph this motorcycle?  Simply because I like to photograph motorcycles.  I do not know how to ride a motorcycle.  I have only ever ridden on one once as a boy.  Yet I am drawn to photographing them.  Mostly parked.  These are photographs just for me.  For my own enjoyment.  I photograph them because it excites me too.  

    I am just trying to say I believe it is important for a photographer to sometimes (always?) make photographs for themselves, first and foremost.  To not care at all what people on flickr will think, not what people in your local photography club will say, not what your more experienced photographer friend will say.  Just make a photograph that you yourself like to look at.  I know I really like looking at all that chrome and green paint above.  If someone else digs it, that's cool.  If not, it will not lesson my own liking of it in the least.  

    I used to live in Tokyo where there are many more motorcycles.  I even made a flickr set just for them.

    What do you like to photograph just for yourself?

    Work on digital photography shooting & editing skills simultaneously

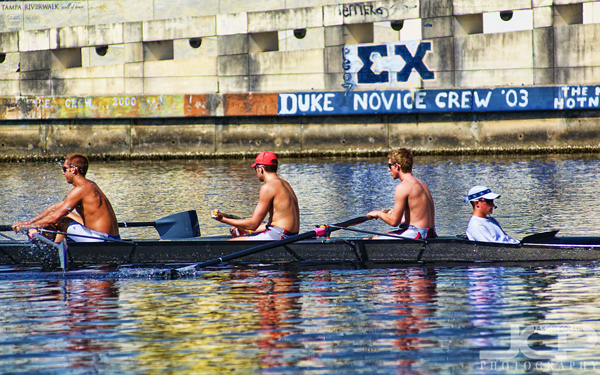
    Nikon D300 Nikkor AF ED 80-200mm f/2.8D lens @ f/4 ISO 200 1/5000th processed in Aperture 3, Photoshop CS5, Nik Color Efex Pro 3, Topaz Adjust 3

    It is a source of pride still among pro, serious amateur, hobbyist and beginner photographers alike to get it right in camera.  By that they mean one should not need to do that much editing to images to produce a great finished shot if only the settings in the camera were optimal to begin with.  I used to think like that.  I still do not shoot lazily thinking I can fix this or that in Photoshop as much as I possibly can, the biggest exception being I know I will have to edit out my light stand's shadow in some backlit portrait shots.  However, I find myself more and more realizing having strong editing skills can mine gold from, well, a bland river (pun intended).

    The above shot was made while teaching a photography lesson to a student.  My full attention was not put into photographing the subject matter as best as possible as I was of course focused on helping my student make the best possible image she could.  Still, there was something about the shot I liked, mostly the one guy sitting down facing the opposite way, as well as the graffiti and color reflected in the Hillsborough River.  Basically, I saw the potential the image had.

    So I opened up my digital darkroom as Rick Sammon likes to call it, and mined a final shot that though technically not perfect (focus slightly behind rowers, etc.), has some pop to it due to the color Topaz Adjust and Color Efex Pro were able to bring out from the RAW file.  I then applied selective contrast adjustments to the wall and the water.  

    Therefore, I recommend working on your editing skills just as hard as you work on your in the field shooting skills.  Develop them simultaneously.  If I combined my shooting skills today, with my editing skills of even just one year ago, I would not be able to produce as many images that pop as I can now.  This is especially true for when shooting during non-golden-hour times.   

    One day soon I will return to this location to do a photo series of crew rowers, as I find it is a subject matter and location I am drawn too.  I made this photograph from the University of Tampa campus side of the river.  It was about 3pm on a weekday afternoon.

    Just the basic processed RAW file, as "straight out of the camera" a photo made in RAW can get

  • Read more photography tips
  • Reserve your own 1-on-1 DSLR Photography Lesson with Jason today!
  • Learn more about the lessons
  • Selective Focus Wedding Kiss Black & White

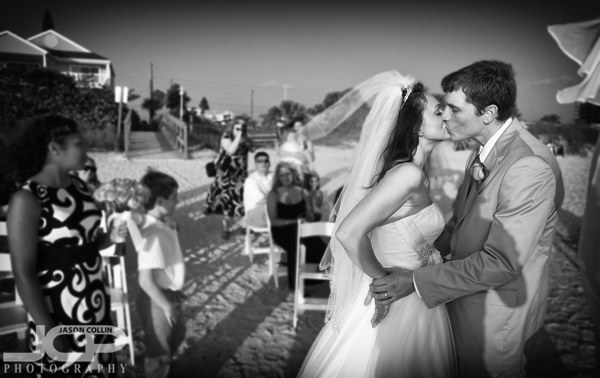
    Nikon D300 Tamron 17-50mm f/2.8 @ f/8 ISO 200 1/500th strobist: SB-600 hotshoe mounted TTL

    What I wanted to make the focus of this image, was the kiss.  Yet I did not want to do this simply by cropping way in on the bride and groom.  My original idea was to just use a holga filter on the image, but I did not like the grain for this shot.  I wanted more of an ethereal look to the shot, rather than historic.  I also wanted to isolate the couple from the distracting background.  The way to achieve this look did not come to me all at once.  I tried one thing, which led to another, which ultimately lead to the final image you see above.

    Here is the step-by-step editing workflow I followed: 

    • import RAW file into Aperture 3
    • increase the vibrancy slider
    • send image into Color Efex Pro 3, apply polarization, pro contrast, & remove color cast filters
    • send 16-bit TIFF version into Photoshop CS5 to remove blemishes & sharpen with unsharp mask (save & close)
    • via Aperture try holga filter in Silver Efex Pro 3 (do not like result)
    • send 16-bit TIFF back into PS CS5 and magic wand select the couple, reverse selection, apply gaussian blur to the selection (save & close)
    • via Aperture use Silver Efex Pro 3 to apply high structure filter, add vignette, burn bottom edge (finished!) 

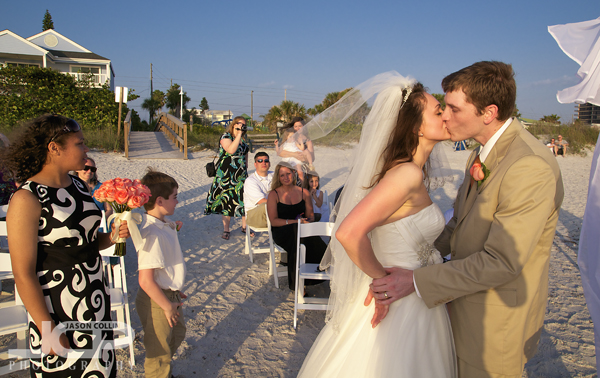
    It took me a good bit of time, like over 15 minutes, but I really like working on experimental processing projects like this, when I have the time.  The original (well, only did first three bullets to it) is below.  What do you think?  Which do you prefer, original or selective focus black & white, both or neither?  Why?

    the "original" image