Photography Tips

Light Painting & Night Photography DSLR Photography Lesson with Julie

Light painting during Julie's DSLR Photography Lesson out at The Pier in St. Petersburg FloridaFor our third of four DSLR Photography Lessons I met Julie on a chilly St. Petersburg evening to practice long exposure and night photography.  This type of shooting most definitely requires a tripod, and we pushed the legacy tripod Julie borrowed from her husband to its limits.  We took the trolley out to The Pier, but first had a quick practice of on how to shoot abstract bokeh with her new 50mm lens.  

Being a Monday night we basically had the entire Pier to ourselves, and especially so at my favorite water level spot upon a decaying concrete platform.  Besides showing Julie how to make the usual long exposure shots of the St. Petersburg downtown skyline, we entered a kind of special effects world with light painting.  For the above shot, I set my DSLR on my tripod with a 10 second shutter time.  Using the LED light on the back of my iPhone 4 I "painted" from the tip of Julie's finger down onto the concrete.  I did not astral project myself, I just moved quickly enough not to be fully exposed in the image.  

We went on to practice light trail shots and a number of other things too.  It was an action packed lesson for sure and Julie was great managing with an unfamiliar tripod and getting adept at changing the settings on her Canon 60D in the dark.

Architecture & Exposure DSLR Photography Lesson St. Petersburg Florida with Rebecca

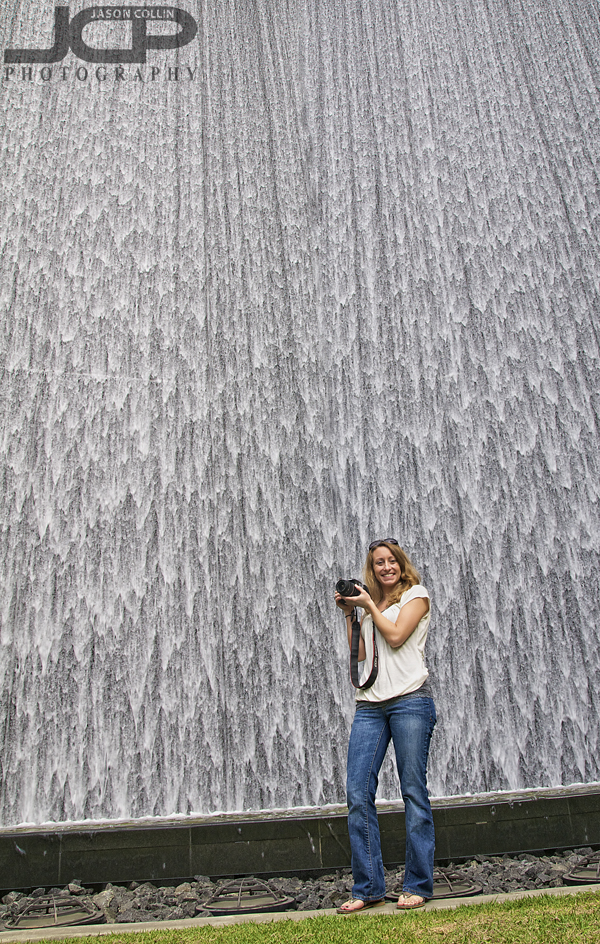
The Waterfall at Signature Place Tower in downtown St. Petersburg - Rebecca with her Canon XSiFor our second of four 1-on-1 DSLR Photography Lessons I met Rebecca at the same spot in downtown St. Petersburg where we began by looking at some photographs she had taken since our first lesson with her Canon XSi.  Rebecca is following my most recommended path for anyone taking my 4-pack of lessons (or even a single lesson) by first taking a lot of notes during the content heavy first lesson, then shooting a lot between the first and second lessons.  This allowed me to see her progress and give very specific help to improve her shots.  In fact, we spent the entire second lesson practicing how to get a correct exposure given differing lighting (backlight, side light, etc) with a focus on architecture subject matter.

For this practice I had Rebecca start in Aperture priority mode (A, Nikon; Av, Canon) at f/11 which is recommended for our typical sunny Florida days.  Then depending on where the sun is relevant to the subject, we were able to find the limits of A-priority mode.  This is how I taught Rebecca to find the limit:  1.)  once the shutter speed goes below 1/60th, increase aperture  2.)  Once the aperture limit of f/5.6 is hit along with the 1/60th shutter speed limit, then increase ISO

When A-priority mode was choosing a shutter speed too fast even at f/11, then I had her switch to manual mode, staying at f/11 while manually setting a slower shutter speed and tweaking the latter to produce the desired balalnce between for example enough blueness in the sky, but also enough detail in the shadows of buildings.  

Using these real world skills for setting up a properly exposed shot, plus the architecture composition tips I passed on to her, I am sure Rebecca will be able to make some great shots when she visits New York City next week.

Photography Tip - sometimes blown out highlights are ok

Blowing out some highlights is not always bad - Nikon D300 Nikkor 50mm @ f/2 ISO 200 1/100th handheldOne of the first things I teach to my DSLR photography students, is how to check for blown out highlights and how to correct the exposure to get rid of them.  However, blown out highlights can be ok and actually compliment how a final image looks.  In the above shot I asked the owner of a restaurant if I could photograph the pendant lights hanging over a row of tables.  I am often looking for repeating patterns as a subject for photographs.  By using my 50mm lens at a large aperture (f/2) I could making the repeating pattern shot I wanted to with bokeh while handholding my DSLR even though in a very dark interior space.

The part of the image where the bulbs are inside the pendant lights are totally blown out.  However, I liked how this looks because it produces an overall exposure that fits the mood of the shot I wanted to make.  

Go out and make your own photograph with some blown out highlights on purpose and post a link to your photo in the comments below. 

  • Read more photography tips
  • Reserve your own 1-on-1 DSLR Photography Lesson with Jason today!
  • Learn more about the lessons 
  • Canon T3i DSLR Photography Lesson 1-on-1 in St. Petersburg Florida with Ren

    Ren taking shelter from a light rain with his Canon T3i in downtown St. Petersburg Florida during our first photography lesson.Something very rare happened during my first 1-on-1 DSLR Photography Lesson with new student Ren (referred by Stefanie, thank you!) and his Canon T3i, it started to rain, or rather really just a hard mist.  Several lessons over the years have been rained out and rescheduled, but for it to be not raining then start raining during the lesson, that has only happened a few times before.  Fortunately, the covered breezeway of the Museum of Fine Arts not only provides protection from the rain, it allows all the same things to be practiced had the sun been out and we covered the usual spots around the downtown St. Petersburg waterfront.  It was also my first time to get hands on with the Canon T3i DSLR.  

    Ren works in a company that uses a lot of gear, gadgets and tech and whose co-workers have a lot of their own which helped him make the jump to the DSLR world.  He has already taken about 6,000 photos he said, though only around 2 out of 4 he ends up liking.  This is totally fine though for someone starting out in photography and as a mostly self-taught photographer myself, I went through a very similar process teaching myself about aperture, shutter speed, ISO and even focus modes (which did baffle me for an afternoon believe it or not).  Now, through that real-world learning experience, I can pass on a very practical DSLR photography teaching method to all my students.  

    Ren also audio-recorded the lesson so he will have the pleasure of hearing my voice and jokes again and again on how to produce well exposed and sharp images in real world situations.  I recommend some kind of note taking during the lessons, unless one has a photographic memory of course!

    Besides setting the settings correctly for any given shot, one must be adept at physcially knowing how to actually manipulte the many buttons and dials on a DSLR.  Even just two seconds wasted fiddling with the wrong button can mean the difference between making and missing a photograph.  As I recommend to everyone, I suggested that Ren keep his DSLR next to him on the sofa while watching TV and work on mastering how to change all the commonly used exposure settings.  

    Ren will return to the museum above on Friday on a school trip with his daughter.  I look forward to seeing his photographs applying what he learned today.

    1-on-1 DSLR Photography Lesson in St. Petersburg Florida with Rebecca & her Canon XSi

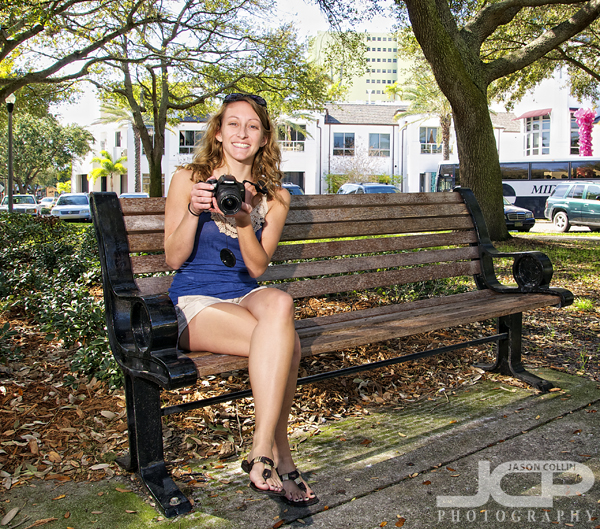
    Rebecca happy to be out of auto-mode with her Canon XSi at the end of our first of four photography lessons.Thanks to a referral from current DSLR Photography Lesson student, Julie, I met Rebecca in downtown St. Petersburg on a sunny Wednesday morning for our first of four lessons with her Canon XSi.  Up until the time of our lesson, Rebecca, like many of my students, was only shooting in one of the auto-modes on her exposure dial.  Therefore, the first thing we did was instantly start using aperture priority mode, and even in our first two hours we also went on to use shutter priority mode and even full manual mode!

    Not only that, Rebecca had yet to even use her new Canon 55-250mm lens!  So I showed her my recommended technique for changes lenses in the field as we went back and forth using the 55-250mm lens and her 18-55mm standard zoom lens.  

    For someone claiming to "know nothing," Rebecca was very fast to pick up on the basic photography terms and concepts needed to be able to properly make a photograph in typical Florida bright daylight conditions.  Perhaps her fast uptake was due to her taken lengthy notes on my four step process for setting up a shot.  I highly recommend note taking, though few students actually come with notepad and pen in hand.

    For our already scheduled second lesson we will head out to The Pier, one of my favorite shooting locations, to practice bird-in-flight shots.

    1-on-1 DSLR Photography Lesson in St. Petersburg Canon XSi with Stephanie

    Stephanie in Straub Park during our 1-on-1 DSLR Photography Lesson in downtown St. Petersburg, FloridaAs a birthday present for herself, Stephanie booked one of my 1-on-1 DSLR Photography Lessons to learn how to better use her Canon XSi.  She has three lenses for her DSLR, but her favorite and most used one is her Canon 18-135mm f/3.6-5.6 due to its wide zoom range.  In addition to that she had a standard zoom lens (18-55mm) and her newest lens, a Tamron 70-300mm, which we found to be difficult to hand hold possibly due to its flimsy build quality.

    We began the lesson as I do most lessons, going over my 4-step process for getting all settings right for any given shot no matter what the lighting conditions.  We concluded the lesson with some natural light portraits where we discovered the difficulties with the Tamron 70-300mm lens.  Switching back to her favorite Canon 18-135mm lens using the exact same settings finally yielded acceptable sharpness results and overall image quality.  

    Stephanie is heading to Colorado on a ski trip and of course bringing her Canon XSi onto the slopes with her.  I look forward to seeing some great action skiing shots.

    Photography tip - compose with subject looking or going into the frame

    great blue heron in profile looking into the frameOne easy to remember photography tip that will improve your shooting is to have the subject "looking" or "moving" into the frame.  This means the subject should be at one edge of the frame appearing to look into or go into the empty space in the shot, rather than staring at the edge of the frame.  A subject that looks into the frame or motion that leads into the frame gives the viewer's eyes some place to go.  

    FOR SUBJECTS IN PROFILE

    Kiki in profile looking into the empty frame makes my eyes follow hers.In the above photographs of a great blue heron and of beloved puppy Kiki, both subjects are shown in profile and both are looking into the empty frame.  If I had composed the shots with the empty space to the right, the images would look awkward and unbalanced.  When photography a subject in profile, be sure to include enough space for that subject, and the viewer, to look into.


    FOR SUBJECTS IN MOTION

    The airplane has enough space to "fly" into creating movement for the viewer.Likewise for subjects in motion, they should also have plenty of space to "move" into in the frame.  This allows the viewer to look and see where the airplane is flying.  The Jeep below suggests a continued movement and leading action.  Having empty space to either the rear of the plane or Jeep would not only look awkward but show that we were too slow on the shutter to catch the action.

    This Jeep continues on because of the composition.


    FOR SUBJECTS LOOKING INDIRECTLY

    What is the flamenco dancer looking at? The composition gives enough space for the question to arise.When a subject is looking indirectly in the frame, space should still be given in the composition in the general direction the subject is looking.  The flamenco dancer above is facing the lens, but looking to her right.  Composing for more space on the left of the frame makes the viewer also look left.  The wedding couple below are really looking indirectly in the frame, but overall both their poses and the directions of their eyes favor viewing from top right toward bottom left.  

    Pose & composition direct the viewer to look from right to left.Keep the "look into the frame" composition tip in mind to produce photographs that give the subject and the viewer space to look into and avoid subjects staring into the edges of the frame.

  • Read more photography tips
  • Reserve your own 1-on-1 DSLR Photography Lesson with Jason today!
  • Learn more about the lessons