Photography Tips

Nikkor 85mm f/1.4G DSLR Photography Lesson with Barbie

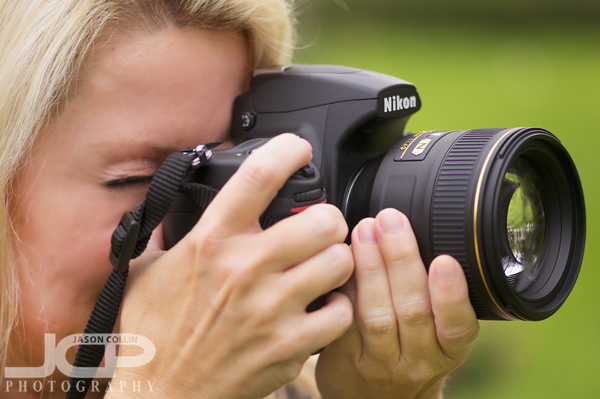
Barbie's amazing new Nikkor 85mm f/1.4G lens on her Nikon D700 - lens used for photo: my Nikkor AF-S 105mm VR micro f/2.8GMy recent DSLR Photography Lesson students just keep getting more and more great gear making me more and more envious!  In fact for our third of four lessons Barbie got so much new stuff we were only able to use some of it.  Last lesson if you recall she brought out her new tripod, this time it was the amazing new Nikkor 85m f/1.4G lens!!  I was very excited to get some hands on time with it and immediately was impressed.  It was by far the fastest and smoothest focusing lens I ever used.  The bokeh was stunning.  You may think that $2,000 for a lens is crazy expensive, but I think it's worth every penny.  It is the type of lens you almost cannot take a bad photo with, it is just that good.

Much like a lesson I had last week with Golda just using her 50mm f/1.8 lens, this lesson I focused on showing Barbie how to get the most out of the magnificent bokeh her 85mm lens can make.  We also worked a lot on the mechanics of setting up and taking a shot, starting with the proper way to stand.  I advised her to leave the flip-flops at home for future lessons and wear more stable footwear.  She ended up taking most shots barefoot tonight actually!  Since we were both using prime lenses, our legs had to be the zoom.  My style is to get my body rock solid before even putting the camera to my eye.  Once I look through the viewfinder if I cannot compose the shot how I like, I do not lean or sway.  I pick up my feet and let them do the zooming.  I then reset to my normal rock solid shooting position.  If one does not start a photograph with this discipline, then it will be hard to repeatedly produce sharp images.  

Barbie did get the new top-of-the-line Nikon SB-900 Speedlight as well, but we did not have anytime to use it at all.  It is something to look forward to for our fourth of four lessons next week.

  • Reserve your own 1-on-1 DSLR Photography Lesson with Jason today!
  • Learn more about the lessons
  • Browse past lessons with all of my students
  •  

    --Professional Model DSLR Photography Lessons now available!

    Canon 7D 50mm DSLR Photography Lesson with Golda in downtown St. Petersburg

    Golda with her new 50mm lens attached to her new Canon 7D!!

    Due to our previously scheduled lesson unfortunately being rained out, it was an extended amount of time until I saw Golda again for our third of four DSLR Photography Lessons.  In that time she has been very busy . . . shopping for great new photography gear!  She added to her camera bag a Canon 7D (upgrading from a Canon XTi) and a Canon 50mm f/1.8 lens!!  I knew she had ordered the 50mm lens, but I had no idea she was getting such a high end DSLR as well.  She wanted to be able to make the best photos possible when she goes on vacation soon so along with improving her photography skills with our lessons, she now has the gear to match.

    We both exclusively used 50mm f/1.8 lenses from 7pm to 9pm never lacking for light as we used apertures ranging from f/2.8 to when necessary wide open at f/1.8.  We also mostly stayed in manual mode giving us total control over the exposure of our shots.  The first thing I showed Golda was how the very shallow DoF a 50mm f/1.8 lens can produce can turn any ordinary subject matter into a very intersting one due to the ease of creating bokeh.  Then I showed her that all bokeh is not equal and that the background still matters even if it is all blurred out.  Having lights or complementary colors in the bokeh of the background is important in producing the best shallow DoF shot possible.

    Well after the sun had set and the sky was dark, we still used our 50mm lenses to produce great shots ending the lesson with some motion blur practice on passing cars on Beach Drive.  

  • Reserve your own 1-on-1 DSLR Photography Lesson with Jason today!
  • Learn more about the lessons
  • Browse past lessons with all of my students
  •  

    --Professional Model DSLR Photography Lessons now available!
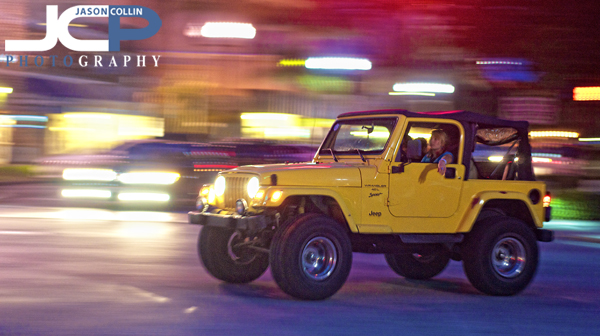
    Photography Tip - creating motion blur for car photography

    Example of motion blue with main subject frozon - SETUP: Nikon D300 with Nikkor AF 50mm f/1.8D @ f/2.8 ISO 800 1/10thIf you have never manually controlled the shutter speed on your DSLR to create motion blur, then you are missing out on a lot of fun!  Using a slow shutter speed and a steady panning technique can transform a mundane photo of a car driving down a road into an image showing a vehicle seemingly cruising at warp speed.  

    SETUP FOR THE ABOVE NIGHT SHOT: 

    • Nikon D300
    • Nikkor AF 50mm f/1.8D
    • manual exposure mode
    • f/2.8  ISO 800  1/10th  AF-C (AI Servo)  single focus point 

    TECHNIQUE FOR CREATING MOTION BLUR: 

    • find a car driving towards you (driving away just produces a rear end shot)
    • start tracking it through your view finder while it is still some distance away
    • twist your body at the hips panning at the exact same speed as the vehicle
    • wait for the vehicle to pass in front of a background with the most lights possible
    • press the shutter all the way, but still keep panning (like follow through in a tennis swing) 

    If you can maintain a focus lock and match the car's speed with your panning speed the car will appear sharp while the background elements will all be blurred.  The shutter speed needed will depend on the time of day and ambient light.  The suggested settings above can be a starting point for night shots.  

    DSLR Photography Tripod & Editing Lesson with Sarina and her Nikon D90

    Photo by Sarina with editing in Color Efex Pro by Jason - before & after maternity portraitIncreasingly, the DSLR Photography Lessons I teach invovle digital photo editing practice as well.  Each one of Sarina's four lessons have been a split between shooting the first hour and editing the second hour.  If one's goal is to produce pro or as close to pro looking photographs, I cannot stress enough how one must work on shooting and editing skills simultaneously.  In Sarina's photo above, it took shooting skills to setup the strobist portrait and to pose the couple accordling and frame them well on the rocks and include the water.  The exposure is off some and that could have been improved in the field with better settings, but as Sarina realized when you have a client making constant requests, and you are standing in ankle deep water with waves coming in, and you have to keep track of a light stand as well as your camera, it can be a lot to keep track of and missing the exposure by a little bit for a portrait photographer just starting out can be forgiven.  

    So without any digital photo editing skills one would be left with the image on the left.  Nicely composed, but nonetheless flawed.  However, if you do about 4-minutes worth of editing the results, by evidince of the image on the right, can be dramatically improved.  During my photography lessons, if you have Color Efex Pro, I can teach you how to transform your photos like this in minutes.  Sarina will be purchasing the full suite of Nik apps including the aforementioned Color Efex Pro and Silver Efex Pro too, which she tells me is on sale now.  

    Sarina using her Nikon D90 on a tripod to produce a level landscape shot of Tampa BayWe started out the fourth of four lessons by getting in some tripod practice.  The first tip I gave Sarina was to always make sure the front of the lens points out directly over a leg of the tripod (see above).  This adds stability.  One can almost always use the smallest ISO when using a tripod since camera shake is not an issue when having to use a longer exposure to compensate for lack of light.  Plus, using a tripod just slows ones shooting down to a nice pace.  When I use a tripod I really feel like I am crafting a shot much more than one I handhold my Nikon D300.

    I look forward to following Sarina's burgeoning portrait photography career and I think I will see her again in the not too distant future for some more advanced lessons.  

  • Reserve your own 1-on-1 DSLR Photography Lesson with Jason today!
  • Learn more about the lessons
  • Browse past lessons with all of my students
  •  

    --Professional Model DSLR Photography Lessons now available!

    DSLR Photography Lesson with Pam & her Canon 60D

    Pam with her Canon 60D with 430 EX II Speedlite during our first of four DSLR Photography LessonsPam using her significant crafts and sewing skills to make products (aprons, etc) that she sells and uses the profits from to buy photography gear!  I think it is a great way to support one artistic pursuit with another.  She started out with a Canon XTi, but now has a Canon 60D along with a growing list of lenses and the Canon 430 EX II Speedlite.  She brought both to our first of four DSLR Photography Lessons last night.

    Pam was already knowledgeable of most photography terms so we focused on what exposure mode is best to use for a given situation.  We started out using aperture priority mode, but with the overcast skies taking away the light faster than usual during our evening lesson, we soon used manual mode.  

    We experimented to find out what was the slowest shutter speed Pam could handhold and maintain a sharp image using her 18-55mm lens.  In my mind I want at least 1/60th of a second using an absolutely stable shooting style.  It is possible to shoot with a slower shutter speed, as Pam was able to get a sharp shot even at 1/30th, but one has to be really careful and of course be shooting only still subjects.

    As a thunderstorm approached that turned out to be all bark and no bite, we concluded the lesson with some flash portrait practice under the cover of the entrance to the Chihuly Museum on Beach Drive.  I told Pam the key thing to keep in mind when setting up a portrait using flash, which is the flash lights the subject and the aperture/shutter speed control the ambient light (background light).  

    For our 2nd of 4 lessons we will switch to landscape and architecture photography.

  • Reserve your own 1-on-1 DSLR Photography Lesson with Jason today!
  • Learn more about the lessons
  • Browse past lessons with all of my students
  •  

    --Professional Model DSLR Photography Lessons now available!
    DSLR Photography Lesson with Jim & his Sony A33 at Sawgrass Lake Park

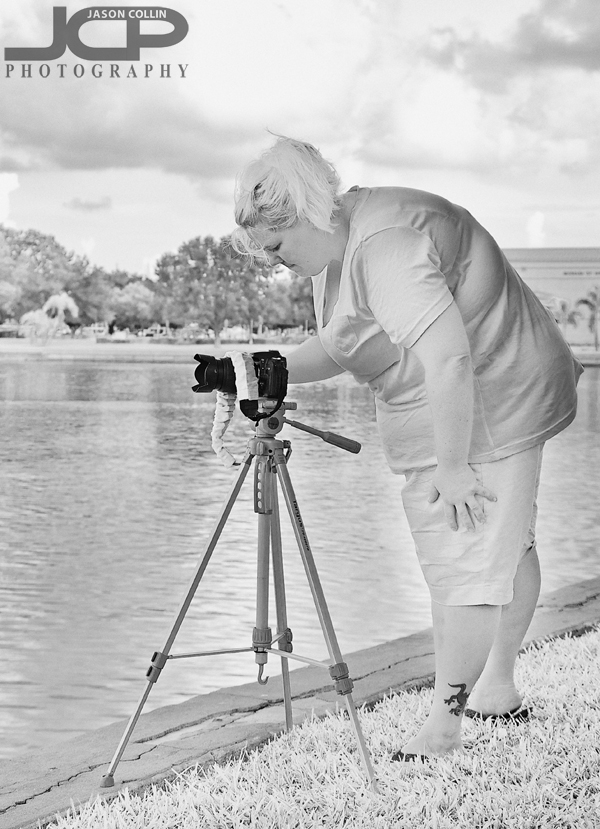
    Jim with his new Sony A33 during a DSLR photography lesson at Sawgrass Lake Park in St. PetersburgAfter a lot of lessons out on The Pier recently, it was a nice change of scenery this morning to meet Jim at Sawgrass Lake Park for our first DSLR Photography Lesson.  He added a Sony A33 to his camera collection, and has already acquired a bagfull (literally) of lenses.  He had a knowledge of photography vocabulary which helped as I explained to him my 4-step process for setting up a shot.  

    We spent most of the lesson out on the network of boardwalks in the park, which featured, as many Florida parks do, a lookout point over a body of water.  We saw ospreys cruising the skies spying for fish, a lone alligator in the distance, and the usual assortment of wading birds.  They were all too far away from the lookout point to be able to photograph, though.  We did get a chance to see butterflies, squirrels and dragonflies up close.  

    Due to the treecover along the boardwalk we soon had to switch to manual mode (from aperture priority) to produce the shots we wanted to.  Jim told me of a favorite spot of his in the park looking down along a long, narrow, watery path.  It was our last shooting location of the day and it proved to be quite a challenging shot to get right.  Once aperture, ISO and shutter speed were dialed in though, we were able to make a shot better than the eye could see in the given light at the time.

    I look forward to seeing Jim's future nature and theme park shots!

  • Reserve your own 1-on-1 DSLR Photography Lesson with Jason today!
  • Learn more about the lessons
  • Browse past lessons with all of my students
  •  

    --Professional Model DSLR Photography Lessons now available!

    DSLR Photography Strobist Lesson with SB-600 in St. Petersburg Florida

    Sarina with her strobist setup of SB-600 Speedlight & Yongnuo radio remotes in St. PetersburgBack at The Pier again this evening for my third of four DSLR Photography Lessons with Sarina.  This lesson followed our established format of practicing off-camera-flash, "strobist," photography the first hour then editing digital photos she took a few days prior.  I was glad to hear that Sarina improved her portrait shooting settings week to week no longer using any ISO above the minimum 200 on her Nikon D90.  This week we worked on perfecting using the right shutter speed with the right aperture and the right speedlight power setting.  It is really important to keep in mind that the speedlight lights your subject while the DSLR's exposure settings control the ambient (background) light.  

    First in our practice tonight we decided to include the background in the shots, thereby using a small aperture with a slower shutter speed.  I then said I like bokeh and longer focal length portraits, so that meant setting a larger aperture and compensating for that increase in light by setting a faster shutter speed.  Typically I would like to use about f/11 and 1/100th for the former and then f/5.6 and 1/200th for the latter.

    We concluded by editing some of the photos Sarina took on a maternity shoot on Sunday.  Most of the editing questions Sarina had revolved around effectively using the quick select tool to make selective edits to very specific parts of the photo only (SEE HOW TO DO THIS).  For example, a bit of clothing material needed to be removed along a defined edge.  Without first selecting the material to be removed, it would have been extremely difficult or near impossible to maintain that defined edge just clone stamping freely.  Later I came up with an on the fly new way of whitening teach by going into the color balance settings and taking the yellow/blue slider more toward the blue end thereby reducing the yellow look of teeth.  We of course did a quick select of only the person's teeth as we did not want to reduce yellow in the overall image.

    Sarina has another maternity shoot before our next lesson so I look forward to seeing her continued progress.

  • Reserve your own 1-on-1 DSLR Photography Lesson with Jason today!
  • Learn more about the lessons
  • Browse past lessons with all of my students
  •  

    --Professional Model DSLR Photography Lessons now available!