Photography Tips

Photography Tip - Slow your photography down

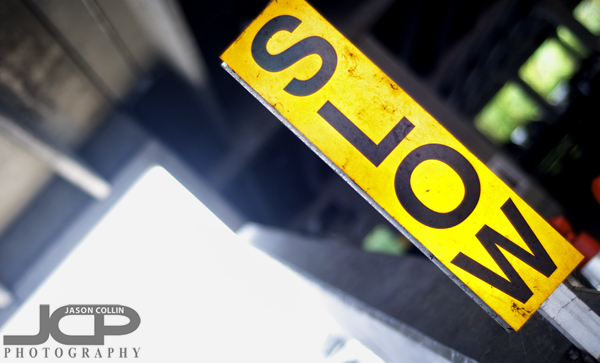
The fastest way to get better at photography is to slow downOne of the fastest ways to improve your photography is to slow down.  I have taught hundreds of people 1-on-1 in the Tampa Bay area and often I see an unnecessary sense of urgency in trying to get a photo among people new to DSLR photography.  It is true, when I am on a job shooting, I defnitely have a sense of urgency to produce in a timely manner, but this is not the case for someone out learning photography.  There is no pressure to produce for a client, and certainly no money on the line when you press the shutter!  So why not slow down and take the pressure off of yourself?  

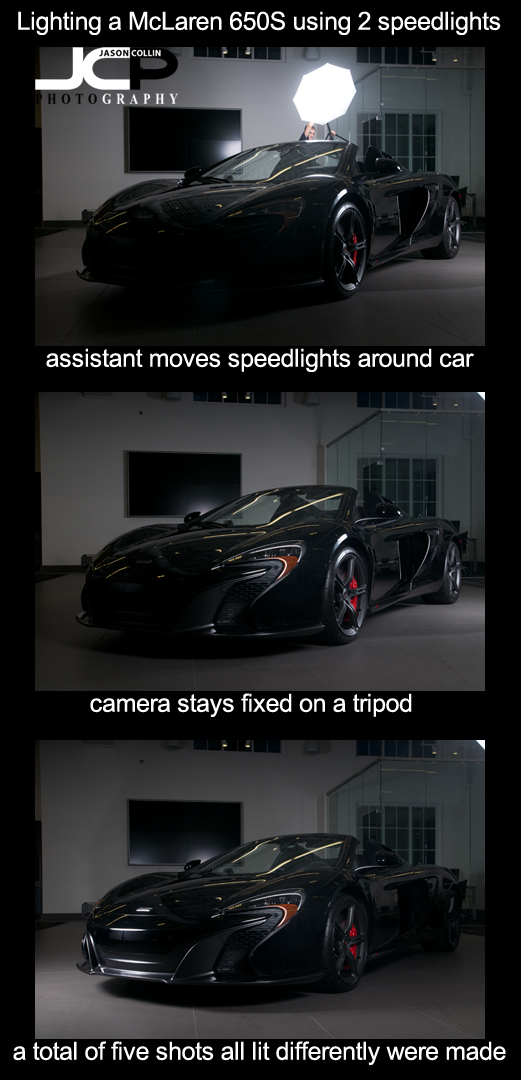
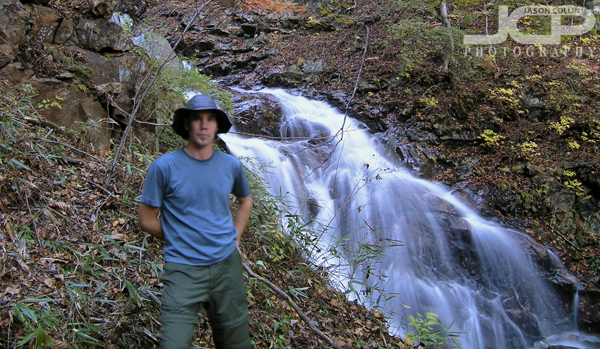
There are a number of ways to slow down your photography.  One way is to use a tripod.  Attaching your camera to three long legs, having to carry that larger system around, and most significantly being able to set the camera on a stable structure so you do not have to support the weight of it while shooting, all naturally slows things down.  Shooting with a tripod is very relaxing.  You can frame the shot exactly how you want adjusting the tripod head.  You can stop and think as the physical burden of holding the often heavy-ish DSLR and lens is removed.  Picking up, moving, and re-setting up a tripod takes time that you can use to really think about what you would like to photograph next.  

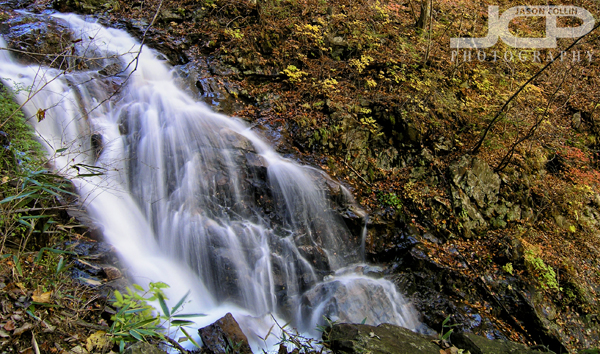
Another way to slow down your photography is to give yourself a shot limit.  When I got my first DSLR in 2008, I took a lot of shots, but at least I was grinding through self-teaching myself photography.  However, even after establishing my 5-step system for shooting in manual mode, I would go to a park or some place and come back with 300+ shots.  That is a lot of shooting when not on a paying job!  There is no way I could have really thought out each of those shots.  So I recommend giving yourself a shot limit.  The next time you go to a park, pretend it's like the film days and give yourself only 24 presses of the shutter, or 36, just choose something less than 50.  Mistakes count as one of those shots.  When thinking of making a photograph you will start to develop a more critical eye and decide is this really something I want to shoot?  What is the subject matter?  What is the story this photograph will tell?

Slowing your photography down by using a tripod and/or giving yourself a shot limit will allow you to answer those questions.  You will also have far fewer shots to go through to find the gems you want to edit and keep.  Try slowing down your photography as you learn and even after you have become an accomplished shooter.  Did you come back home with a higher number of keeper images?

Photography Tip - have a foreground element in vertical orientation photos

Photo Tip - without a foreground object this vertical orientation shot would have not enough interest as composed - made with an iPhone 5When shooting in portrait orientation (vertical shots), which I recommend to do more often than you are probably currently doing, having a foreground object really helps fill the frame with interest for the viewer.  In the above shot made with an iPhone 5, there is a salt marsh and Kiki of course as subject matter, but without the boardwalk in the foreground leading to those other subjects, it would just be empty space of little interest and probably would end up being cropped out.

So when shooting landscape type shots in portrait orientation, try and include a foreground object to add more interest to the photograph overall.  Post a link to your results in the comments below!

McLaren 650S in black multiple strobist blend layer mask photography tip Clearwater Florida Car Photography

What if you want to photograph a large object, especially in a low light situation, but you only have two speedlights, or even only one?  No problem!  Here is how you can do it and what you will need.

Photo gear used to photograph the McLaren 650S indoors:

  • Nikon D300
  • Tamron 17-50mm f/2.8
  • SB-800 & SB-600 Speedlights
  • 2 shoot through umbrellas
  • Yongnuo radio triggers
  • tripod
  • cable release
  • assistant (to help move and hold the lights)
  • Photoshop CS5

A tripod is a must because you will need to take multiple shots from different angles to properly light the subject, in this case the McLaren 650S supercar.  In all I ended up using five photographs to make the one fully lit photograph (below).  I lit the front of the car first, then moved the lights around the car (counterclockwise in this case) taking another photograph each time.  I even had my assistant hold a speedlight over the top of the car (see top most image).  The assistant being in the shot or a lightstand partially being in the shot is no problem at all as the final step takes place at home in Photoshop using layer masks.

In the above photo all 5 shots have been blended together one at a time using layer masks in Photoshop.  I started with the shot of the McLaren 650S lit from the front.  I then dragged it onto the next photo in the series with the driver's side wheels lit up.  I created a layer mask and then revealed the lit wheels photograph underneath, keeping the front lit part from the other photo.  I then flattened all layers and repeated this process using the other three photographs.  You can see shadows from coming from more than two angles in the above shot because effectively ten speedlights were used to light up the car, not just the two in reality I had for the shoot.  

I could have stopped with the 5 shot composite, but I got carried away with removing objects from the background until I finally decided just to remove them all!  I started this edit on Saturday night, and finished it on Monday afternoon it took that long and I kept wanting to do more and more to it.  I did nothing special to remove the background objects, just simply used the Clone Stamp tool on only carefully selected portions of the photo.  Then I removed a lot of the reflections on the car body and cleaned up the floor.  The final result was my most advanced photopraph edit in Photoshop to date!

Give this multiple exposure strobist blend layer mask type image a try and let me know the results in the comments below.

Photography Tip - be careful using slow shutter for waterfalls in daylight

A waterfall in Japan I photographed a decade ago, long before my skills were competent....this was a 0.8 sec shutter speedA photography student recently asked me about photographing waterfalls and specifically about getting that soft cotton look to the water.  Well, to do that, it is rather easy, if you have the right gear and conditions, otherwise it is rather tricky.

The ideal gear to have would be:

  • tripod
  • neutral density filter
  • cable release

Obviously of course you need a DSLR too with an appropriate lens to frame the waterfall.  So if you can mount your camera on a tripod, attach a neutral density filter to the lens, then use the cable release to eliminate camera shake, all is good.  What if you do not have all of that?

The same waterfall with 0.6 sec shutter speedThese photographs were made when I did not really know what I was doing back in November of 2004.  I had a pretty good digital camera that had manual exposure abilities, but I did not understand aperture properly as these shots were all like at f/3.5!  Should have been f/11.  At least I had a tripod.  If you do not have a tripod, then there is no chance as no one can hold a camera for 0.6 seconds steady.  So you at least need a tripod.  If no cable release, then you can use the self-timer to have your hands off the camera as the shutter opens.  

The problem with shooting long exposures during the day is that it is very easy to overexpose the shot.  Very easy.  So the waterfall shots here do not look as good as they could because I could only get away with a 0.8 sec shutter speed.  Of course if I had used f/11, then I could have used a much slower shutter speed.  Either way, if I had a neutral density filter, essentially a very strong pair of sunglasses for your lens, then I could have left the shutter open for nearly as long as I wanted to get the ideal look to the waterfall without overexposing the rest of the shot at all.  So if you find that you like making these kinds of waterfall shots, and long exposures in general, do yourself a favor and get a good tripod, a cable release, and a good neutral density filter.  

Yours truly circa November 2004...whoops, missed the focus due to using too large of an aperture, something I would never do now.I took the time to even make a self-portrait.  I initially thought I back focused and because of using such a large aperture, I was out of focus, but I now realize it might have just been because I moved some during the 2 seconds the shutter was open!!  If you can believe it, I still wear that same hat everytime I go hiking and now trekking here in Florida.  I actually wore that shirt just last week too!  The photo was from November 2004 in a forested mountainside in Japan.

Photography Tip - a cloudless sky is the enemy of the landscape photographer

Clouds add a lot to a landscape photograph mostly by making the sky interesting -- Mountains in Yamanashi Prefecture JapanA bright blue, cloudless sky sounds like part of what would make for a very beautiful day, does it not?  Well, if you are a landscape photographer nothing could be worse!  I have heard it put that, "a cloudless sky is the enemy of the landscape photographer."  If there are no clouds in the sky, then it is just an expanse of a mostly solid color with no visual interest, especially if it is a middle of the day plain blue sky.  Even for sunset portraits, I definitely prefer to have some clouds in the background even though the sky is all orange, yellow and red.  

So the next time you are thinking to make a landscape photograph, make sure there are some good clouds to add that extra element of interest to you image.  

Photography Tip - do not photograph flowers in harsh light

Assuming you have a good subject, then light and background are the two make or break factors for any photograph.  Both flower photos above have complimentary backgrounds.  However, only one of them works due to the light.  The top flower photo was made in harsh light.  Even with a large amount of digital editing to try and recover detail in the flower, it was not possible.  In contrast, the bottom flower required very little editing as it was photographed in good, soft light.  

No matter how pretty the flower may be, if it is not photographed in good light, then it will turn out looking ugly in a photograph.  Look for soft light for flowers.  This can be done by photographing flowers in shade and basically avoiding the strong mid-day sunlight times.  Early morning or late evening are often prime times for this kind of light.  Then remember to make sure the background is good too!

Photography Tip - look closer

Sometimes finding an amazing subject is very easy and obvious, like when you are around Mt. Fuji for example.  However, many interesting subjects go totally unseen if one does not make an effort to look closer.  Passing by this tree in South Straub Park I peeked inside a hole on the trunk (as I am apt to do on all trees) to find a small branch (or plant?) growing inside it.  This was a nice surprise.  By looking closer I found a very unexpected subject to photograph.  From the normal photo view of the tree above you can see how easy it would be to just walk right on by without ever seeing it.  This was actually the second time I found such a small plant growing inside a hole in a tree, so I knew from past experience to always peek inside trees for potential hidden wonders.

The final shot I made of this look closer hidden subject going back with a proper macro lens.I actually had to go back a second time to photograph the hidden leaves properly because the first time I only had a wide angle lens with me.  I went back with a proper macro lens and made the above shot.

On your next photo walk be sure and look closer to find surprising photography subjects.  Let me know what you find in the comments below.