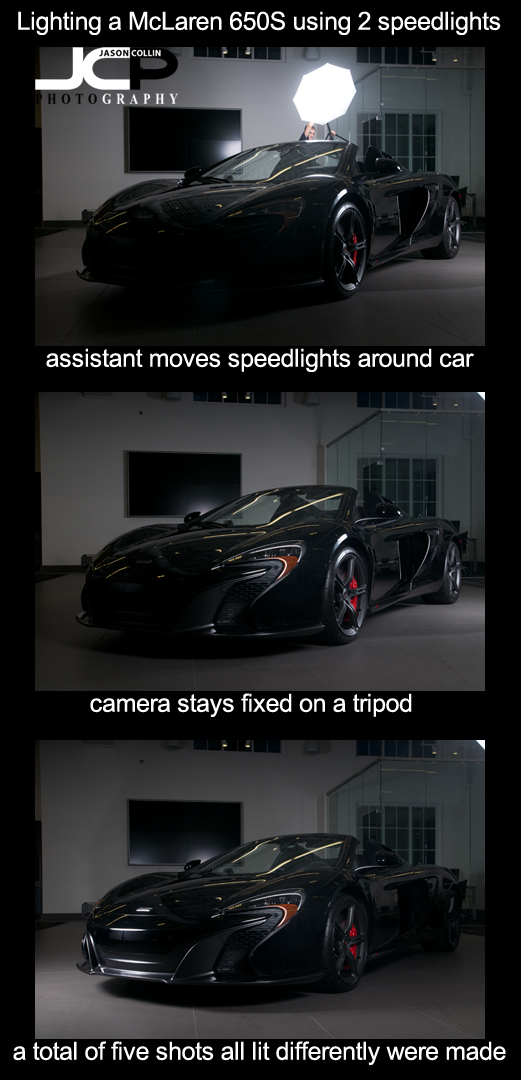
What if you want to photograph a large object, especially in a low light situation, but you only have two speedlights, or even only one? No problem! Here is how you can do it and what you will need.
Photo gear used to photograph the McLaren 650S indoors:
- Nikon D300
- Tamron 17-50mm f/2.8
- SB-800 & SB-600 Speedlights
- 2 shoot through umbrellas
- Yongnuo radio triggers
- tripod
- cable release
- assistant (to help move and hold the lights)
- Photoshop CS5
A tripod is a must because you will need to take multiple shots from different angles to properly light the subject, in this case the McLaren 650S supercar. In all I ended up using five photographs to make the one fully lit photograph (below). I lit the front of the car first, then moved the lights around the car (counterclockwise in this case) taking another photograph each time. I even had my assistant hold a speedlight over the top of the car (see top most image). The assistant being in the shot or a lightstand partially being in the shot is no problem at all as the final step takes place at home in Photoshop using layer masks.

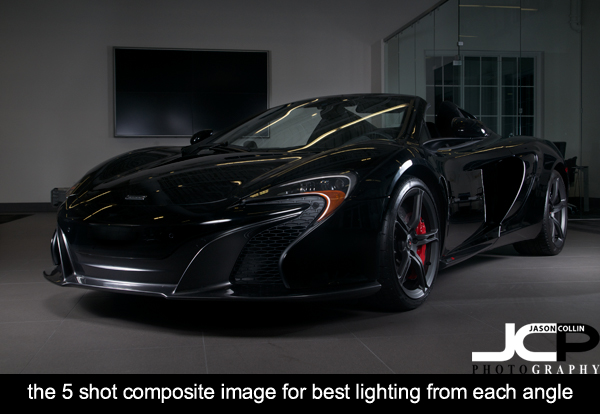
In the above photo all 5 shots have been blended together one at a time using layer masks in Photoshop. I started with the shot of the McLaren 650S lit from the front. I then dragged it onto the next photo in the series with the driver's side wheels lit up. I created a layer mask and then revealed the lit wheels photograph underneath, keeping the front lit part from the other photo. I then flattened all layers and repeated this process using the other three photographs. You can see shadows from coming from more than two angles in the above shot because effectively ten speedlights were used to light up the car, not just the two in reality I had for the shoot.

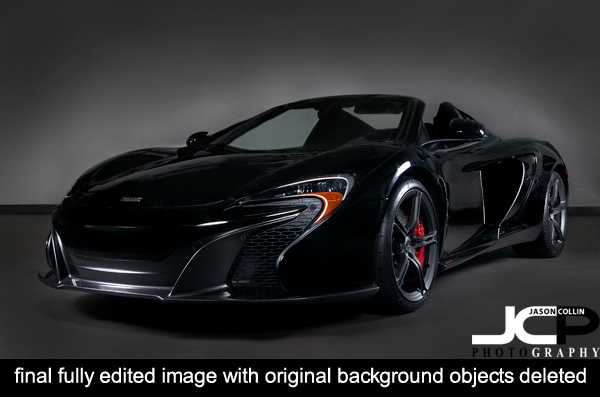
I could have stopped with the 5 shot composite, but I got carried away with removing objects from the background until I finally decided just to remove them all! I started this edit on Saturday night, and finished it on Monday afternoon it took that long and I kept wanting to do more and more to it. I did nothing special to remove the background objects, just simply used the Clone Stamp tool on only carefully selected portions of the photo. Then I removed a lot of the reflections on the car body and cleaned up the floor. The final result was my most advanced photopraph edit in Photoshop to date!
Give this multiple exposure strobist blend layer mask type image a try and let me know the results in the comments below.
 |
 |
