bird in flight

Brown Pelican Bird in Flight St. Petersburg Florida Fine Art Nature Photography

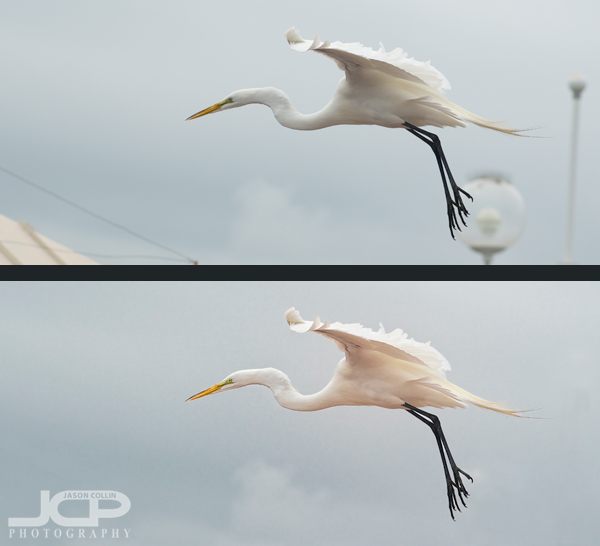
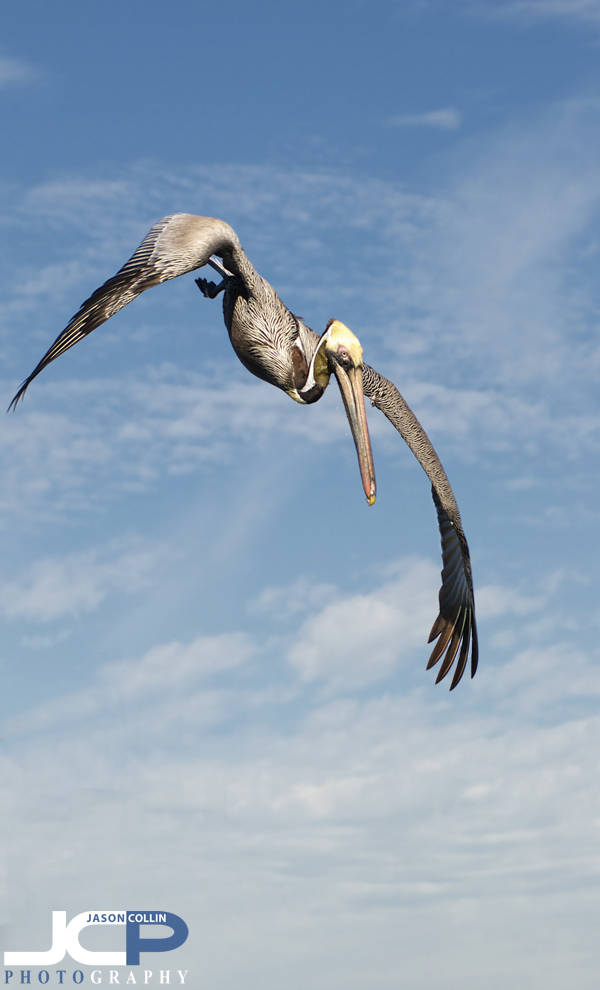
Brown Pelican preparing to dive St. Petersburg Florida - Nikon D300 Nikkor 80-200mm @ f/5.6 ISO 200 1/1250th

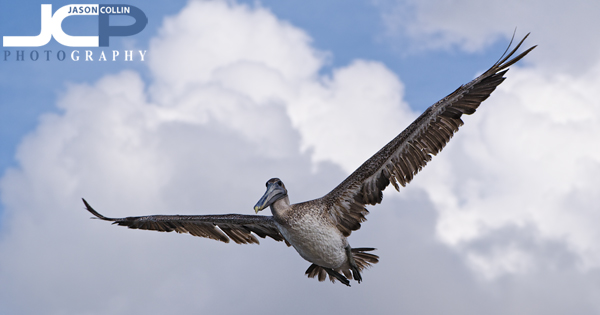
Regular followers of my nature posts will know that I am very fond of photographing the many local brown pelicans in my St. Petersburg, Florida neighborhood.  I have not yet achieved my long-term goal of photographing a pelican skimming just over the water, but I was glad to be able to add these images to my pelican portfolio.  On Saturday pelicans were regularly diving out of the sky into the water for fish around The Pier.  Once getting the settings dialed in using shutter priority mode and multi-point focus, it was just a matter of tracking the birds fast enough as they made their dives.

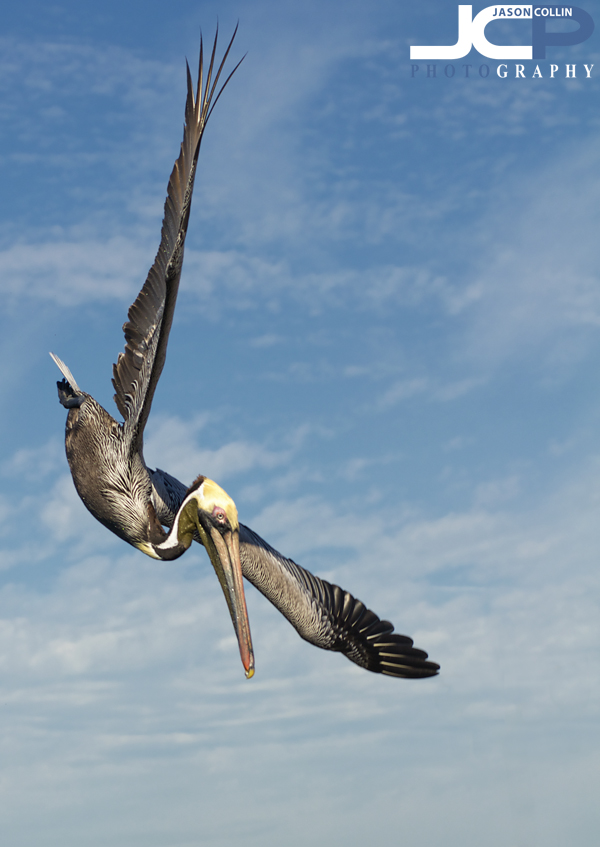
Brown Pelican on an aerial fish survey - Nikon D300 Nikkor 80-200mm @ f/6.3 ISO 200 1/1250thThis collection of pelican images focuses on the birds as they are about to make a plunge into Tampa Bay hoping to come up with a beak-full of small silvery fish.  Observing a bird's behavior is key to being able to capture the photographs one wants.  I watched where and how they circled and what they did with their wings right before their split second descents.

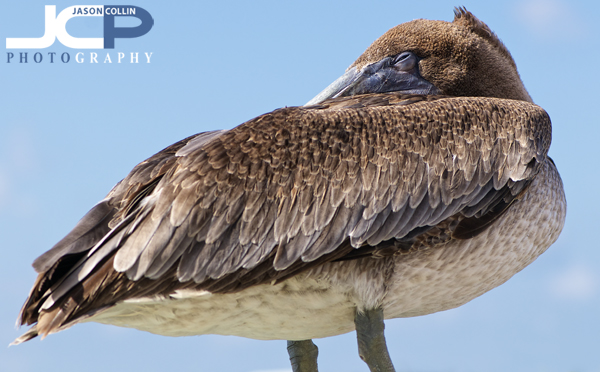
Brown Pelican wings arced for diving in St. Petersburg Florida - Nikon D300 Nikkor 80-200mm @ f/6.3 ISO 200 1/1000thDuring this shoot I also became, at long last, a believer in shutter priority mode.  With the pelicans diving from a bright blue sky background down to the dark waters of Tampa Bay, I knew what shutter speed I needed to freeze their flight, but adjusting the aperture constantly to maintain the correct exposure would have been nearly impossible.  Thus, shutter priority was the best exposure mode to use for these bird-in-flight images.

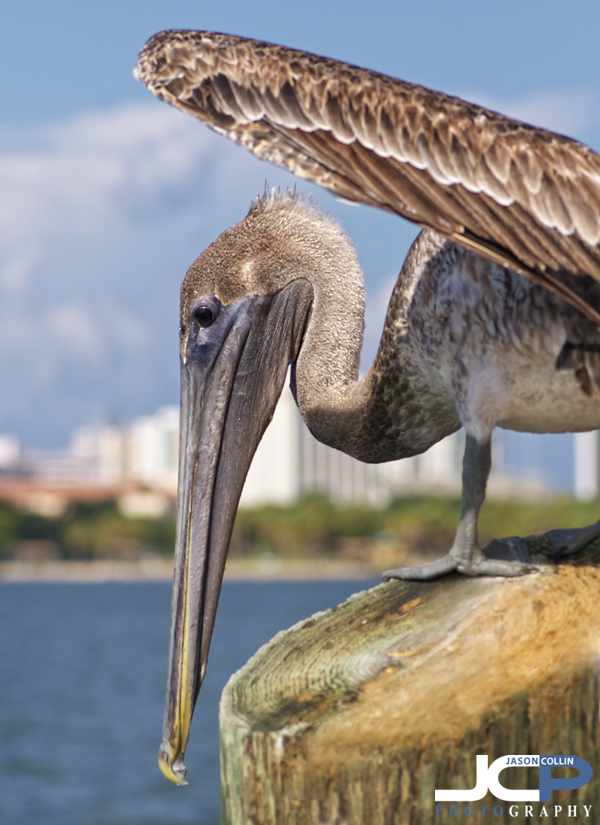
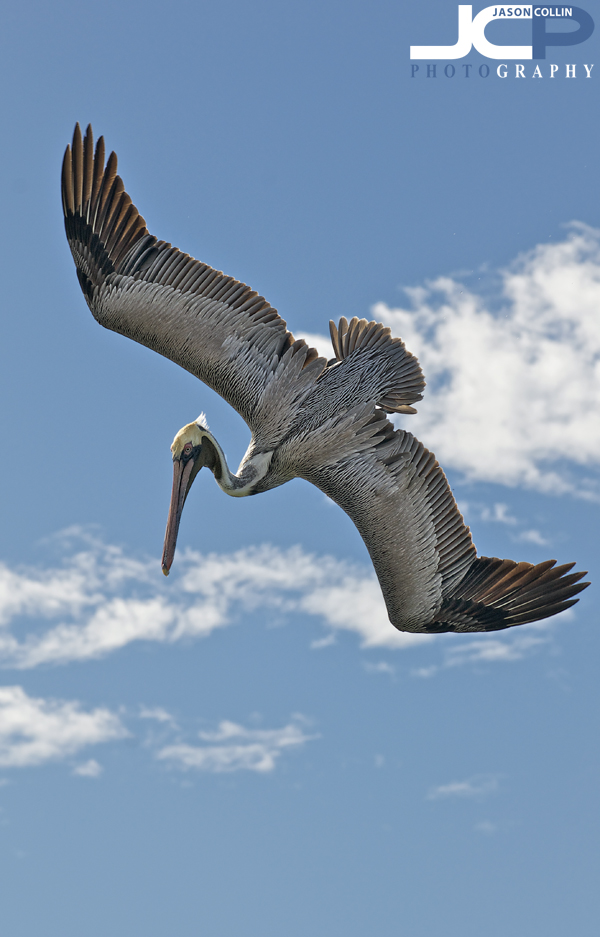
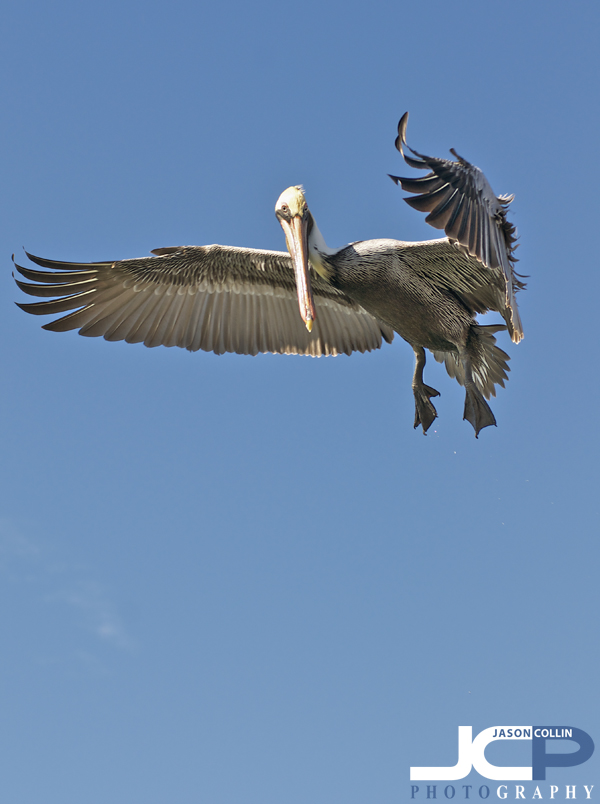
Brown Pelican hovering before diving in St. Petersburg Florida - Nikon D300 Nikkor 80-200mm @ f/4.5 ISO 200 1/1250thI also used multi-point focus because I was able for the most part to fill the frame with the pelicans, allowing the 21-focus points to act as a net.  If I could not fill the frame with the pelicans, well, I probably would not even push the shutter, but in that case I would use a single focus point to place right on the bird to distinguish it from any other possible background elements.  In relative close-up shots like these, the multi-focus point setting gave me the best chance of landing a focus point on the subject (pelican) where a single focus point might get lost under a single wing flap.

Visit The Pier for great pelican and bird-in-flight photography opportunities:


View Larger Map

  • License these images for business use or purchase fine art prints
  • View more pelican photo stories
  • Read more photography tips
  • Egret takes flight from Shinobazu Pond Ueno Japan

    Egret takes flight from Shinobazu Pond in Ueno, Tokyo Japan - November 2008 - Nikon D80 with Nikkor AF ED 80-200mm f/2.8D lens @ f/2.8 ISO 400 1/4000th -0.33 evThis photograph was a mistake.  I could not react fast enough to catch the egret fully in frame as it took off from Shinobazu Pond in Ueno Park, Tokyo, Japan when out shooting with old friend Can. Mike.  I may have never paid this photograph any attention if not for someone saying they liked it when I showed all the shots of the day to a group of friends.  This was early in my DSLR photography career.  My culling process was not as refined as it is today.  

    Now when I look at the image I get a sense of potential, of Freedom, of the unknown.  All I can see is that the bird is in flight and headed to a place I cannot see.  I wonder if it was late in starting its migration?  Now living in Florida, it is a place birds migrate to about this time of year.  It would perhaps be a nice bookend to make an image of an egret landing in water.  

  • View more nature & wildlife photo stories
  • Read more philosophy
  • Find more photography tips

  • Florida Brown Pelican Fly Hunt Sleep at The Pier St. Petersburg

    FLY -- Brown Pelican in flight St. Petersburg Florida -- EXIF: f/5.6 ISO 200 1/1250thRegular readers will know that I enjoy and often photograph brown pelicans.  They are not a rare bird around this part of Florida at all.  In fact, it would be rare to go to any coastal area of St. Petersburg and not see one.  However, I find myself continually drawn to photographing them despite my usual instinct being to not photograph things that are commonly photographed.  Plus, I have a bit of unfinished business as I still want to photograph a pelican in flight hovering just over the surface of the water as they are apt to do.  Catching one in flight like above requires seeing the bird approach from distance, tracking it as it swoops in, then of course have sufficient shutter speed to freeze it in mid-air.  Maybe some luck is required too?

    HUNT - brown pelican looking for lunch at The Pier St. Petersburg Florida -- EXIF: f/5.6 ISO 200 1/1600thI used my Nikkor AF-S 105mm VR micro f/2.8G lens for all these shots.  It is not a very long lens but The Pier provides a very close vantage point for photographing pelicans as they fly, hunt and sleep.  To photograph these three different female brown pelicans I observed and studied their behavior.  Of course the sleeping one was not a challenge, but the flying one took a sharp eye to find and photograph and I needed to follow the hunting pelican from pier top to pier top until I could catch her while still standing at the ready.

    SLEEP -- brown pelican catching a little shut eye at The Pier in St. Petersburg Florida -- EXIF: f/5.6 ISO 200 1/800thAs these photographs illustrate, brown pelicans do not all exhibit the same behavior at the same time of day.  Some flew, some hunted and many slept.  One day, I will photograph one of you skimming over the water's surface!  Until then, expect more pelican photographs of another nature.

    These brown pelican photographs are available for commercial license and fine art print, inquire today!

    Photography Tip - Use Photoshop Clone Stamp Tool to clean backgrounds

    Top: the original RAW image Bottom: after using clone stamp tool to clean background

    When I go around saying digital photography editing skills are 50% of what you need to produce a satisfactory final image, I really mean it even though every other photographer around would probably disagree with that.  I invite you to look at the above before and after shots and tell me in the comments below what percent digital editing had in helping the final image be all it could be.  

    For this photography tip I will just concentrate on: 

    • how I used the clone stamp tool in Photoshop CS5 to clean up the background, i.e. removing the light posts and wires 

    When I first pulled up this photo in Aperture 3, I really liked the bird in flight action.  The great egret was caught in an unusual mid-flap wing position.  However, the background was not clean and the egret's feet were overlapping a light post.  Then there was the corner of a roof intruding in the lower left of the frame.  Finally, there was a single tall light post on the right of the frame that was another distraction.  

    To me the two things that really make a photograph of a common subject matter standout are light and background.  You need good light for a flattering exposure and a clean background to let the subject stand out.  While it is entirely possibly to be at a location where one can get both of these things just right, I, myself, do not want to be limited to just those exact right circumstances.  Hence, I have worked on my clone stamp skills with earnest.  

    Now, if you have used the clone stamp tool in Photoshop you know it kind of has a mind of its own.  It almost never works like you want it too, especially if you use it in broad strokes.  First, in order to be able to use the clone stamp tool, you must have a source area in your photo you can sample from.  In the great egret shot, I have plenty of other gray clouds to sample to later stamp onto the light posts.  Really this is an ideal shot for using the clone stamp tool to fix because of the ample source cloning material, the relatively small amount of area that needs to be stamped on, and the fact that the subject does not much overlap any of the background distractions (just a bit of feet do).  

    The shortcut for selecting the clone stamp tool is "S" and the key to using Photoshop efficiently is learning as many keyboard shortcuts as you can.  To change the size of the brush use the bracket keys:  ] and [   To sample an area hold the Option key (on a Mac) then click on the desired spot.  I very rarely use the clone stamp at 100% as that makes is hard to control and often artifacts are introduced.  For this shot I mostly used 80% opacity.  Once I sampled a cloud I stamped in ver short strokes, never more than one or two at a time.  Then I would go back and sample the same or another area.  Also, I almost always use a soft brush (see screenshot).  

    So to summarize how I use the clone stamp tool in Photoshop CS5: 

    • "S" to select it
    • [ ] to change brush size
    • type 8 to change opacity to 80%, etc
    • Option-click to sample an area
    • Use short strokes
    • Resample every one or two strokes as needed 

    Try this clone stamping technique on one of your photos and post a link in the comments below to a before and after shot, or e-mail the shot to me and I will include it in this post.