Color Efex Pro

Lamborghini Gallardo on a lonely street in Ybor City Tampa Florida Car Photography

Stylized image of a Lamborghini Gallardo in Ybor City Tampa Florida Car Photography - Nikon D300 Tamron 17-50mm @ f/11 ISO 200 9-exposure HDR tripod mounted with cable releaseGoing through my unused archives from a Lamborghini Gallardo shoot from December I spent a little time experimenting with the filters in Color Efex Pro 4.  It took me awhile to get used to the UI changes in this new version, but after not liking 4 I now prefer how you can add multiple filters at once.  In this Lamborghini shot I used no less than four filters, starting with the usual Pro Contract and Polarization filters, then the Glamour Glow filter before finishing with the Cross Color filter.  The image started out as a 9-exposure HDR.  The biggest impact of the filters was a contrast improvement, a softening of details and an overall warm tint to the tone of the image.  What do you think . .  too much or looks cool?

Color Efex Pro 3 - Make Fake Autumn in the Park

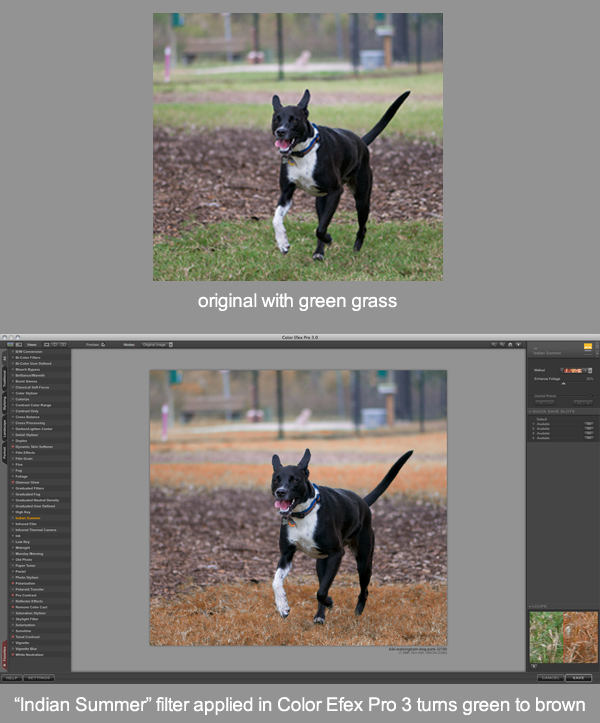
Kiki running on grass turned brown by Color Efex Pro 3 - Nikon D300 Nikkor AF-S 105mm VR micro f/2.8G @ f/2.8 ISO 400 1/800thI really like that Florida is such a green and lush place nearly year round.  This, however, means there is a near complete absence of autum colors.  At Walsingham Dog Park last weekend, even though it was in the second half of November, all was as green as always.  However, as you can see, Kiki is running on brown grass.  This transformation was done with just one mouse click.

I really recommend the plugin app Color Efex Pro 3.  I have it for Aperture 3 and use its filters on everyone of my photographs.  It is very easy to use wiht a list of filters on the left that are applied with a single click.  The effects can be modified down to very fine details if desired by using the fine tuning controls on the right column.  The "Indian Summer" filter does just one thing - turn greens to browns.  So with just the application of that single, simple filter, photographs can have that autumn look to them no matter what time of the year they were shot.

Kiki at Walsingham Dog Park - Nikon D300 Nikkor AF-S 105mm VR micro f/2.8G lens @ f/4 ISO 200 1/500thThe green leaves that make up the bokeh of this shot were made to look like autumn colors once again by applying the "Indian Summer" filter in Color Efex Pro 3.  As you can see, Kiki's markings and collar retain their correct colors since none of them included green.

DSLR Photography Tripod & Editing Lesson with Sarina and her Nikon D90

Photo by Sarina with editing in Color Efex Pro by Jason - before & after maternity portraitIncreasingly, the DSLR Photography Lessons I teach invovle digital photo editing practice as well.  Each one of Sarina's four lessons have been a split between shooting the first hour and editing the second hour.  If one's goal is to produce pro or as close to pro looking photographs, I cannot stress enough how one must work on shooting and editing skills simultaneously.  In Sarina's photo above, it took shooting skills to setup the strobist portrait and to pose the couple accordling and frame them well on the rocks and include the water.  The exposure is off some and that could have been improved in the field with better settings, but as Sarina realized when you have a client making constant requests, and you are standing in ankle deep water with waves coming in, and you have to keep track of a light stand as well as your camera, it can be a lot to keep track of and missing the exposure by a little bit for a portrait photographer just starting out can be forgiven.  

So without any digital photo editing skills one would be left with the image on the left.  Nicely composed, but nonetheless flawed.  However, if you do about 4-minutes worth of editing the results, by evidince of the image on the right, can be dramatically improved.  During my photography lessons, if you have Color Efex Pro, I can teach you how to transform your photos like this in minutes.  Sarina will be purchasing the full suite of Nik apps including the aforementioned Color Efex Pro and Silver Efex Pro too, which she tells me is on sale now.  

Sarina using her Nikon D90 on a tripod to produce a level landscape shot of Tampa BayWe started out the fourth of four lessons by getting in some tripod practice.  The first tip I gave Sarina was to always make sure the front of the lens points out directly over a leg of the tripod (see above).  This adds stability.  One can almost always use the smallest ISO when using a tripod since camera shake is not an issue when having to use a longer exposure to compensate for lack of light.  Plus, using a tripod just slows ones shooting down to a nice pace.  When I use a tripod I really feel like I am crafting a shot much more than one I handhold my Nikon D300.

I look forward to following Sarina's burgeoning portrait photography career and I think I will see her again in the not too distant future for some more advanced lessons.  

  • Reserve your own 1-on-1 DSLR Photography Lesson with Jason today!
  • Learn more about the lessons
  • Browse past lessons with all of my students
  •  

    --Professional Model DSLR Photography Lessons now available!

    DSLR Photography Lesson #2 with Teresa off camera flash & editing

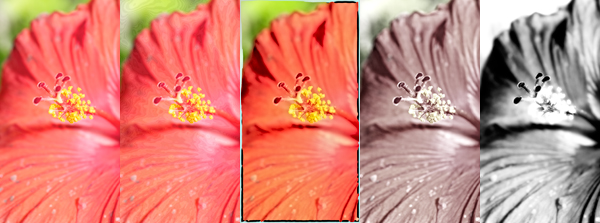
    Strobist hibiscus photo with various Color Efex Pro 3 filters applied to it (original photo by Teresa)Teresa once again made the journey down from New Port Richey for our second DSLR Photography Lesson (the 1st).  One of the best benefits of the Canon 7D over its less expensive Canon family members is its ability to trigger a flash off camera with no additional accessories.  Now, perhaps setting the 7D up to trigger a Canon brand flash is easier, but with Teresa's Nissin flash we had a heck of time making it work despite having all the settings on the 7D and Nissin correct.  What we discovered is the 7D must be in manual exposure mode for it all to work.  This is strange, but actually ok since I prefer to shoot in manual mode for strobist photography anyway.

    We had to use yours truly as the model for the first part of the lesson, and used the covered walkway in front of the Museum of Fine Arts as the location.  I actually like that location a lot and have shot actual models there before.  Using the flash off camera allowed Teresa to use her favorite lens, the Canon 70-200mm f/4 because the flash could be positioned close to the subject (me) while allowing her to be the necessary distance away from me to use the 70-200mm lens at its full 200mm focal length.  I have spared you by not included the closeup shot of my face in this post!

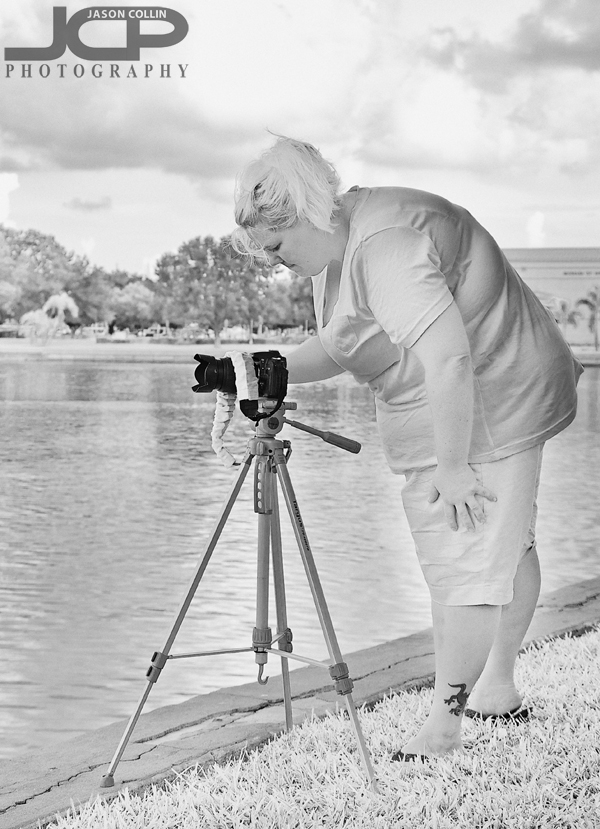
    A hibiscus bush in bloom was our last subject matter for the day (see above).  After taking a few strobist shots of the flowers with me acting this time as the light stand, we went to the St. Petersburg Chamber of Commerce (of which I am a member) and used a conference room there for practicing editing.  Teresa had gotten my favorite filter editing app, Color Efex Pro 3.  I showed her the selected filters I use on almost every single photo I take, indoors or out (see this post for detailed info on my editing process).

    In this way the three-hour lesson went by very quickly.  We already have another three hour lesson scheduled for next week with more shooting and editing on the itinerary! 

  • Reserve your own 1-on-1 DSLR Photography Lesson with Jason today!
  • Learn more about the lessons
  • Browse past lessons with all of my students 
  • Photography Tip - Previsualization of bleach bypass

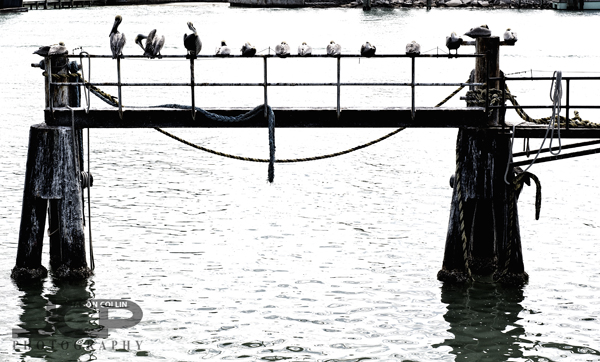
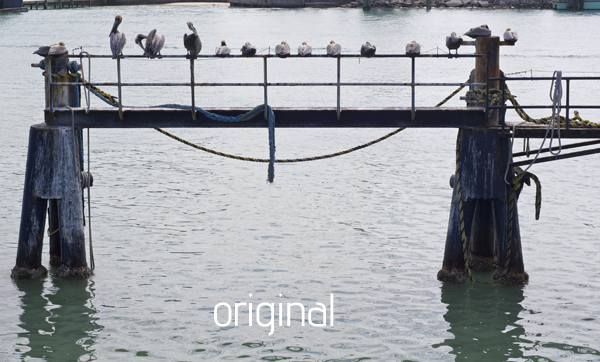
    Previsualized for bleach bypass filter - Nikon D300 Nikkor 50mm f/1.8D @ f/11 ISO 200 1/400thOne photography tip to keep in mind as you start to progress as a photographer is previsualization.  This is the process by which you see the final photograph before you even put the camera up to your eye.  I was teaching a 1-on-1 DSLR Photography Lesson at John's Pass Village recently in very poor, harsh mid-afternoon Florida light.  This meant there was no reason for me to look for shots that would produce great color or exposure.  So I did not.  Instead, I switched my mind to looking for possible black & white or similar photo opportunities.  

    As soon as I saw all these birds sitting in a neat row on the railing of a pier this popped into my head:  use the rectangular shape to frame the shot, post-process using a bleach bypass filter (found in Color Efex Pro).  How was this able to instantly come to my mind?  Because I had already started the previsualization process when I accessed the natural light situation.  I gave myself a very specific type of shot to focus on looking for, so once a possibility was seen, I knew right away how I wanted to photograph it.

    This is what the above scene looked like to the naked eye:

    Being able to see the potential for a shot is KEY to producing consistently satisfying imagesThe next time you set out with your DSLR, try to previsualize shots before you even think about pushing the shutter.  This will not only likely help you produce better photographs, it will cut down on the number of shots you just immediately delete when you get home.

    Post a link to your previsualization results in the comments below . . .

    Photography Tip - use filters when editing for great quick results

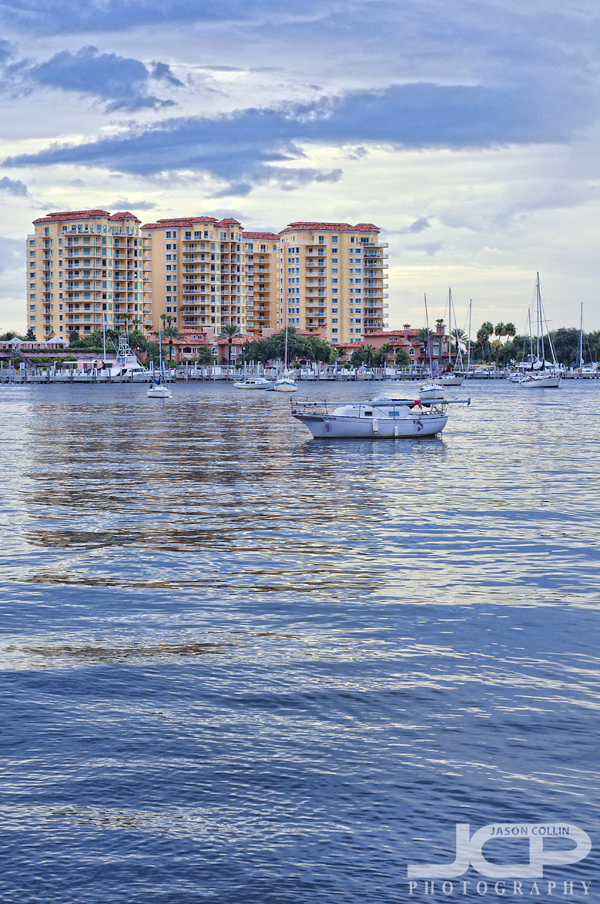
    Nikon D300 Nikkor AF 50mm f/1.8D ISO 400 1/60th - sailboats of St. Petersburg HarborFor this digital photography editing tip I am using a photograph that was made in an unusual way and breaks a few rules.  Typically for a landscape, fine art type photograph I would of course mount my DSLR on a tripod and probably use a cable release and wide angle lens too.  For this photograph I was shooting handheld with a 50mm prime lens, and in portrait orientation to boot.  At the time I was teaching a DSLR photography lesson to a student preparing for a trip to Costa Rica and he would not be bringing a tripod.

    This photograph had been lying around unedited for five months, which means I did not love it, but something about it made me want to not just delete it right away.  Maybe it is the completely empty foreground and the use of portrait orientation, or because of the sailboat with a lowered mast in the middle.  Either way, I will in the following describe my simple and fast editing method of using filters.
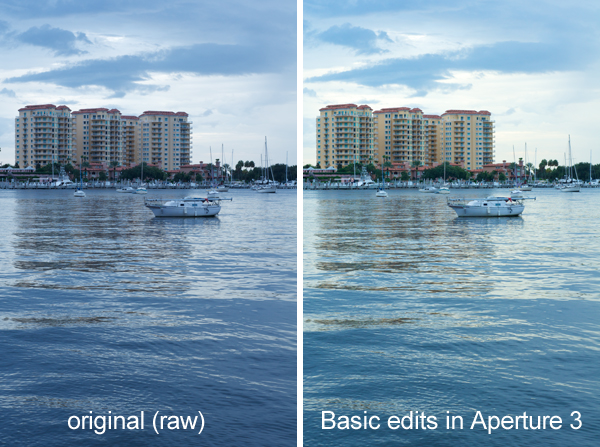
    The first step was importing the RAW file into Aperture 3.  If you use an app like Aperture 3, then shooting in RAW requires no extra work over just shooting in jpg.  So you get all the benefits of shooting in RAW, with no big work required on your part because Aperture 3 upon file import applies a RAW processing profile based on your specific DSLR right to the file.  No mess no fuss.  So there is absolutely no excuse not to shoot in RAW.  The myth of RAW being extra work is gone!  

    Here are the next steps I took in Aperture 3

    • straighten the horizon (right side was low)
    • adjust exposure and vibrance sliders
    • use the temperature slider to add warmth (image was too blue) 

    After doing super easy and basic slider adjustments in Aperture 3, I then launch Color Efex Pro 3 which is a plugin I have right inside Aperture 3.
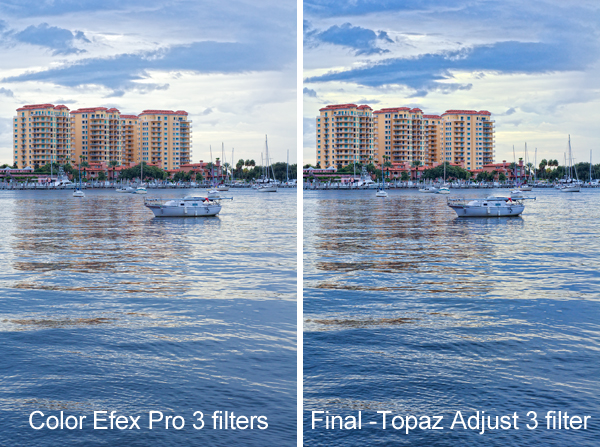
     

    The filters I used in order in Color Efex Pro 3

    • Polarization
    • Remove Color Cast
    • Tonal Contrast 

    After finishing things up in Color Efex Pro 3, I export the image as a TIFF right into Photoshop CS5 where I applied a 60% unsharp mask filter.  Then from right within Photoshop CS5 I launched Topaz Adjust 3 and applied the "Photo Pop" filter.  The last little thing I did to the image was use the dodge brush in CS5 set for midtones at 20% to brighten up the condos a little more, and the shoreline too.

    This is basically the editing process I do on every single photograph I edit, save for using Topaz Adjust which is only used once in a great while.  One or two of the filters may change in Color Efex Pro, and I may adjust different sliders in Aperture 3, but I think this is a streamlined, easy and effective editing process.  

    Please try this editing process out on one of your own images and post a link to the results in the comments below.

    Psychedelic Medical Mannequins

    Nikon D300 Tamron 17-50mm f/2.8 @ f/5.6 ISO 400 1/60th strobist: SB-600 off camera on counter to the right

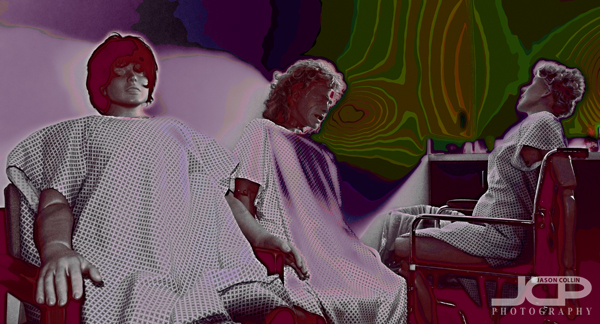
    I do not often play around with editing software filters much, but last week I found myself inside a Red Cross office building with my camera in hand and no supervision.  The mannequins pictured above were visible from the far end of a dark hallway and startled me at first.  My next thought was I want to photograph these things!  

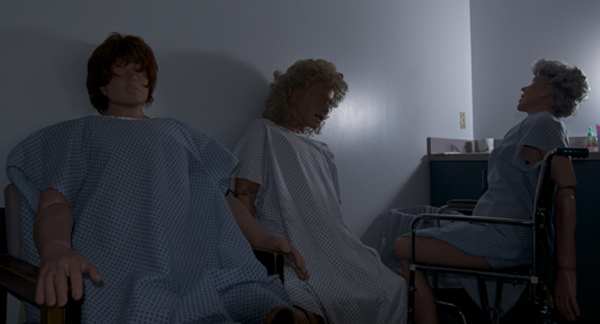
    I touched nothing.  There were in the exact positions you see above.  I looked around for a good place to put my SB-600 Speedlight on because I knew right away I wanted to bounce the light off one of the walls in this room to try and get an unusual lighting outcome.

    Since this was just a photograph I took for fun, I then went through some of the filters I rarely ever use in Color Efex Pro 3, and settled on this one to portray a kind of psychedelic horror nightmare look.  I feel it kind of makes it look like a composite shot, like all three mannequins were photographed separately then combined into this one image.  

    I think it is important to still have fun with one's photography from time to time as it is easy to get caught up in the business end of shooting.  Who knows, maybe some day a potential client will see this image and want their own portrait made like this!  

    Here is the original image straight out of the camera:

    original, no processing done