rule of thirds

Photo Tip - put a major subject focal point in a third and a third

Many of my hundreds of photography students start out always centering the subject in the frame during our first lessons.  That is understandable as they are busy learning my 5-step process for making a well exposed and sharp photograph in any given shooting situation.  Once the technical apsects of photography take up less of the process of making a photo, then one can begin to focus on being creative, and the first step in that is composition.  

The rule of thirds is a good way to start getting more appealing composition, but I like to think in two dimensions with the rule of thirds as well.  By that I mean putting a major feature of my subject in a vertical thid and a horizontal third.  In the above example of a model at the Dali Museum, the upper third and left third interset right by the model's face.  Then the lower third and left third intersect by her hand and the melting clock.  There is still a good amount of negative space in the frame, but that is put to the far upper and left parts of the photo.  I would not want a lot of negative space on both sides of the subject (as in if I had centered her with no focal points other than along the midpoint of the photograph).

So the next time you go out shooting, especially a portrait, try putting a major subject focal point at a third and a third in the frame.

The final version of the photo putting a major focal point at a third and a third

Where to put the horizon in landscape photographs

When composing a photograph, especially a landscape shot, everything needs to be considered, and that includes where to put the horizon.  By where the horizon is placed in the frame determines much of the overall impression of the photo.  One simple way to help with horizon placement is to follow the rule of thirds, by that I mean placing the horizon in the lower or upper third of the frame often results in an appealing shot.  

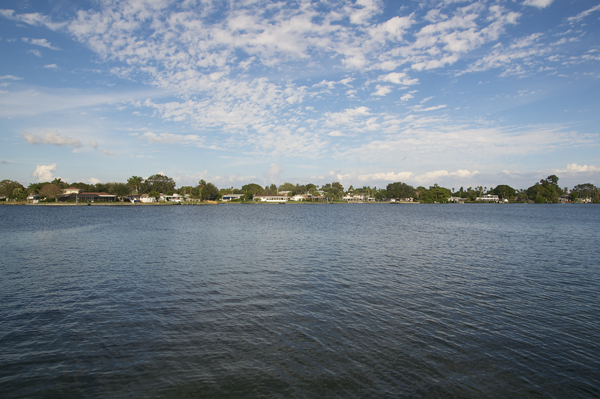
The horizon dead smack in the middle, not a very exciting shot.Without any formal photography training, most of the time picking up a camera and making a landscape shot of sky and water would result in the above image with the horizon dead centered.  Unless there is some kind of cool reflection or vertical symmetry, this results in a boring shot.  The photographer has not chosen which to feature more of in the frame, the sky or the water?

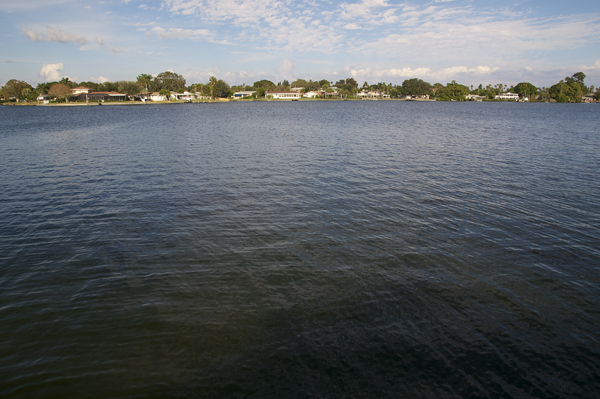
Placing the horizon in the upper third showcases the foreground.In the above shot the horizon is placed in the upper third of the frame, showing that the photographer chose to feature the water.  Putting the horizon in the upper third highlights the foreground.  So you have to ask yourself, is the foreground nicer than the background?  If so, compose with the horizon in the upper third.  However, for most water shots here in Florida, including the one above, the water is not as beautiful as the sky so the shot can end up looking like a lot of brown with a peak of blue at the top.

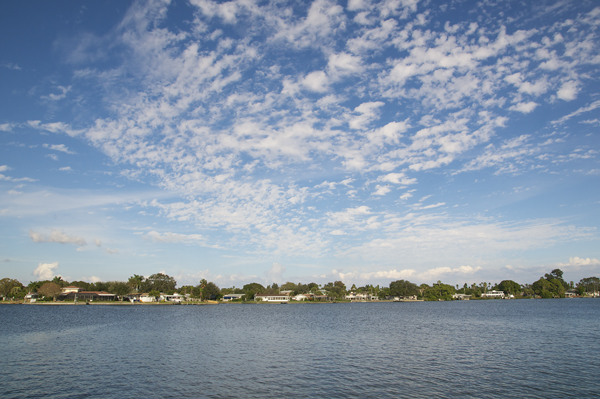
Putting the horizon in the lower third often results in the best Florida landscape compositionFinally the horizon is placed in the lower third showing more of the beautiful afternoon sky and less of the nondescript water.  This framing showcases the best feature of the shot, the sky, and just enough water to let the viewer know it is a waterfront shot.

So when framing your shot, decide what you want to feature, and then place the horizon accordingly.