portrait practice

Portrait Photograph Tip - set the focus on the eyes

When making a portrait, set the focus on the eyes, then recompose.I always use a single focus point when photographing still subjects.  Most of the time I keep that single focus point in the center, and the recompose how I want the final image to look.  Of course for shooting still subjects I use AF-S (one shot) focus mode.  So when making portraits using the settings described previously, I set the focus on the subject's eyes, then recompose because the most important thing with a portrait is getting the eyes in focus.  

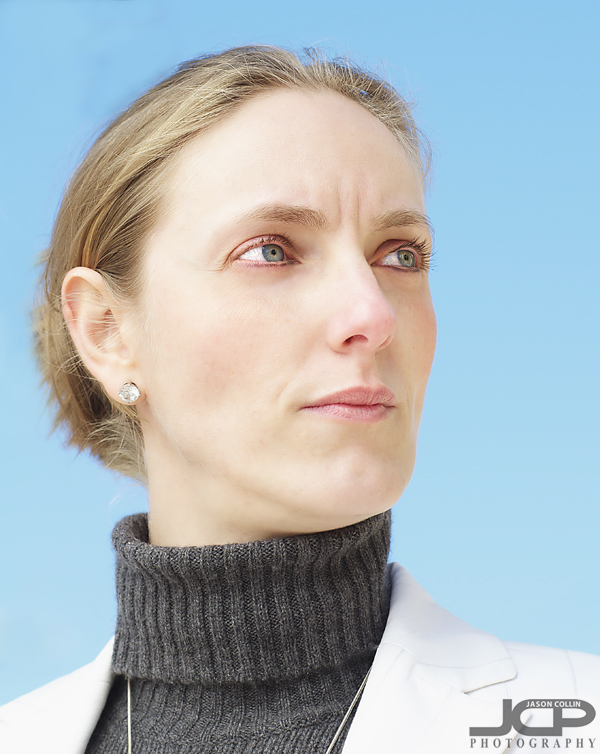
Very rarely do I center subjects, and in a portrait the eyes of the subject are not very likely to end up perfectly centered as well.  In the above shot I first put my center focus point on the subject's eyes, then recomposed to put her eyes in the upper third of the frame (also her right eye ends exactly at the right horizontal third).

So when making portraits, set the focus on the eyes, then recompose how you like.

Photography Tip - Posing App for iOS and Android helps photographers

One of the hardest things about making a portrait is often the pose.  Now I like to make as candid of portraits as possible, but not every client has the personality for such a shoot.  Likewise, as a photographer it is not easy to memorize exactly a whole catalogue of poses, and even if you have done so, describing that in words to a client is not so easy.  

This is why I really like the Posing App (available for iOS & Android).  It is a visual way out in the field for me to show clients how to get into natural and attractive poses that will result in great portraits.  The app breaks poses down by the number of people in a shot making it easy to find a collection of poses for the number of subjects.  There is also a tips & tricks section.  Just for how to better pose hands and arms the app is worth it.  

DSLR Photography Lesson with Rosa and her daughter as a model

For our third DSLR photography lesson, Rosa practices bouncing her speedlight off a side wall.This is already my third lesson with Rosa! (first - second)  She has done some significant shopping since our last lesson about two weeks ago.  She has added to her lens collection with the purchase of a Canon 50mm f/1.8 lens, and a larger camera bag to store all three of her lenses in.  She's added a tripod, and most excitingly, a 430 EX II speedlight!  Rosa also brought her daughter, Kristina, with her to be a practice model for portraits.  I cannot say enough how great Christina was, and patient too, with our 2-hours of posing her all over the Plant Museum building on the University of Tampa Campus.  

We started with practicing portraits out on the front porch of the Plant Museum building just like I would my own portrait clients.  Here I showed Rosa the best places for Christina to stand in order to make best use of natural light in addition to the light from her speedlight.  

A portrait of Christina I made while Rosa was getting setup.

As in previous lessons, Rosa was a fast learner and soon was totally getting into portrait making mode, even helping out Kristina with scarf placement and other set design stuff.  We made good use of all the new gear she bought, even the tripod as she put her Canon T1i with her new 50mm f/1.8 lens onto the tripod for natural light portrait practice.

I'm sure once her family sees the portraits she made of Kristina, they are going to be hounding her even more to photograph them too!

Thanks again to Kristina for being such a trooper of a model and to Rosa for another great, and different, DSLR photography lesson.

***************

More Information: