Nikon D300

Photography Tip - go through all your DSLR menus and recheck settings

To start out the year, the first photography tip of 2014 is to go through each and everyone of your DSLR's menus and confirm that all the settings are what you want and to refresh your memory about where less often used settings are.  Deep in the menus are things that basically only ever need to be set once (like number of auto-focus points beyond a single point), but gremlins do exist and even though you may never remember changing any of these lesser used settings, they might have on their own somehow!  

Going through all the menus will also help you remember where things are that do occassionally need to be changed.  It's better to refresh you memory home at your desk than when out in the field already shooting.  

If you find something in your menus you are not sure of what to set at, or even what it does, leave a question in the comments and I will try and answer it for you.

Good luck shooting in 2014!

1/60th sec minimum shutter speed for handholding still shots - photography tip

Handholding 1/60th of a second is the minimum I feel safe with and only when using a focal length 50mm or shorter -photo made with an iPhone 5When a shot comes out blurry, the usual culprit is shutter speed.  Therefore, it is critical to make sure you are using a minimum shutter speed that you can handhold reliably.  For me, that is 1/60th of a second.  There are many conditions that apply to this, but basically if you are using an 18-50mm lens, photographing a still subject, not using a tripod and not using a flash, then the minimum shutter speed you should set on your DSLR is 1/60th of a second.  This is also why shooting in manual mode is a great help as you will purposefully set your shutter speed to what you know is the minimum (1/60th).  If you shoot in aperture priority mode, the camera may set a shutter speed below that resulting in a blurry shot.

  • 1/60th of a second minimum for any still subject shot

Some people may be able to reliably handhold a slower shutter speed, and yes sometimes I do attempt it myself, but I know that for sure 1/60th with a focal length 50mm or under and a still subject will produce a sharp image.  So if your still subject photographs are coming out blurry, set your shutter speed to 1/60th minimum, use good shooting technique and you will be able to produce a sharp photograph.  

1/500th sec minimum shutter speed for action shots moving subjects - photography tip

1/500th of a sec is the minimum shutter speed I feel comfortable shooting action shots with.When you shoot in manual mode or shutter priority mode, you have to set the shutter speed on your DSLR.  Of all the things you can set on your DSLR, shutter speeds have the most choices.  On my Nikon D300 I can choose from the fastest setting of 1/8000th of a second to essentially infinity (bulb mode).  So how to decide which shutter speed to use?  This week's photography tip is for choosing a minimum shutter speed for action shots or shots with moving subjects. 

  • 1/500th of a second minimum for any kind of moving subject/action shot

For me, I only feel comfortable with a minimum of 1/500th of a second when photographing anything moving.  You may be able to get away with a little slower shutter speed for not so fast moving subjects, but 1/500th of a second gives me confidence that I will freeze most action.  1/500th is the minimum though because for faster moving subjects like competive cyclists, excited dogs, etc, then even faster shutter speeds may be required.  Basically, for anything happening in your own backyard, 1/500th should be fine.  Now you have a starting point for setting your shutter speed for action shots.

Strobist fun with friends & dogs

Terry holding his dogs Lucy & Sadie with my dog Kiki frame left - Nikon D300 Nikkor 80-200mm @ f/8 ISO 200 1/250th Strobist: SB-800 in brolly to frame left & SB-600 on a chair to frame rightOn a recent visit to eldest friend Terry's house I brought with me a good bit of my strobist portrait gear planning to make some images of us with our dogs.  This involved not only getting the lighting and logistics correct for shooting in his living room, but also giving Terry some quick tips for how to shoot using my Nikon D300.  Once I got the above image of him with my dog Kiki and two of his three dogs, we switched players and I began coaching Terry how to first focus on my eyes and then recompose all while holding down the shutter halfway and shooting from a position lower than my eye level.  He learned fast, which should not be surprising as he was the valedictorian of our high school class after all!

Yours truly with Kiki & her best friend Sadie - Terry pushed the shutter on this one - Nikon D300 Nikkor 80-200mm @ f/8 ISO 200 1/250th Strobist: SB-800 in brolly to frame left & SB-600 on floor to frame rightHere is the image Terry and I created together.  This is all without mentioning the random element of the dogs and their movements, who were actually rather stoic for them.  Once Sadie laid down I got Kiki to come in behind her and I just rested on both of them, Terry was in position, and boom, we got the above shot.

Lucy kissing Kiki - background added digitally - Nikon D300 Tamron 17-50mm @ f/8 ISO 800 1/60th SB-800 hotshoe mountedLucy was hanging off the sofa with peoples' legs in the background for the above shot, but I liked the kiss Lucy was giving Kiki so I took both dogs out of that busy background and then using Photoshop painted in a color sampled from Lucy's own hair color with a slight gradient added as the final touch to the digital background.

All these shots were done in just a few moments of time, just a fraction of the time we were there, but now thanks to a little photography know-how we will always have these memories of our dogs together.  

Nikon D700 & Nikon SB-900 Speedlight DSLR Photography Lesson St. Petersburg

Barbie relaxing during our 6th DSLR Photography Lesson with her Nikon D300 at the New Dali MuseumBarbie returned from her many travels for our sixth DSLR Photography Lesson this morning at the New Dali Museum in downtown St. Petersburg.  As you can see from the photo above, she makes herself very comfortable while doing photography.  We were not on a beach but under a large tree behind the museum that has a pathway made up of of broken shells.  

We kept the flash on the camera for today's lesson, but still produced creatively lit portraits (unfortunately I had to be the model!).  I really like using the Dali Museum location for photography work, and of course photographing the museum itself, especially at twilight, can produce dynamic results (see here).

I had Barbie really concentrate on thinking which settings to use before pushing the shutter as we shot in various lighting and background situations.  As a photographer, as you move to the next location you should already be thinking of what kind of shot you want to make, which in turn dictates which settings you will need.  If you change light between locations and keep the same settings, well, the results will of course be very overexposed or underexposed.  Even though it's all digital, I do not like to waste shots.  Plus, if the shot is too bad it gives me no reference to use to hopefully perfectly dial in my settings by the second shot.  

Lessons with Barbie are always fun and before she travels again we need to finish our remaining two lessons!

BlackRapid RS-Sport Camera Strap Gear Review

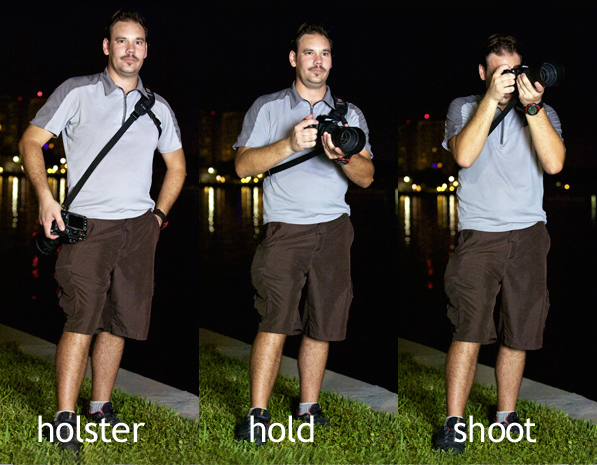
Gunslinger hip to eye shooting style demonstration using the BlackRapid RS-Sport strap system with a Nikon D300 & Nikkor 80-200mm f/2.8D - photo by PedroLet me start by just saying that the BlackRapid RS-Sport strap has made me excited about using my DSLR again because of just how cool it feels to slide the camera up and down the strap.  Readers of my movie reviews will know I am a big western fan, and I definitely feel like an old gunslinger when using my BlackRapid RS-Sport.  So this is the emotional part of the review, which is mostly what determines buying a certain product or not.  I decided to buy one even before I knew it would make me feel like a gunslinger.  Just trying a photo student's RS-7 strap for a few seconds instantly convinced me to free my neck from its burden and get a sane camera carrying system.

For the ergonomics and practicality part of the review, the BlackRapid RS-Sport strap still gets a very positive gear report from me.  I have only had the RS-Sport for exactly two weeks, but I have already put it through many different shooting situations and it has performed great in all of them.  On a 2-day event shoot (5pm-8pm Friday; 9am-12am [yes 15 hours] Saturday) I got home early Sunday morning with zero shoulder pain.  Normally after only a few hours using my old Nikon Professional branded Optitech neck strap, I would have lingering sourness after a job.

The effectiveness of the BlackRapid strap system comes from taking the weight off your neck because when do you ever carry anything around your neck ever besides for some reason a heavy DSLR?  Instead, the BlackRapid strap system puts the weight on your left shoulder like any other style of bag one carries.  It has to be your left shoulder too.  If you are left-handed like me and concerned because you usually carry everything on your right shoulder so your left hand has easy access to the bag, it immediately felt normal to me to have the BlackRapid strap on my left shoulder because you grab a DSLR with your right hand first anyway.  The grip on the DSLR body is designed for the right hand so do not be concerned about having to use it on your left shoulder, even if your are left-handed.

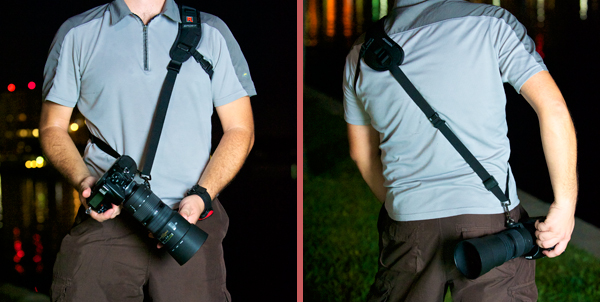
Your camera on a BlackRapid strap can hide behind your hip in tight spots or can easily be held in front to squeeze through places.

I chose the RS-Sport model for the extra bit of strap that goes under the armpit area for extra stability.  I have to admit I did think at first that this is not comfortable and maybe I should have just gotten the RS-7 which is similar to the RS-Sport but minus the underarm strapping.  However, in real world use and not hyper nitpicking when trying it on in one's house, I am definitely glad I got the RS-Sport because the main shoulder pad is more ergonomically tapered and the underarm strapping is not noticable to me anymore.  

How anybody can use the first party straps that come with a DSLR is beyond me.  I immediately got a cushier Optitech neck strap, which sells for about $24.  Now I wish I had gotten a BlackRapid strap long ago.  The RS-Sport sells for $69.95 and the standard RS-7 for just $58.95.  There are several other styles, including a dual strap system for carrying two cameras!

Take a 1-on-1 DSLR Photography Lesson with me and I will let you try out my RS-Sport strap for yourself! 

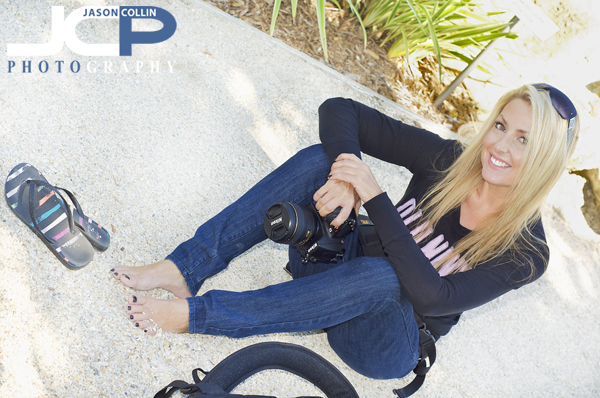
--thanks to Pedro for taking these shots of me
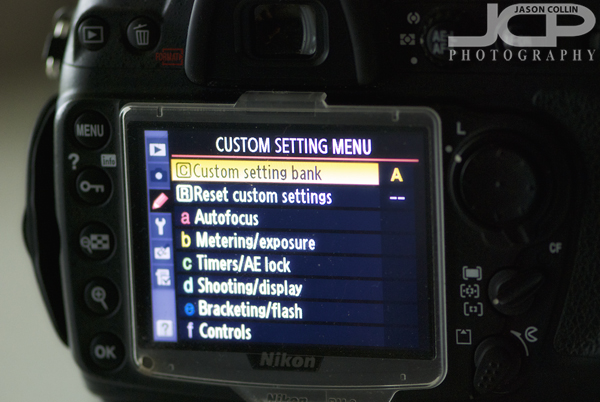
DSLR Photography Lesson with Chris & his Nikon D300 in St. Petersburg

Chris concentrating on getting a shot in downtown St. Petersburg during our 3rd DSLR Photography LessonIt was an extra hot morning for my third DSLR Photography Lesson with Chris in downtown St. Petersburg.  The past two mornings had been almost pleasant, but not so today, even with an early-ish 9:30am start.  After I met Chris and had the usual pre-shooting chat we hopped on the trolley to The Pier to practice photographing moving subjects, i.e. pelicans.  Early on the pelicans were very obliging by flying right in front of us, however, catching them in frame is another story.  I showed Chris my method of holding the view finder just below my eye and using the length of the lens to track the bird in flight with, all the while holding the shutter half-way in continuous focus mode until the bird comes into range.  Then it's a matter of putting your eye in the view finder and being quick on getting the bird properly framed before it soars by.  In case you were wondering, this is not an easy skill to master and takes lots of practice and a very fast focusing DSLR / lens combo.  

Ovation Luxury Waterfront Condominium - downtown St. Petersburg commercial photographyAfter nearly melting out at The Pier we headed to the shade of downtown for a little architecture photography and random street photography as well.  The Ovation Luxury Waterfront Condominium building can be seen above, or at least just the top of it.  I had on my Nikkor AF-S 105mm VR micro f/2.8G lens on so no wide shooting for me, but I like to get close-up detail shots of architecture anyway.  Chris was in a similar situation using his 70-200mm lens.  After seeing his first shot I suggested that he use a titled axis for a more visually interesting shot of the top of the building rather than just framing it straight up as one can see with the naked eye.  I always try and have the point of the building or subject point into a corner of the frame.  

Next up Chris and I will return to our laptops for an editing lesson before he does some traveling and puts to use all we have practiced over our eight hours of lessons.

  • Reserve your own 1-on-1 DSLR Photography Lesson with Jason today!
  • Learn more about the lessons
  • Browse past lessons with all of my students
  •  

    --Professional Model DSLR Photography Lessons now available!