lightbox

Macro Jewelry Product 1-on-1 DSLR Photography Lesson in St. Petersburg Canon T3 with James

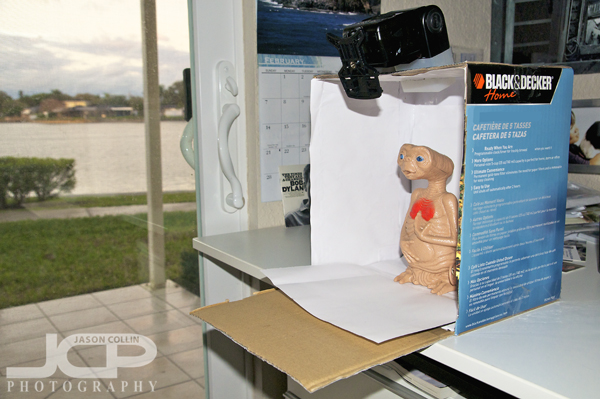
James making a macro shot of a ring in a lightbox during our 1-on-1 photography lessonThis morning I headed over to the BB&T Building in downtown St. Petersburg to meet James in his office for an atypical 1-on-1 DSLR Photography Lesson.  He sells rings and other jewelry and wanted help making the best product shots he could using his Canon T3, lightbox and Canon 60mm macro lens.  He also wanted workflow instruction on how to cleanly remove the ring from the background and place it on a pure white one.

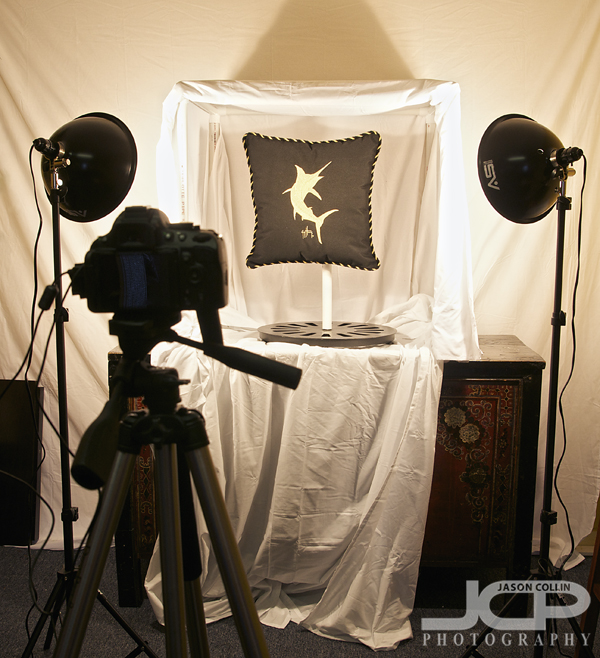
We started off with shooting instruction and the best settings to use and also where to place the lights to give the best look on the ring itself.  Since the lighting and subjects were constants, it did not take long to dial in the best settings.  We took those sample shots we made and opened them in Photoshop where I showed James my Quick Select & Refine Edge technique for putting a subject on a clean white background.  In order to produce the best looking edges, I had to use one extra setting I had not used before in the Refine Edge process, teaching myself something new on the fly as well as James!  In the end we were both very pleased with the results we were able to produce.  One other top tip for Photoshop, if you are having trouble selecting an image, do not crop the image at all, leave as much space between the frame and the object as possible, as this was how we were able to get a more accurate quick select.  I told James many times that Photoshop is alive and has feelings and needs to be coerced sometimes into doing things!

James only had a very short and flimsy tripod to put his Canon T3 on so right during the lesson I helped him pick out a very nice Induro tripod and also a cable release!  It was a fun and different lesson than my usual ones and I enjoyed learning about James' various businesses.

DSLR Photography Lesson with Karin & her Nikon D5100 & home product studio

The brand new Nikon D5100 on tripod with Karin's new light setup for her pillow product shots.I returned to Northern Pinellas County this morning for my second DSLR Photography Lesson with Karin, but the first with her brand new just arrived Nikon D5100!  This was of course my first time hands on with that Nikon as well and I came away impressed by its fit, finish & image quality.  The D5100 was not her only new gear though, she also got a cable release for it, a tripod and a 3-light studio package!  Karin wants to be able to produce great product shots for her pillows and she is not afraid to get the tools she needs to do it!  I can respect that.

Assembling the lights was not that difficult, but it was definitely nice to have two pairs of hands to get them together.  Setting up her Nikon D5100 was no problem for me as Nikon has kept things fairly consistent across its product line for some time now.  So in just a matter of minutes we had her product shot lighting studio all setup and running!  Getting the correct white balance and other settings were super simple thanks to working with continuous lighting.  

With the D5100 on the tripod with a cable release, and all the pillows being basically the same size, and the lights being continuous, it really is no mess no fuss to produce absolutely consistent results shot after shot with minimal effort required on the photographer's part.  Karin was very delighted with this.  

We ended the lesson with a setting the settings hands-on quiz, so I could see if Karin can reproduce the results we got earlier when I am not there.  First I changed every setting on the camera so that Karin would have to go through the settings progression I recommend when in manual mode:  aperture, shutter speed, ISO, white balance and then finally focus mode.  She passed and is now ready to add another hat (product photographer) to the many others she already wears for her business.  I am really pleased to have been able to help her with her business in some way.

What Karin said about today's lesson:

"I'm very excited about what I'm learning and you are a great teacher for beginners!" 

  • Reserve your own 1-on-1 DSLR Photography Lesson with Jason today!
  • Learn more about the lessons
  • Browse past lessons with all of my students 
  • DSLR Photography Lesson with Karin on product shots

    A sample incomplete product shot of a Guy Harvey designed pillow in a homemade lightbox.New DSLR Photography Lesson student Karin has a booming pillow and cushion business featuring embroidered designs by Guy Harvey.  She has literally hundreds of variations of the pillows regarding design, color and border and she wants to have photographs of everyone one of those iterations on her business website for customers to browse and buy.  

    She setup a very nice homemade lightbox (see my DIY attempt) in her office with multiple hot lights.  However, she was having white balance and overall image quality problems.  Well, I was able to sort out the white balance problem very quickly by setting her Canon XT with a custom white balance.  Thanks to Natasha who had a lesson earlier in the day and also has a Canon XT and showed me how to set the custom white balance on the XT!

    After this we spent the rest of the lesson better arranging the proportions of the lightbox and discussing what photography gear Karin should next invest in.  Let's just say she is ready to make a significant investment!  I will be helping her get all her new stuff setup and running during our second lesson already scheduled for next week.  I am looking forward to continuing the interesting photography lesson-project with her! 

  • Reserve your own 1-on-1 DSLR Photography Lesson with Jason today!
  • Learn more about the lessons
  • Browse past lessons with all of my students 
  • DIY Lightbox Version 1

    Where did I get the idea of putting the strobe in the top like that? I already know it was a crazy idea.

    Some time ago I read a blog post about making your own lightbox and made a mental note to try it someday.  As such mental notes go they can remain in my mind for a few weeks, or even a few decades before they are actualized.  Fortunately for me Aya does not have such a lag between idea and doing, as well as a penchant for crafts.  So last week I came home one afternoon and Aya said, "tada, a lightbox."  I was impressed and excited to give it a try.  

    Somehow I got the idea that the strobe just goes into the top.  Umm, having now done an image search for "DIY lightbox" I realize that it is more important for the sides to be translucent and any opening in the top is optional.  Now I know how to get started on version 2!

    No shadows were deleted in this dead-on shot of E.T., who normally resides on my desk.

    I had no trouble choosing the first test subject for the DIY lightbox, E.T.!  I already realize that I need to pose these inanimate objects just like I would a human, otherwise the portrait comes out looking flat.  Next time I will photograph E.T. from a slight angle to add depth and a more interesting composition.

    Even at f/14, my Nikkor AF-S 105mm VR micro f/2.8G lens' DoF was too shallow to get both of E.T.'s eyes in focus.

    I definitely see now how having two light sources on the sides would make for a much better lightbox.  The light really makes E.T.'s right eye sparkle.  Getting both to shine like that would have greatly improved the image, as well as eliminated the shadow behind him to frame right.

    Apparently the Sweet Basil was so nervous to be photographed it broke out in a sweat!

    Even with just a single strobe above the subject and my D300's on camera flash, almost all shadows were eliminated, which was my first goal with this DIY lightbox experiment.  

    I learned a lot from this first try, and DIY lightbox version 2 will be greatly improved with side lighting, a single, long sheet of paper to eliminate that crease right at the base of the subject and maybe a larger box overall.  

    If you have made your own DIY lightbox please share the link in the comments below.